Working with the client
The Storgrid Icon
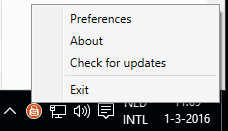
After installing the Windows client and the application is running, you will have a “Storgrid icon” in your taskbar. When clicking on the Storgrid icon you can see your up/download status and when you right-click the storgrid icon in the taskbar you go to preferences to configure your Storgrid client or to check for updates.
Configuration
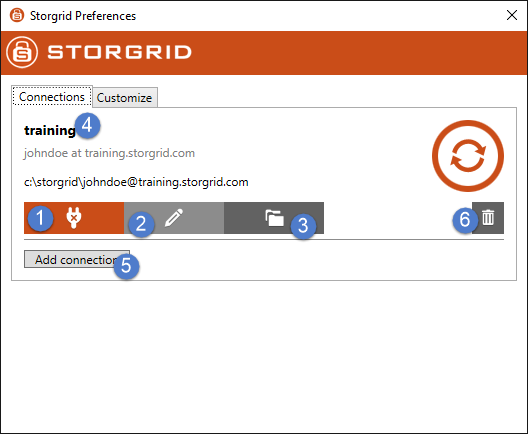
Select Preferences when right-clicking on the Storgrid icon. This will show the screen seen above.
Details:
No. |
Description |
|---|---|
1 |
Disconnect/Connect account |
2 |
Edit account settings |
3 |
Edit sync options folders |
4 |
Title of account |
5 |
Add new connection |
6 |
Remove connection |
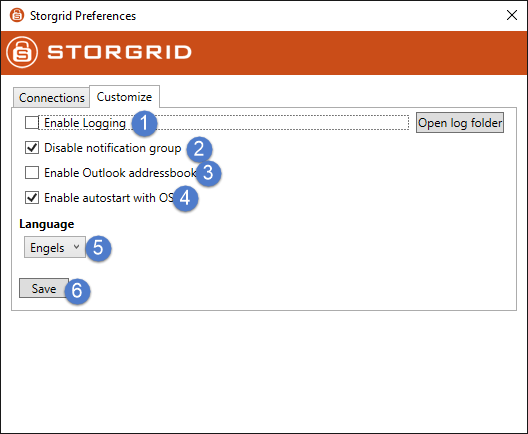
Customise client
No. |
Description |
|---|---|
1 |
Enable or Disable logging |
2 |
Enable or Disable notification pop-up |
3 |
Enable or Disable Outlook addressbook |
4 |
Change Language |
5 |
Save current settings |
States
When you click on the Storgrid Icon, a state will be shown.
State |
Description |
|---|---|
Checking for updates |
The client is checking if there are any updates |
Disabled |
The account is disabled |
Error |
An error is encountered. Check logs for details |
In Progress |
The client is synchronising data |
Is not responding |
The remote Storgrid server is not responding |
Up to date |
The synchronised data is up to date |
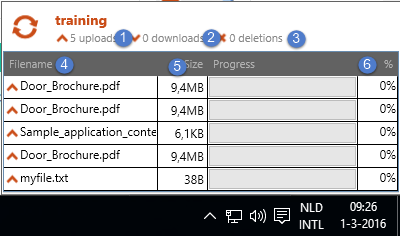
If the client is synchronizing you will see the following pop up when you click on the Storgrid icon.
No. |
Description |
|---|---|
1 |
Total files that need to be uploaded |
2 |
Total files that need to be downloaded |
3 |
Total files that need to be deleted |
4 |
Current filenames being processed |
5 |
The size of the uploaded or downloaded file |
6 |
Progress in percentage |
Synchronisation
Synchronisation with the server happens automatically when you put a file in the local sync folder (and vice versa). As long as the account is not disabled, the server is reachable and there are no errors.
Browsing the locally synced folder
The data of an account, by default, is locally synced to the following path:
C:\storgrid\<username>@<name>.<domain>.<tld>
For example:
C:\storgrid\johndoe@training.storgrid.com
To go to this folder you need to open the Explorer. From here you can navigate to the folder by using the url bar.
In the url bar type in the default path or the path that you created and press enter.
Sharing files
It’s possible to share one or multiple folders/files with an internal user or external user. The difference between internal and external is that an internal user has a registered account on the Storgrid server. In the external case you can sent an email to this user. When the external user wants to edit the relevant file, the external user will be asked to create an account. Viewing can be done without a registered user account.
Icons
You will be able to see if files or folders are shared when you look at the icons.
Auto Update
The clients supports auto updating. Every time when Storgrid releases a new version you will be notified that there is a new version. It’s possible to check for new updates manually by right-clicking on the storgrid icon.
Client Side Encryption
The “Domain Manager” can change the property “Use Client Encryption” for files and folders. This means that the files are encrypted on your mobile device or workstation. In the latter case the file has extension .sef. You can also view the properties of the file using right mouse click and select info on file. Encrypted will be set to yes.
Client encryption is mostly transparent. If you want to access the file you first need to decrypt it. This is a manual process. This will change in newer versions. You can decrypt a file by selecting the relevant file right mouse click and then decrypt. The client decrypts the file and creates the unencrypted file at the same location but the .sef extension will be removed.
So this will look like this:
Folder contains one file:
Test_file.txt.sef
<Decrypt file process>

Folder contains two files:
Test_file.txt.sef
Test_file.txt
You can now work with the file and the file will be automatically re-encryped after a grace time of 30 minutes. The old encrypted will be replaced with the new one and the “Test_file.txt” file will be removed.
Note
Client side encryption is not licensed by default.
Version Management
If you update an existing synced file, the system will save your previous version. To see the current versions of a file browse to the relevant file, right mouse click and click on info. If there are version you will see them in this window. Subsequently you can restore, remove and/or download previous version.