Domain Management
Overview
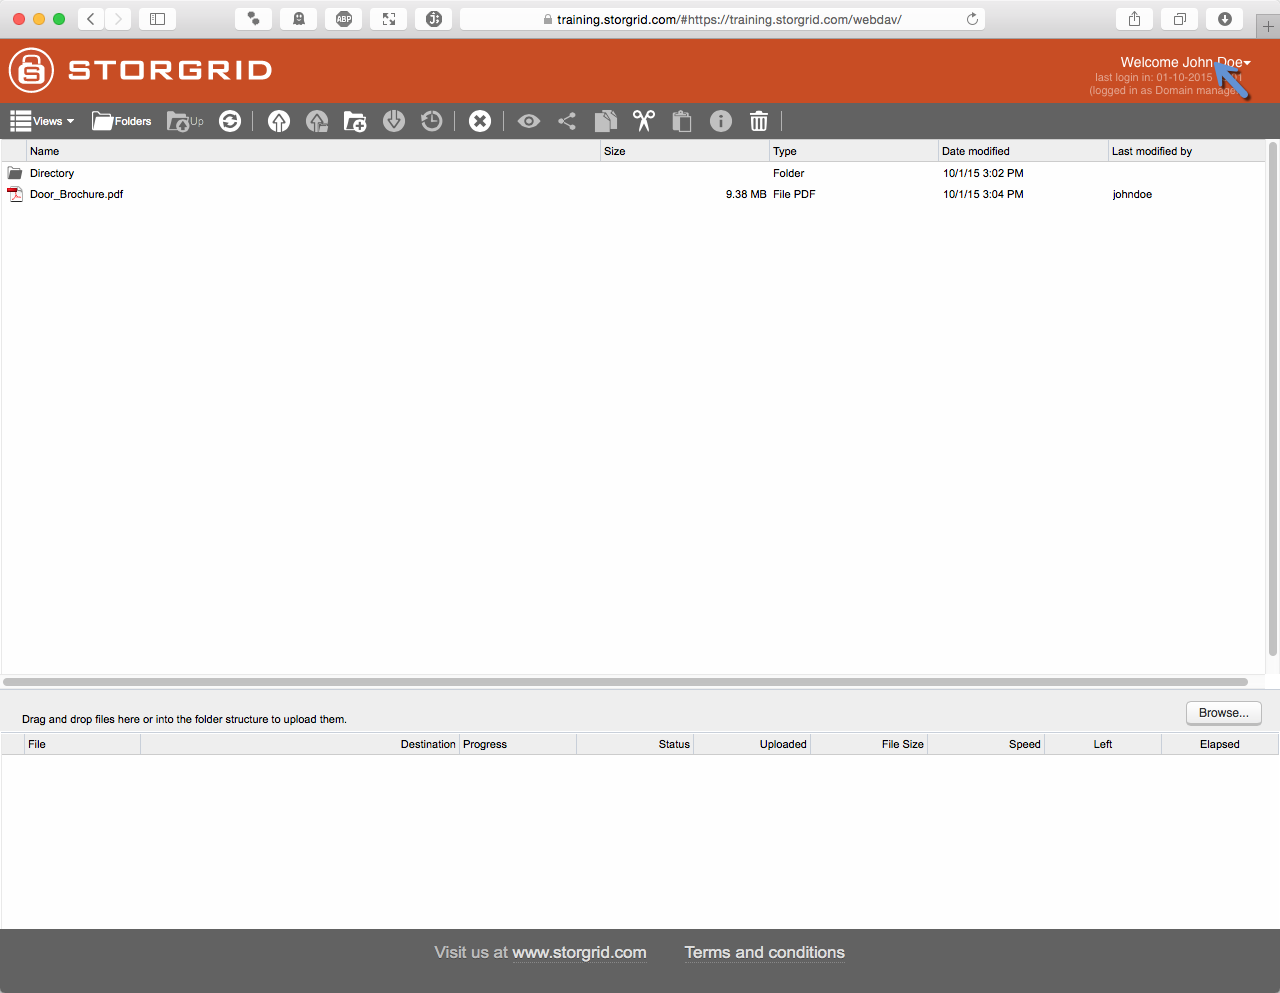
With the “Domain Management” interface you can administer your domain.
Step |
Action |
Screenshot |
|---|---|---|
|
|
|
|
|
|
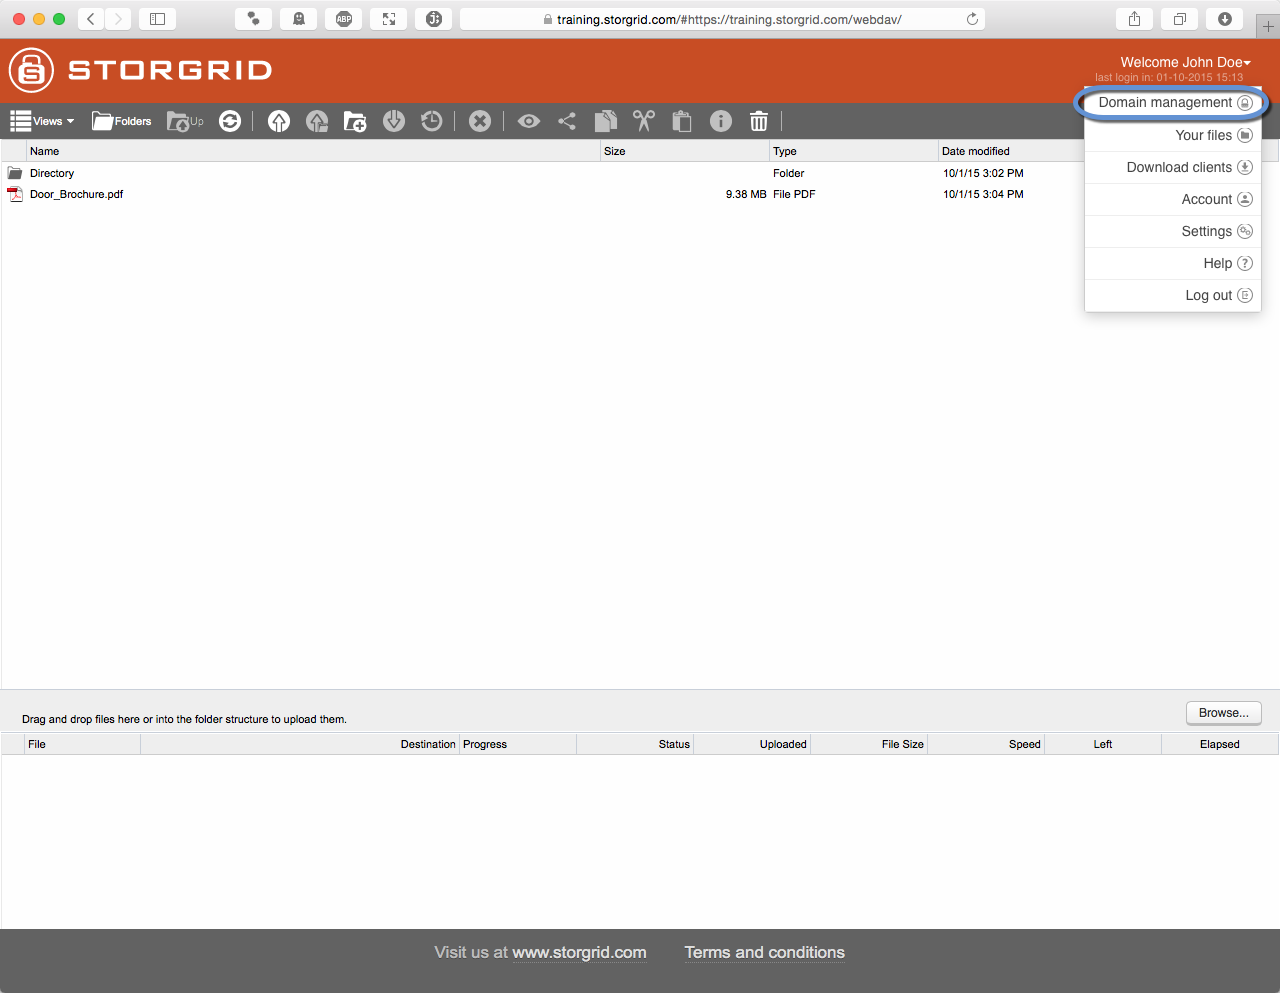
The “Domain Management” section is shown |
|
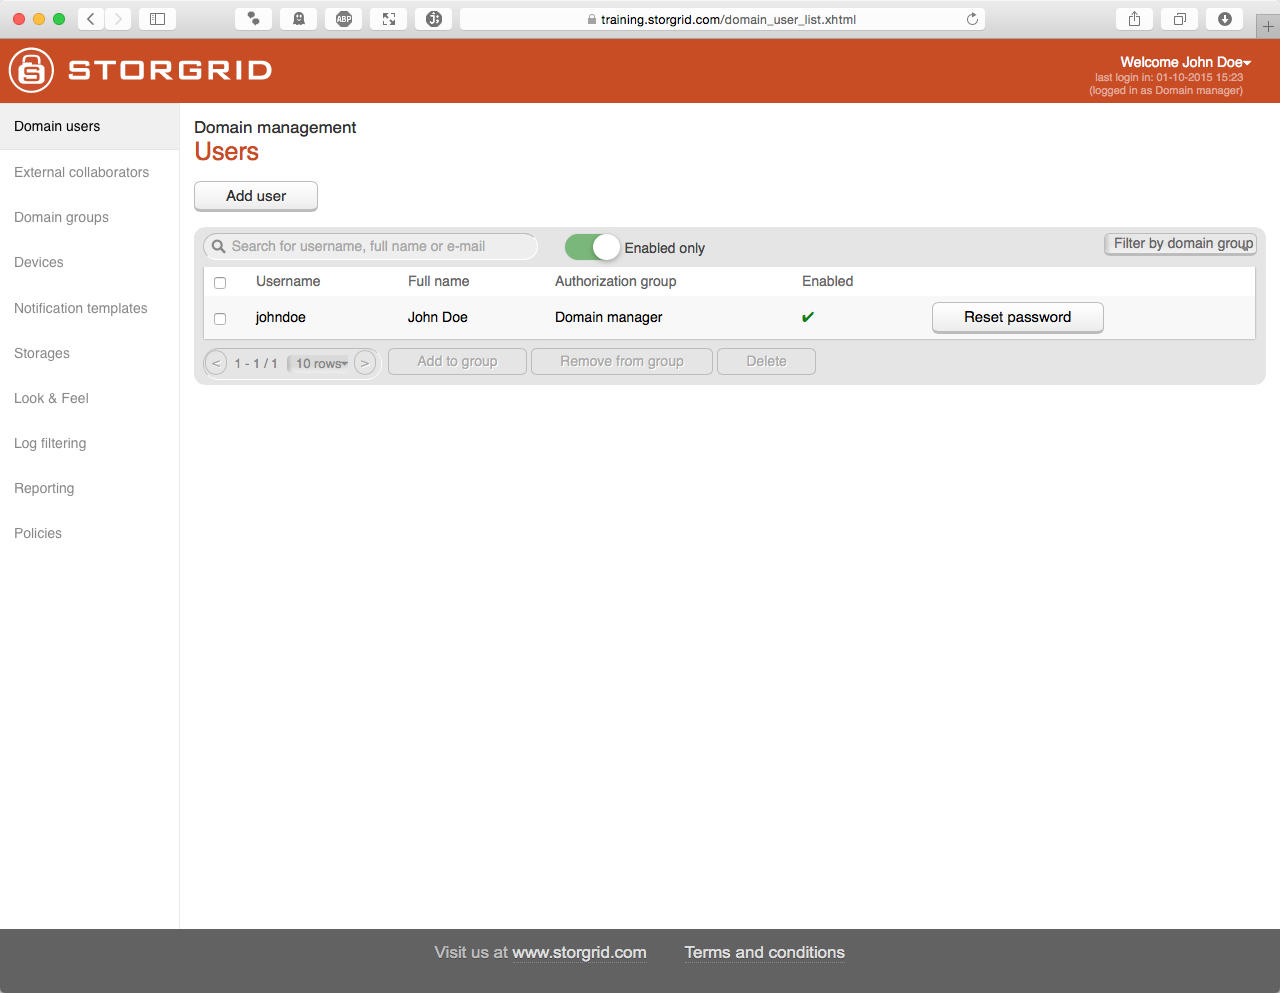
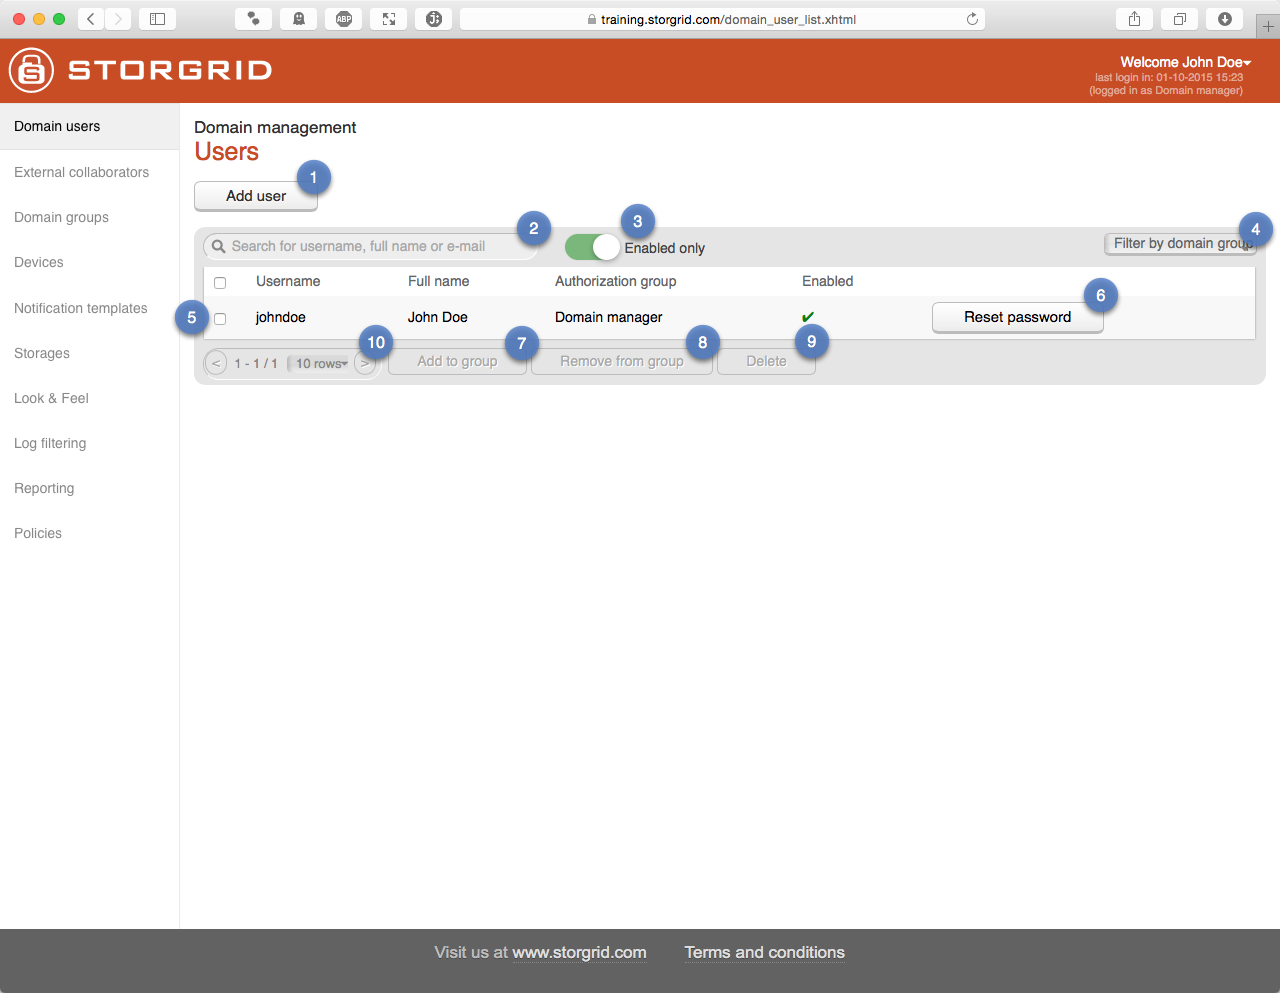
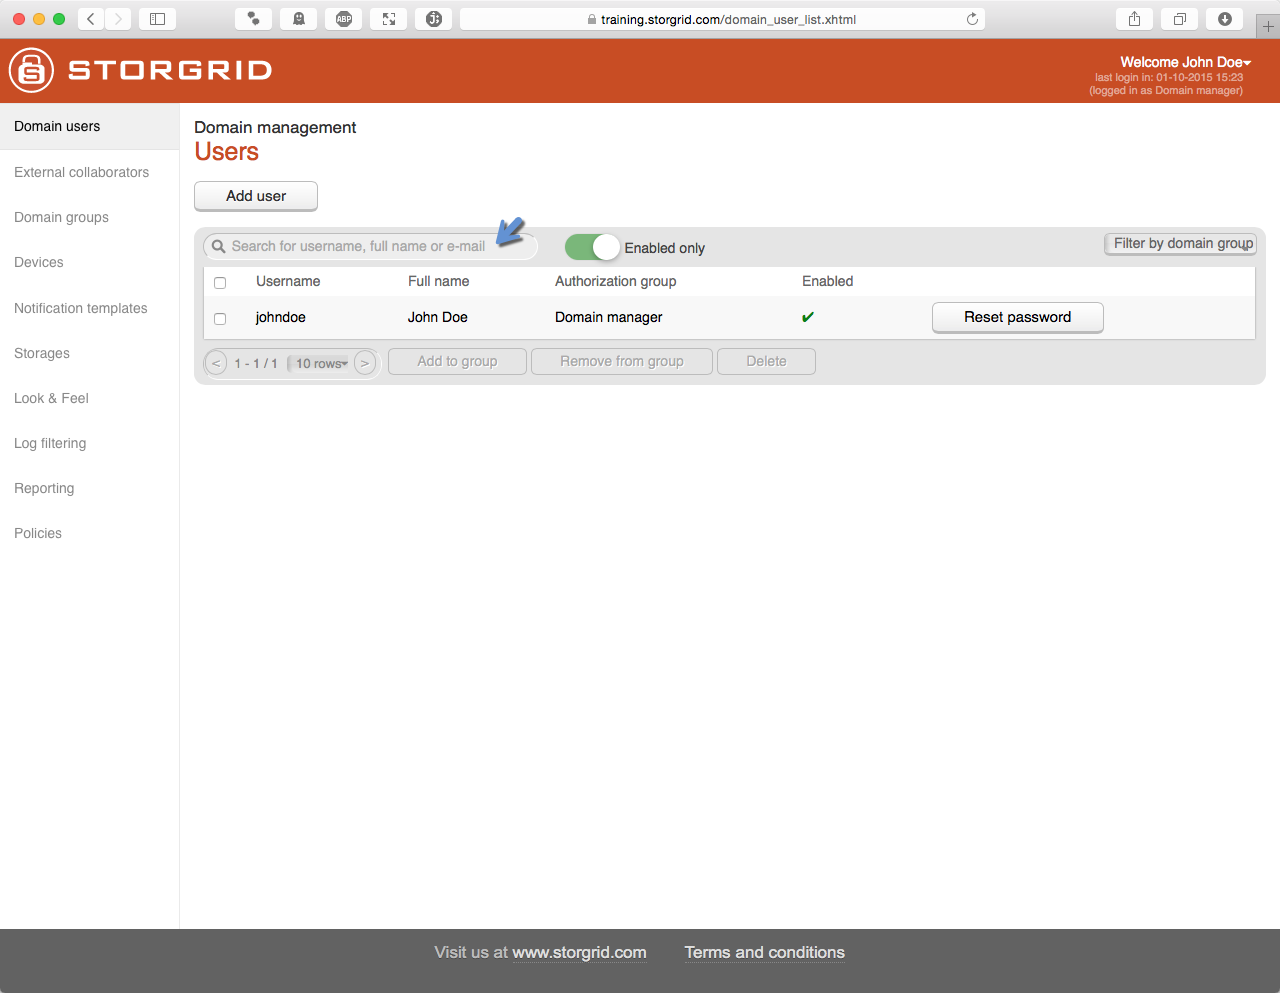
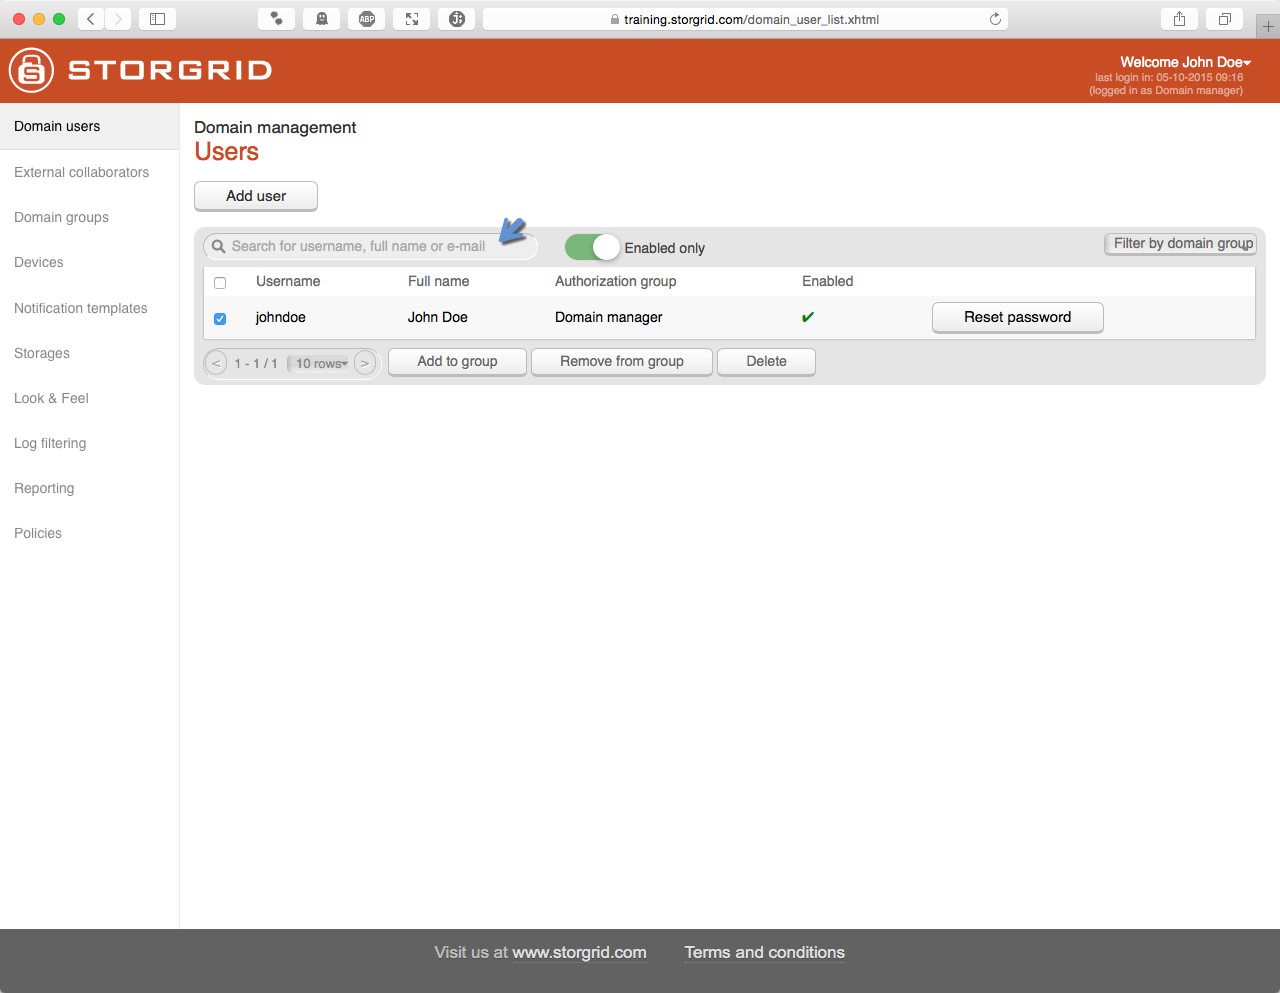
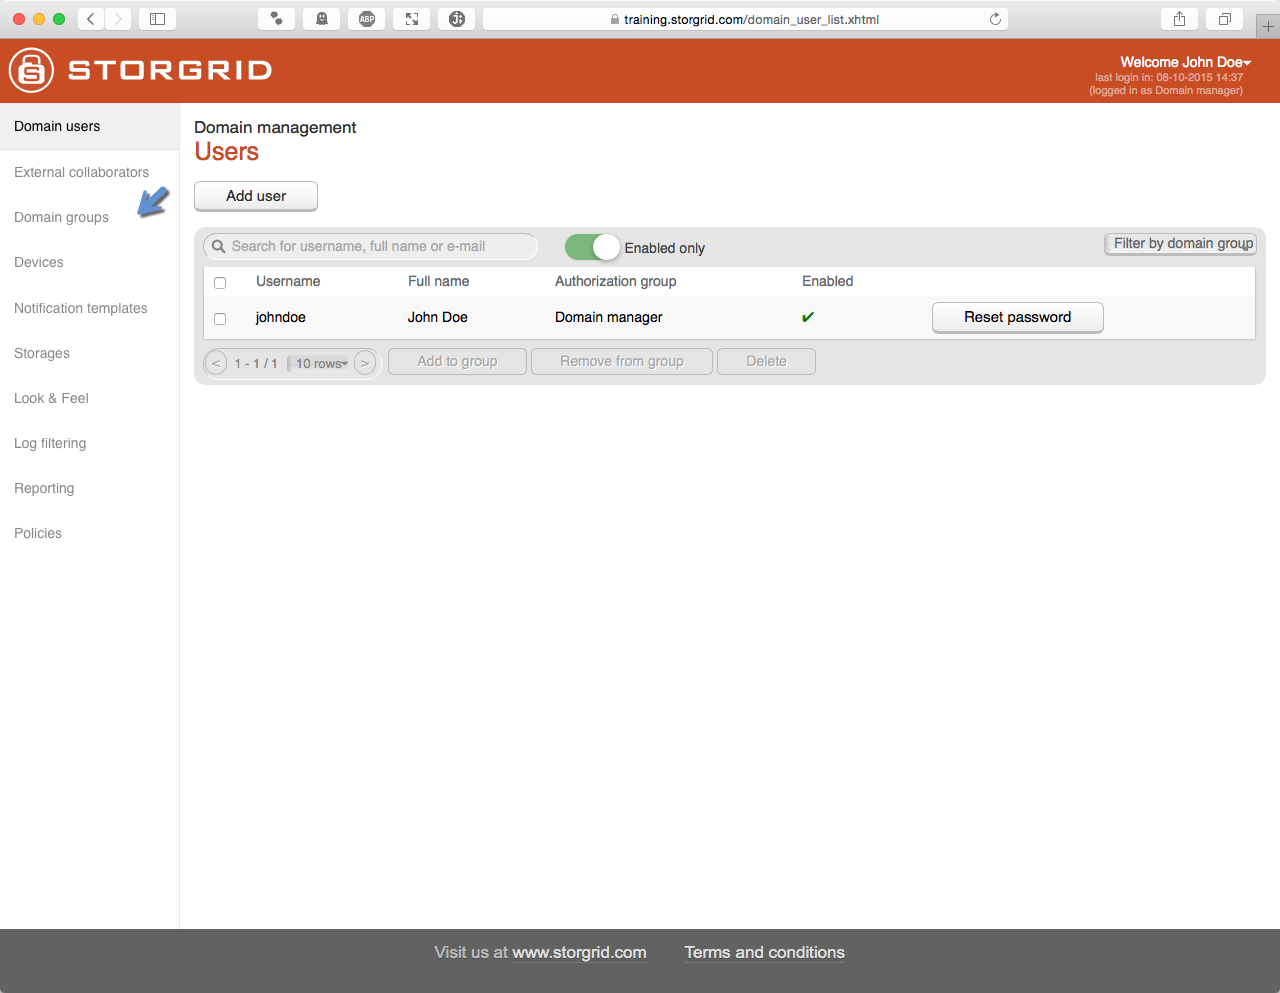
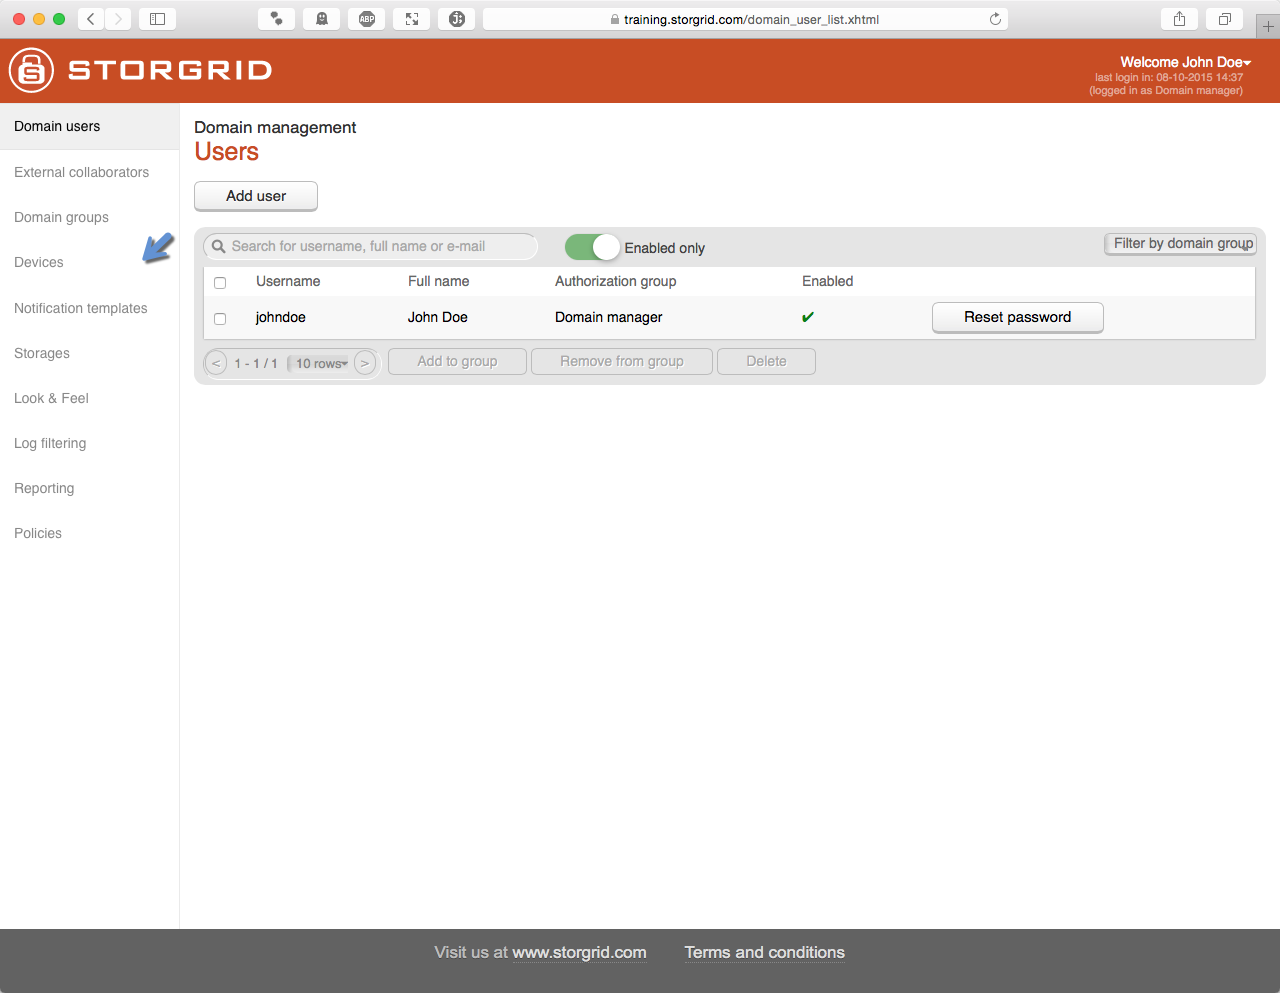
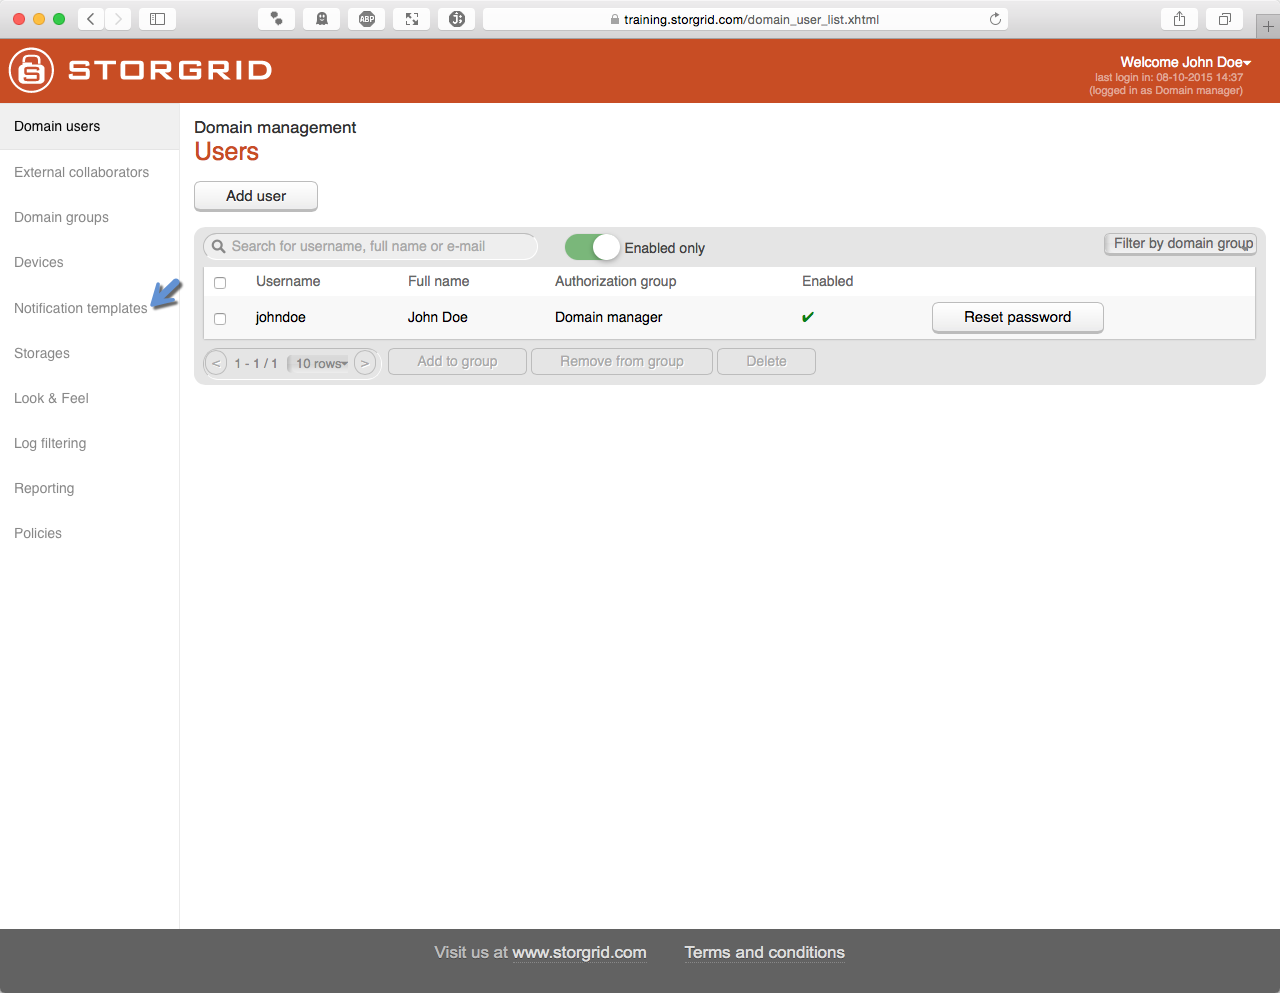
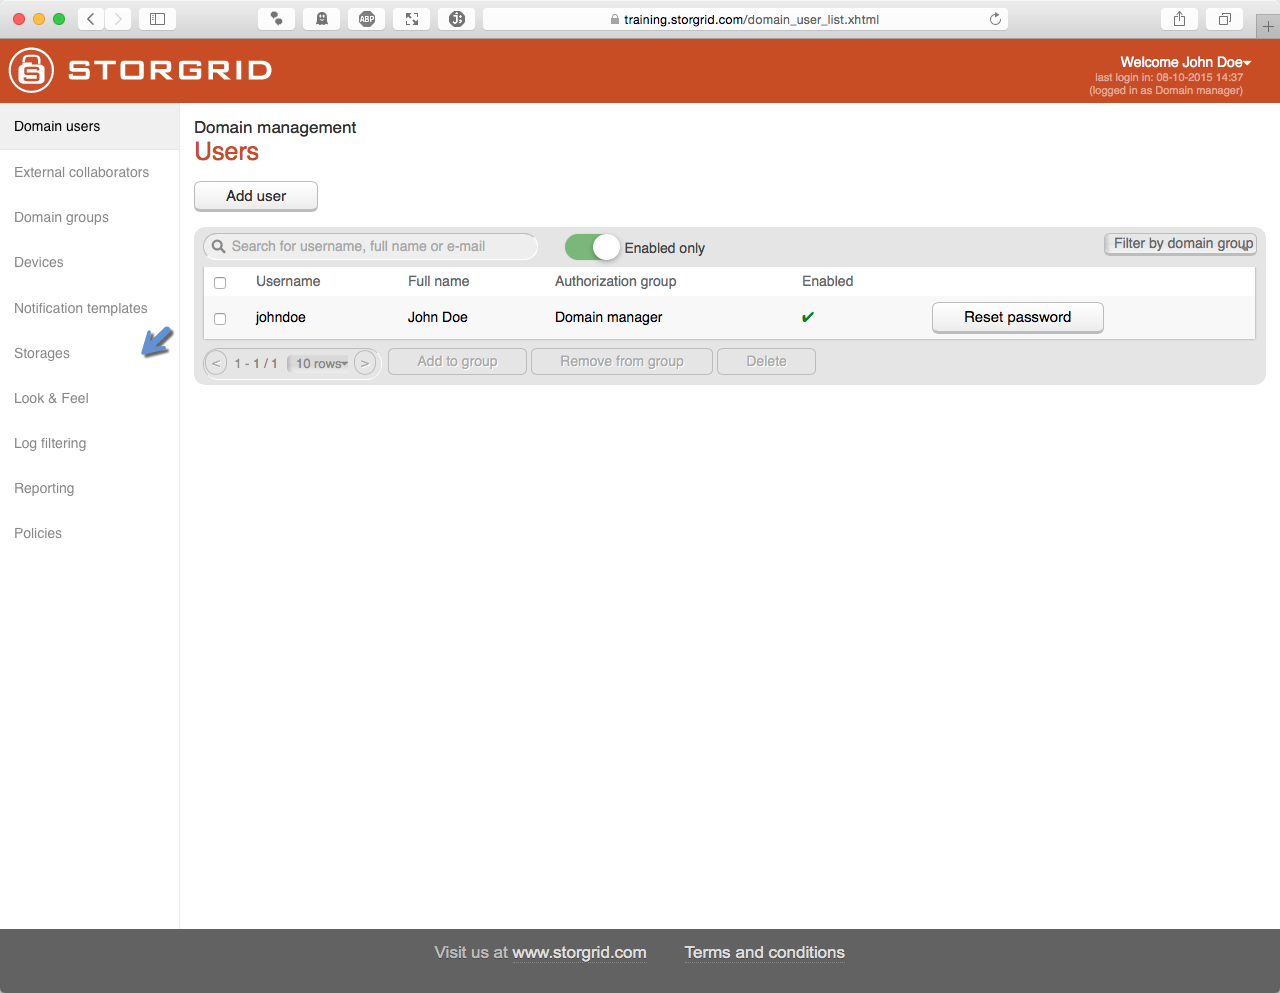
Domain Users
Details:
No. |
Description |
|---|---|
1 |
Add users to Storgrid |
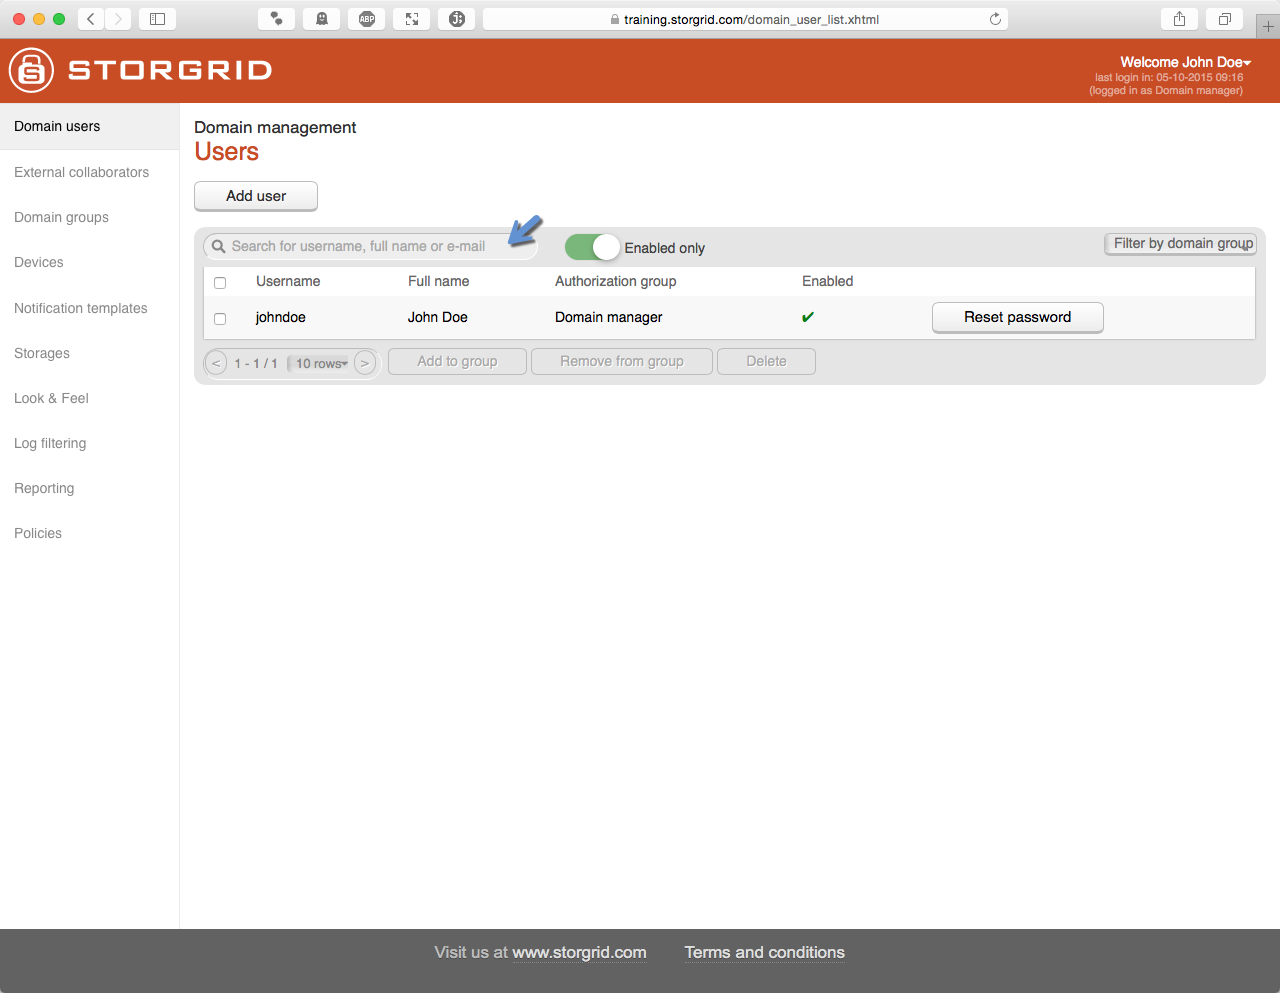
2 |
Search field for username, full name or e-mail |
3 |
If enabled, only show enabled users |
4 |
Only show users who are member of specified group |
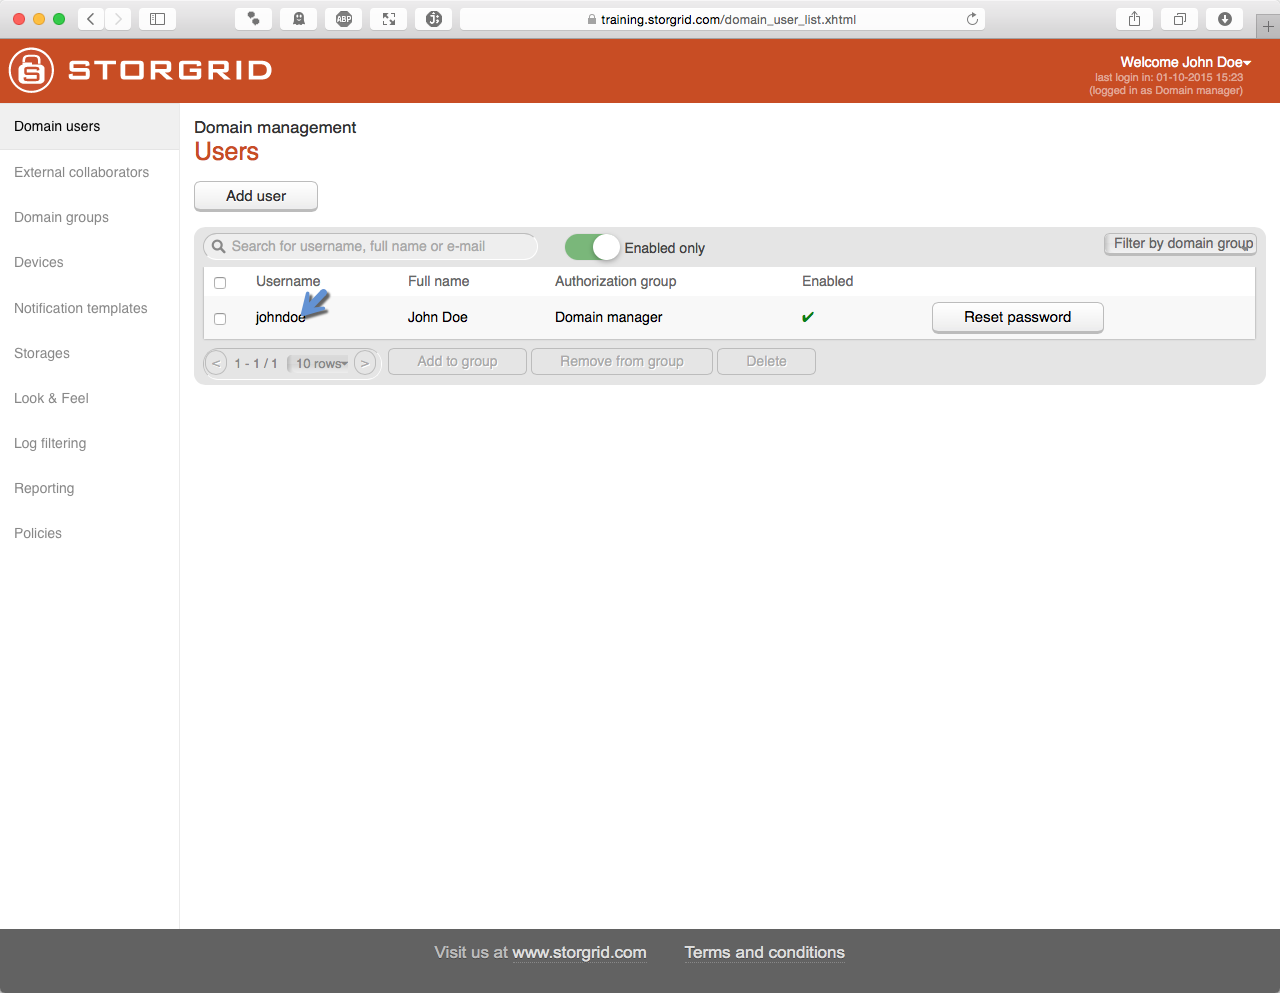
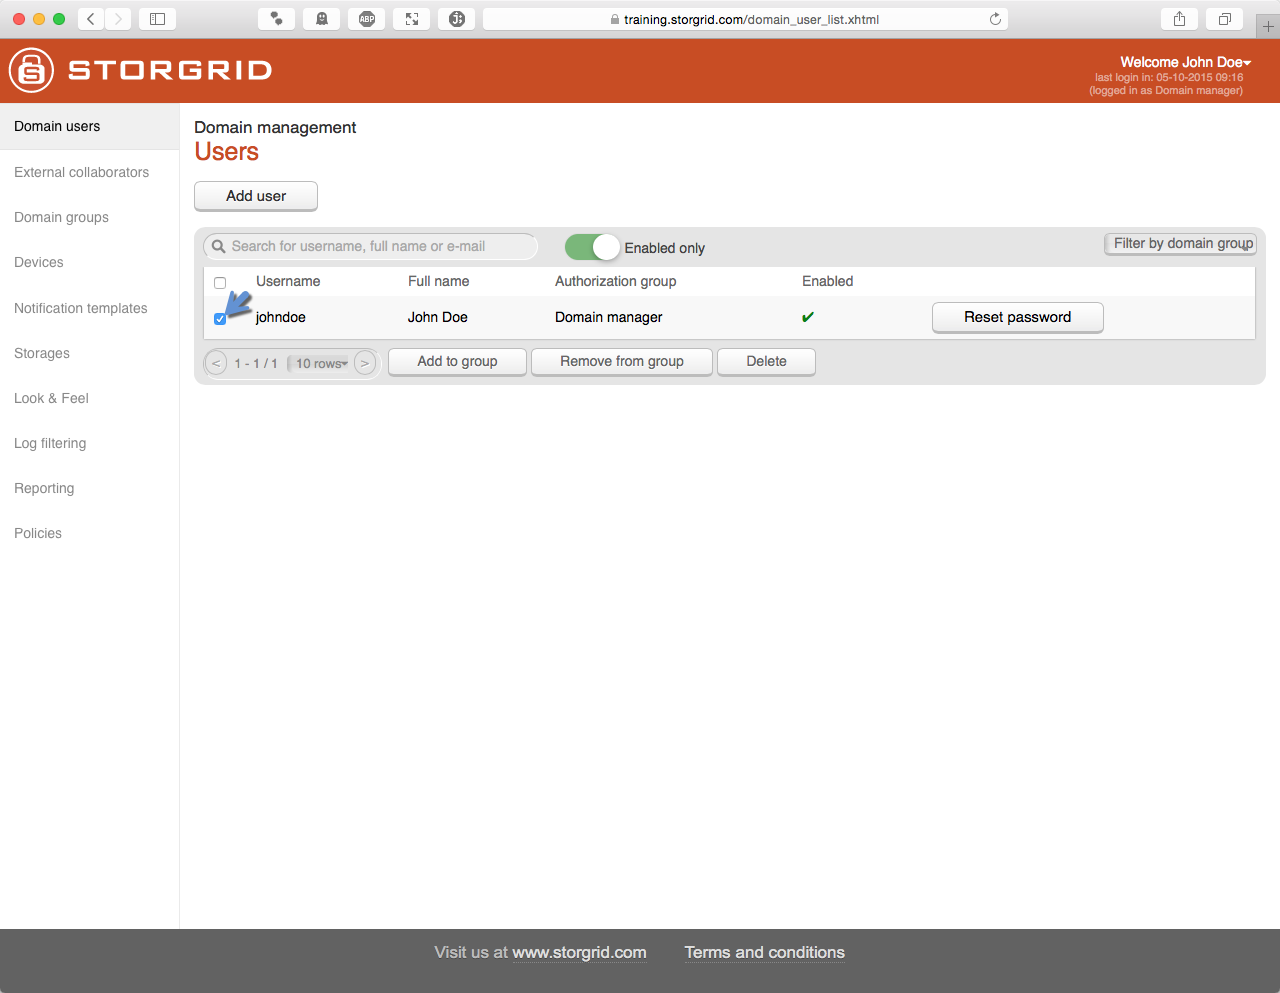
5 |
Row with checkbox which contains a Storgrid user |
6 |
Sends password link to relevant user |
7 |
Add selected user to a group |
8 |
Remove selected user from a group |
9 |
Deletes selected user |
10 |
Pager |
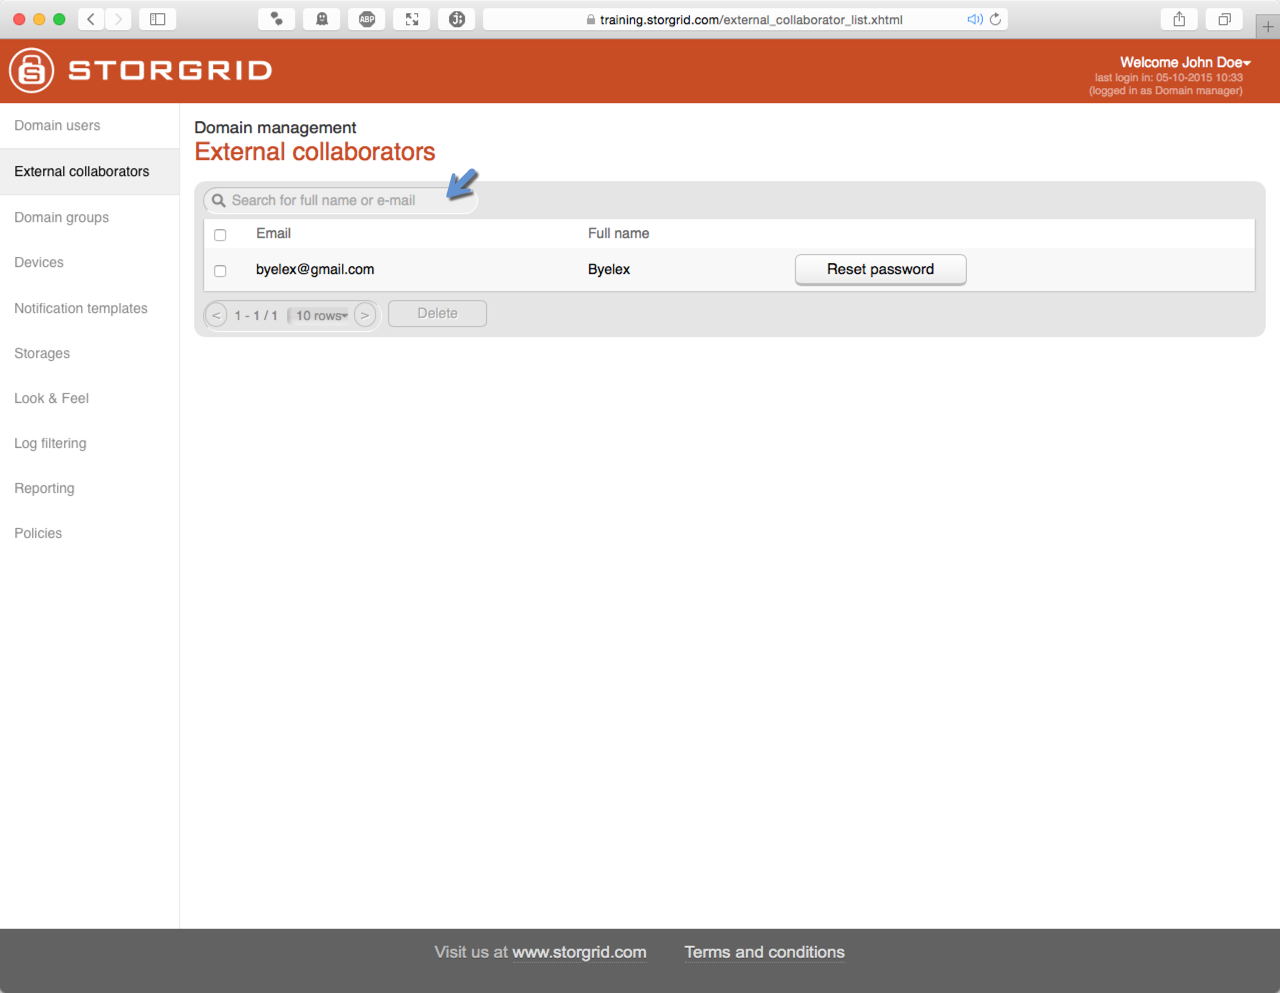
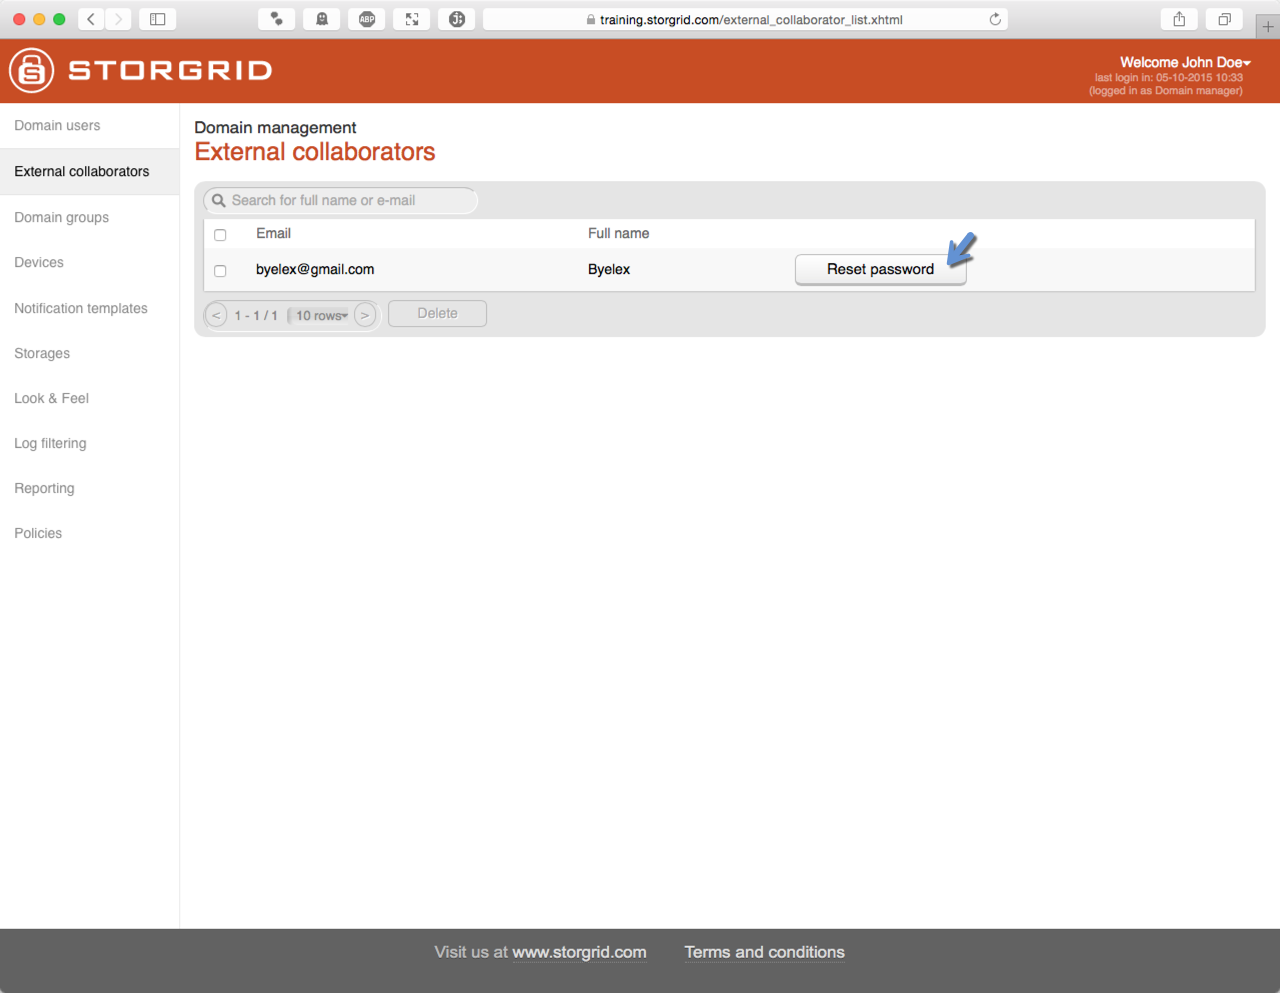
External Collaborators
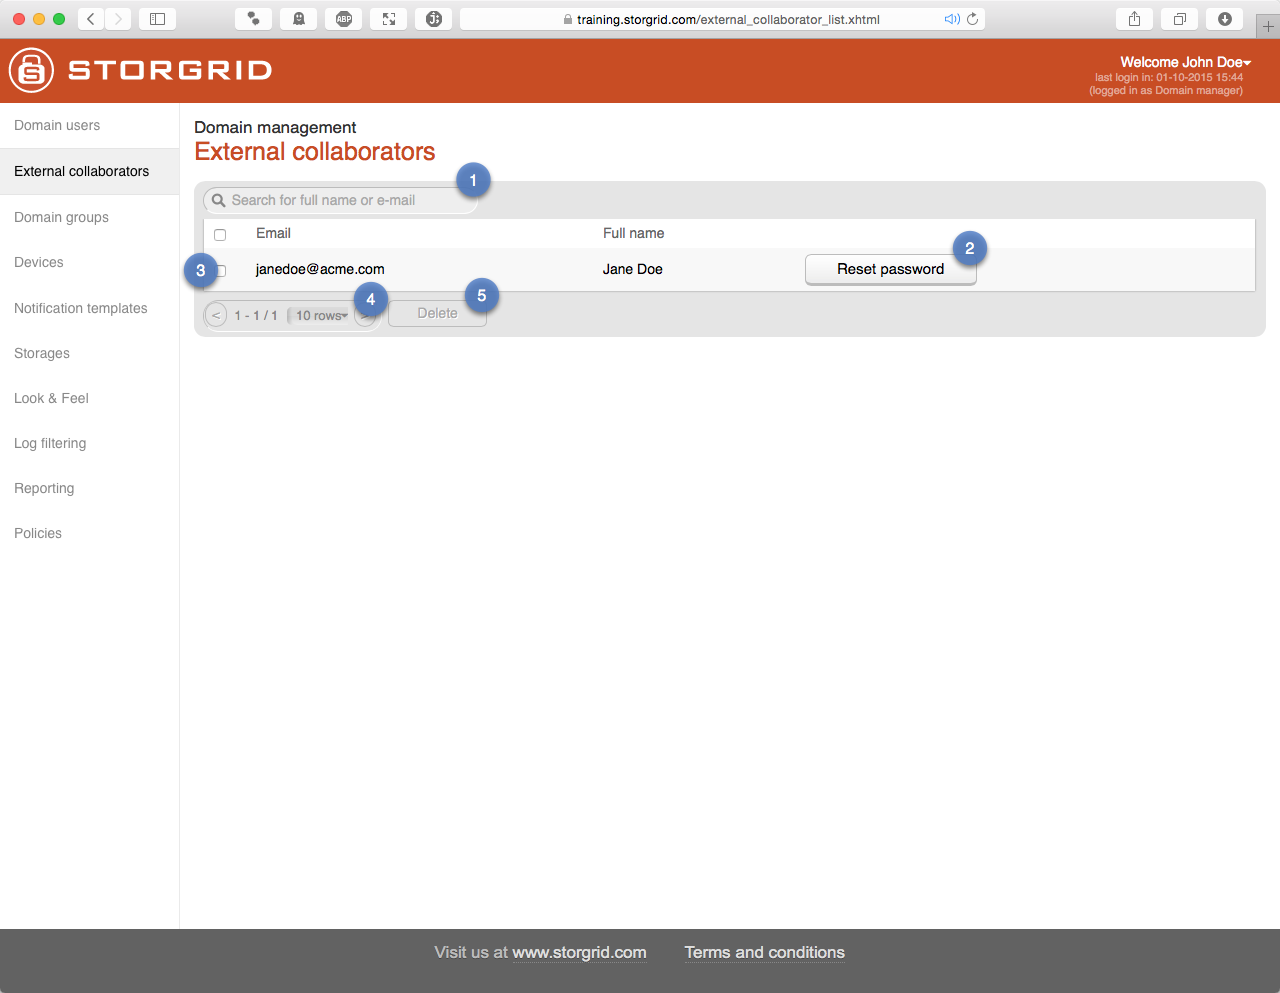
Details:
No. |
Description |
|---|---|
1 |
Search field for full name or e-mail |
2 |
Sends external user a reset password link |
3 |
Row with checkbox which contains a Storgrid user |
4 |
Pager |
5 |
Deletes selected user |
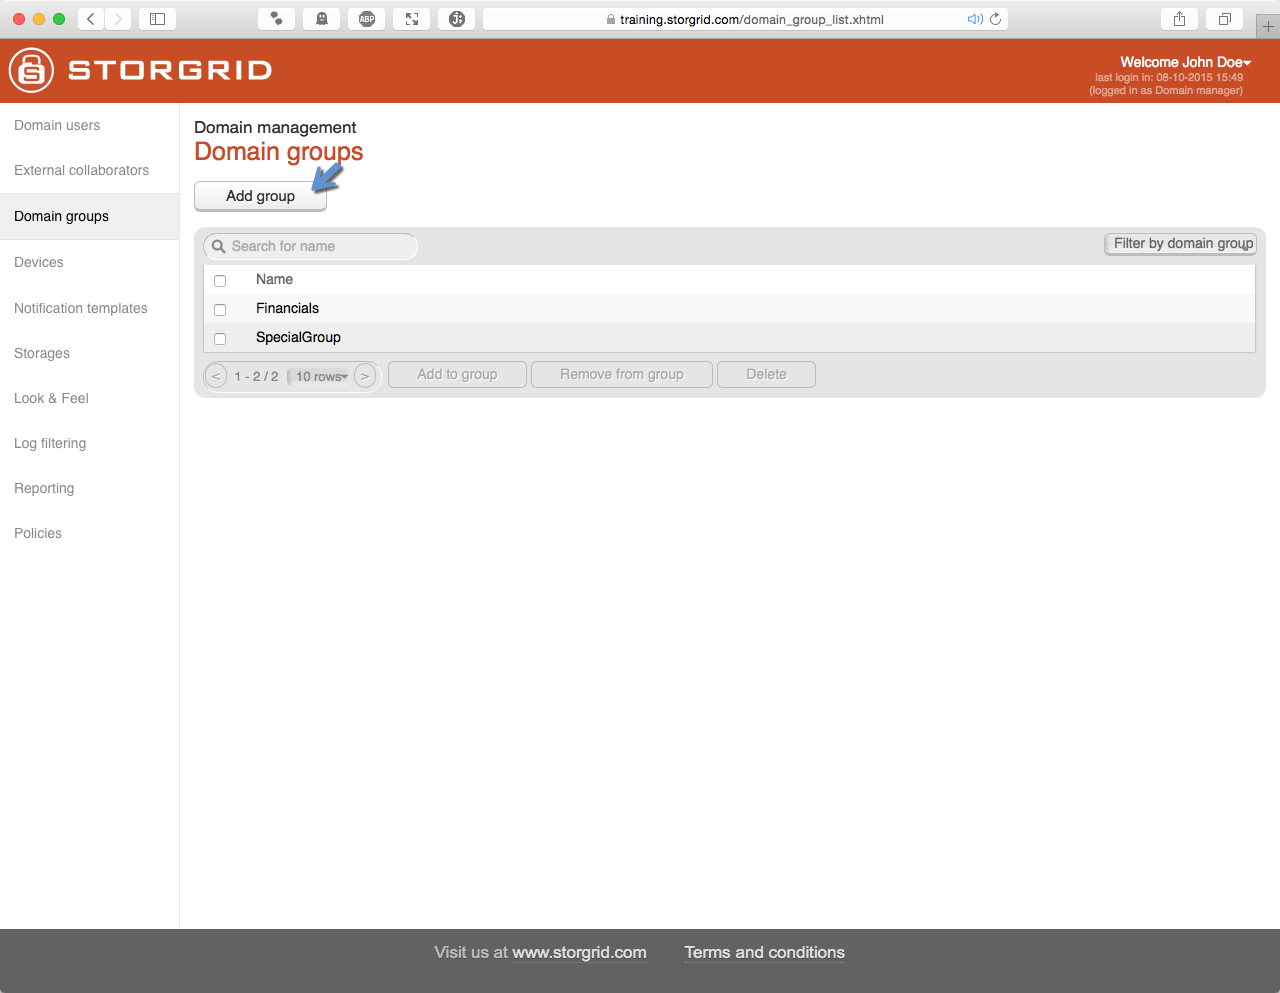
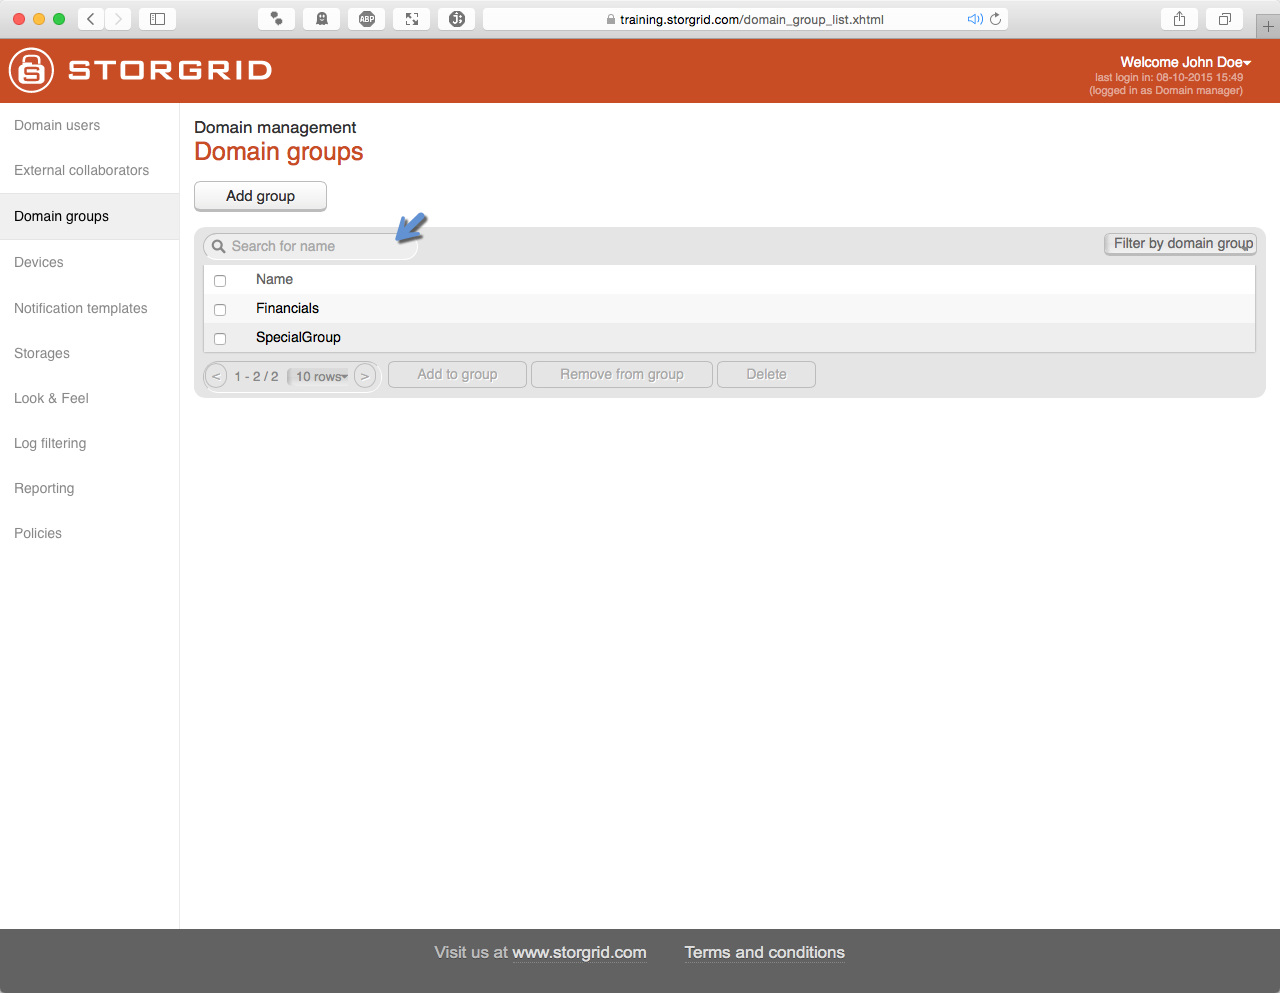
Domain Groups
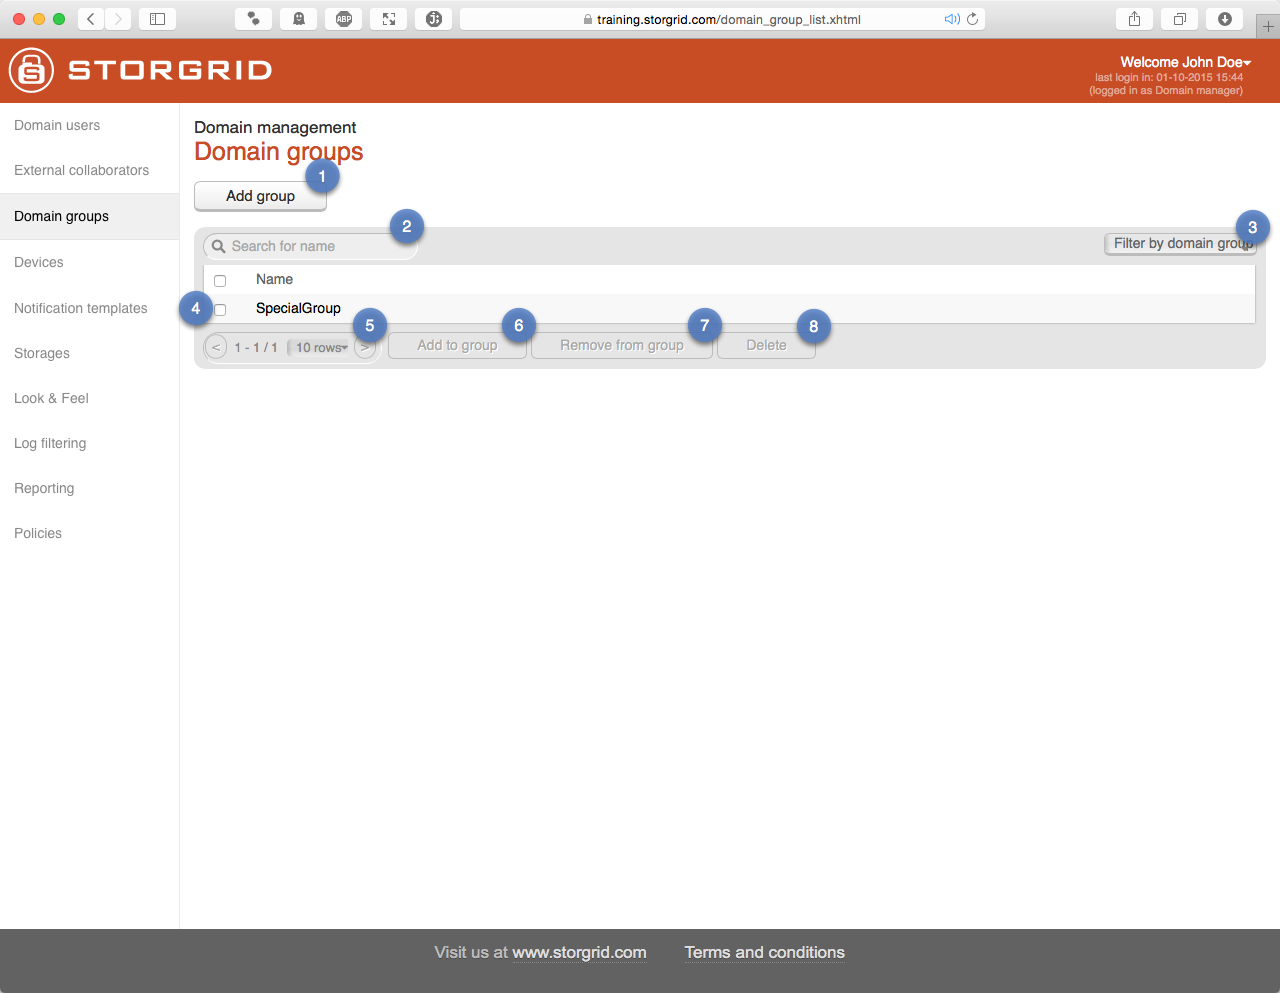
Details:
No. |
Description |
|---|---|
1 |
Adds a group to Storgrid |
2 |
Search for name |
3 |
Filter by domain group |
4 |
Row with checkbox which contains a Storgrid group |
5 |
Pager |
6 |
Add selected group to a group |
7 |
Remove selected group from a group |
8 |
Delete selected group |
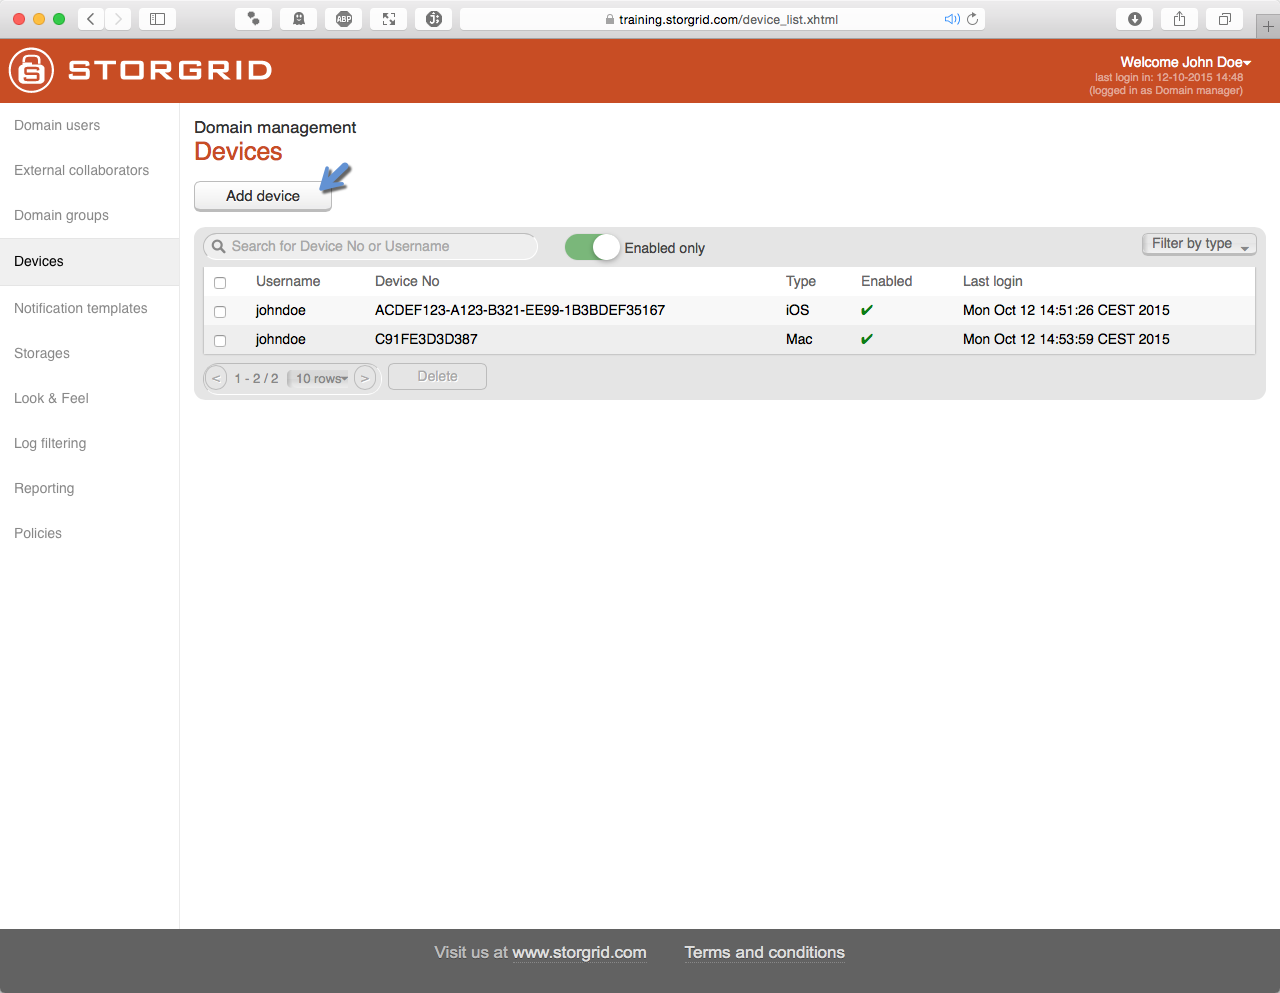
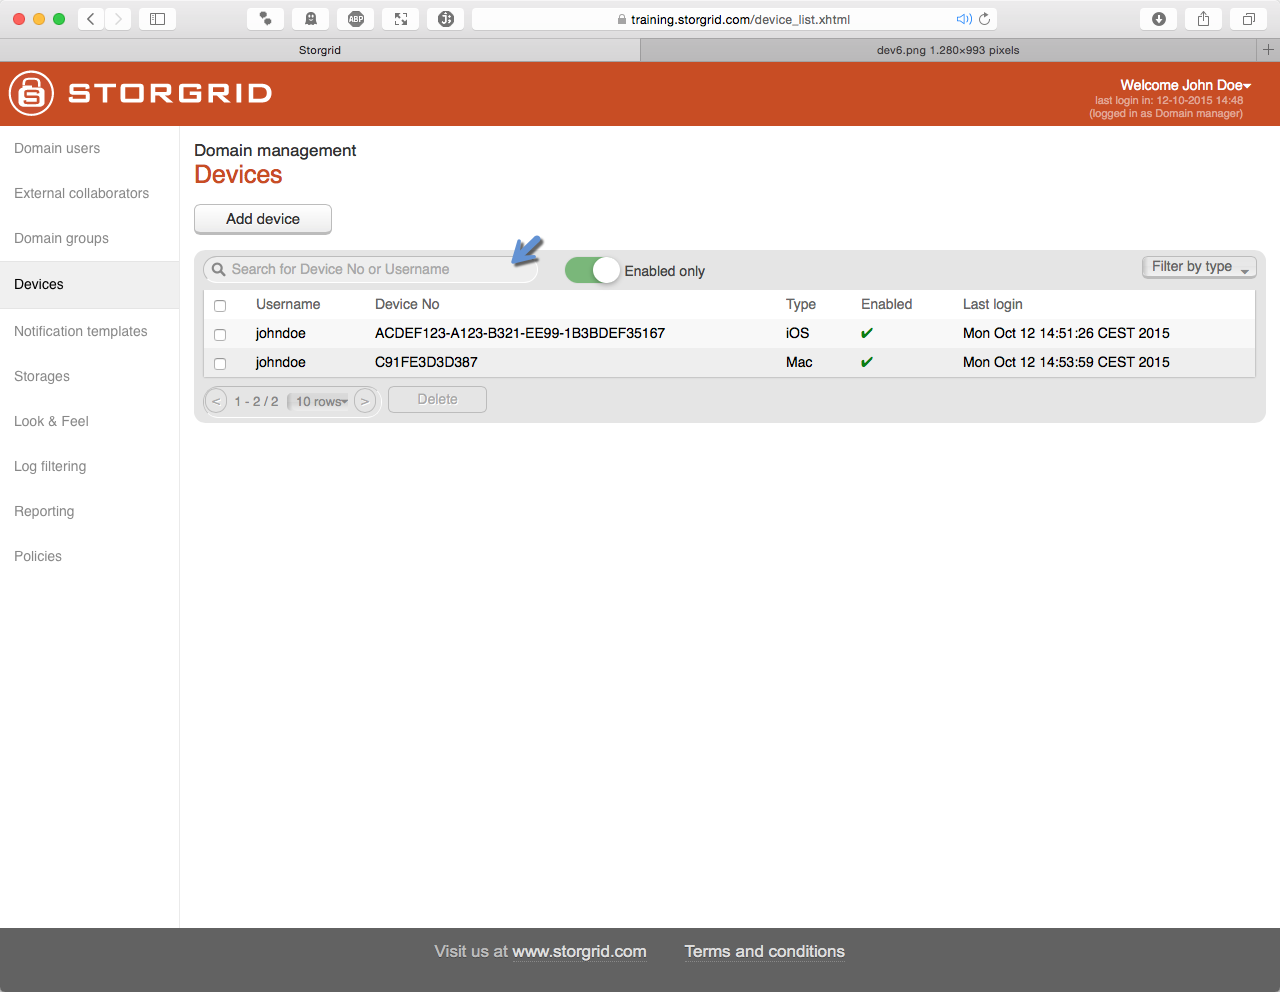
Devices
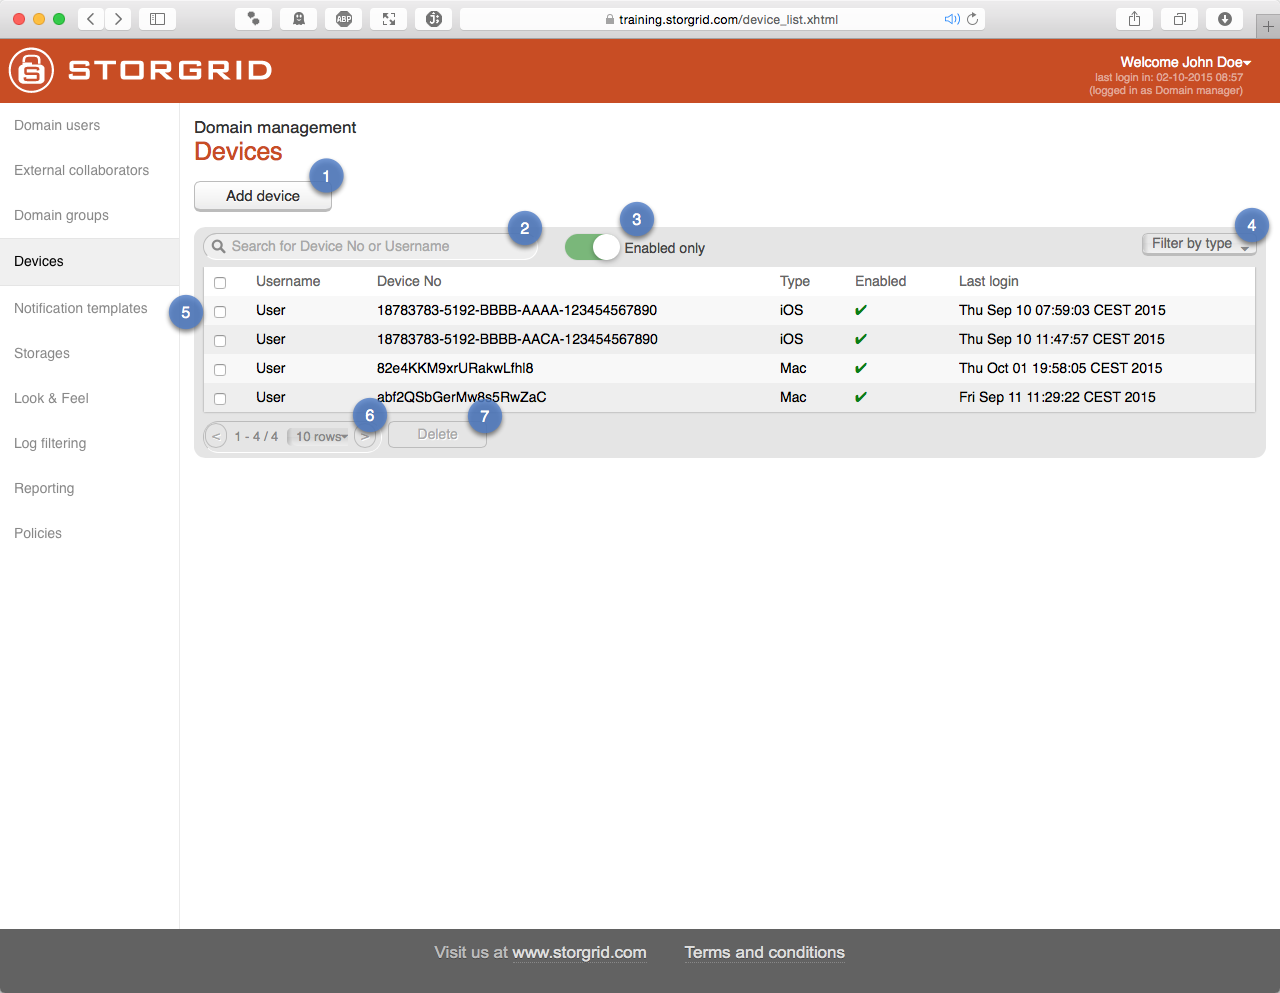
Details:
No. |
Description |
|---|---|
1 |
Adds a device to Storgrid |
2 |
Search for Device No or Username |
3 |
When enabled, only show enabled devices |
4 |
Filter by type |
5 |
Row with checkbox which contains a Storgrid device |
6 |
Pager |
7 |
Deletes selected device |
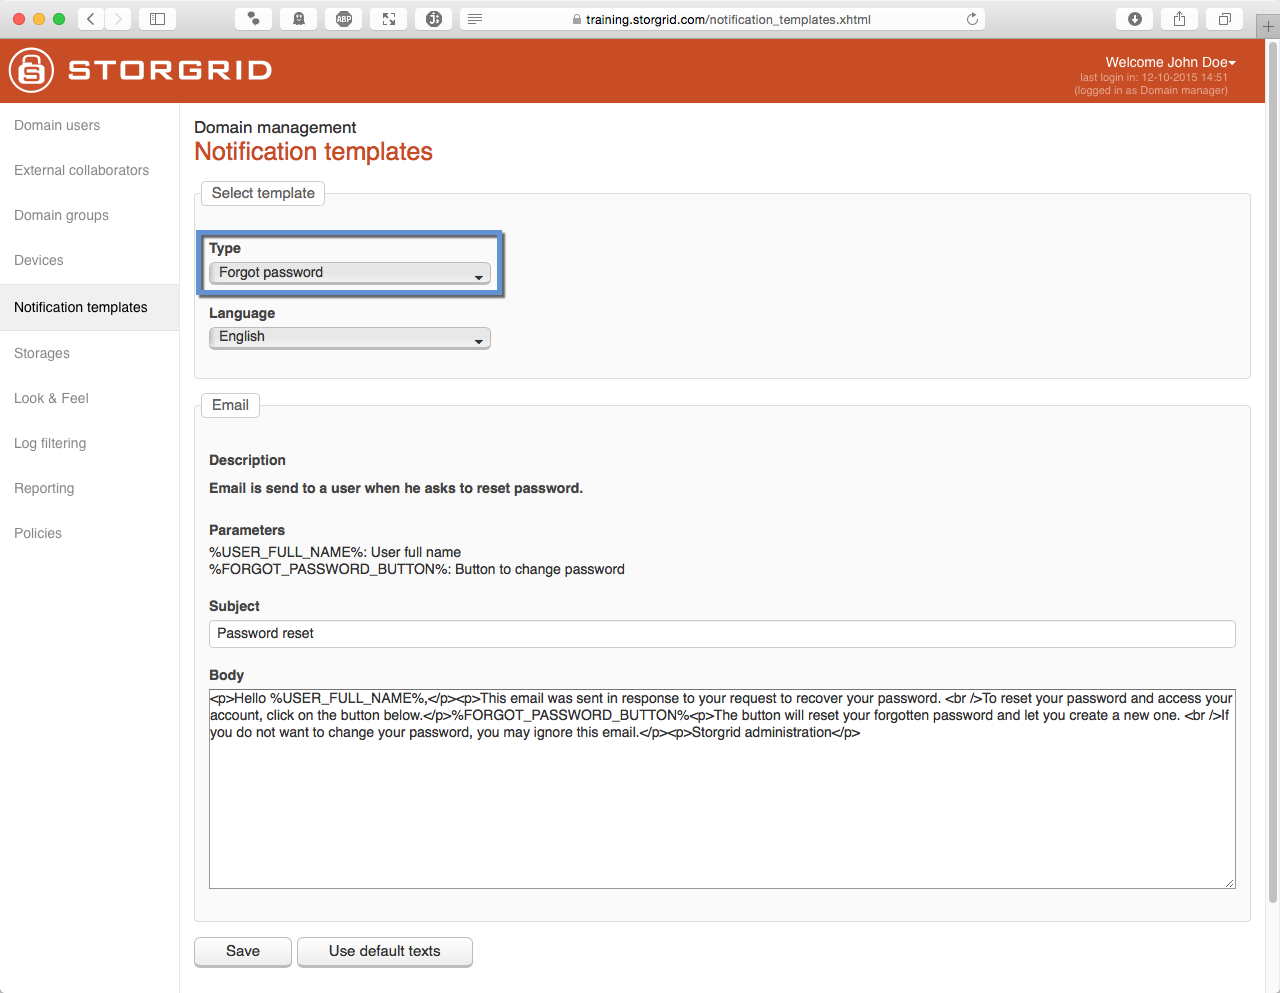
Notification Templates
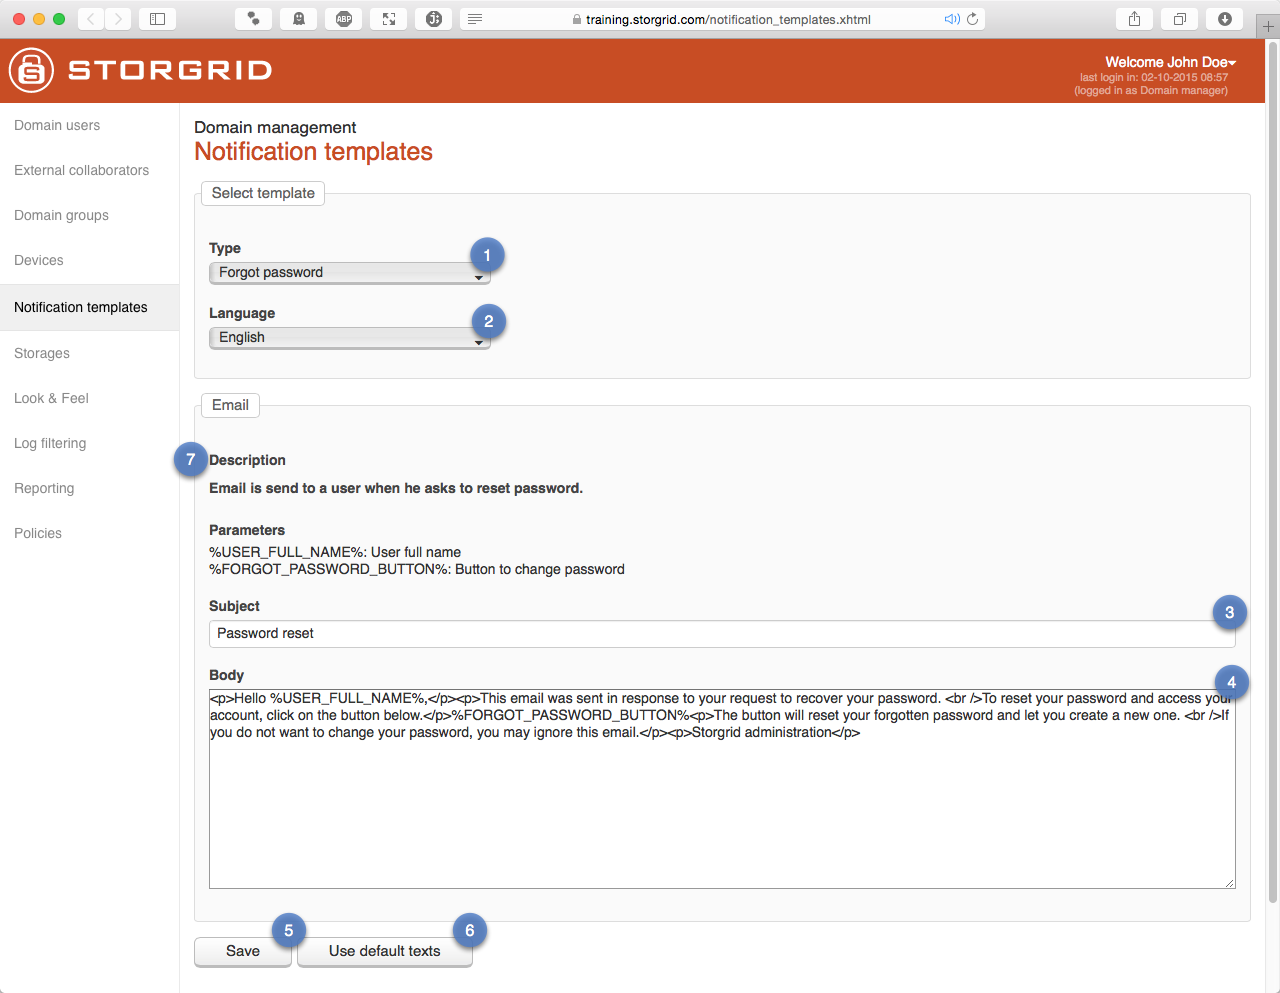
Details:
No. |
Description |
|---|---|
1 |
Template Type |
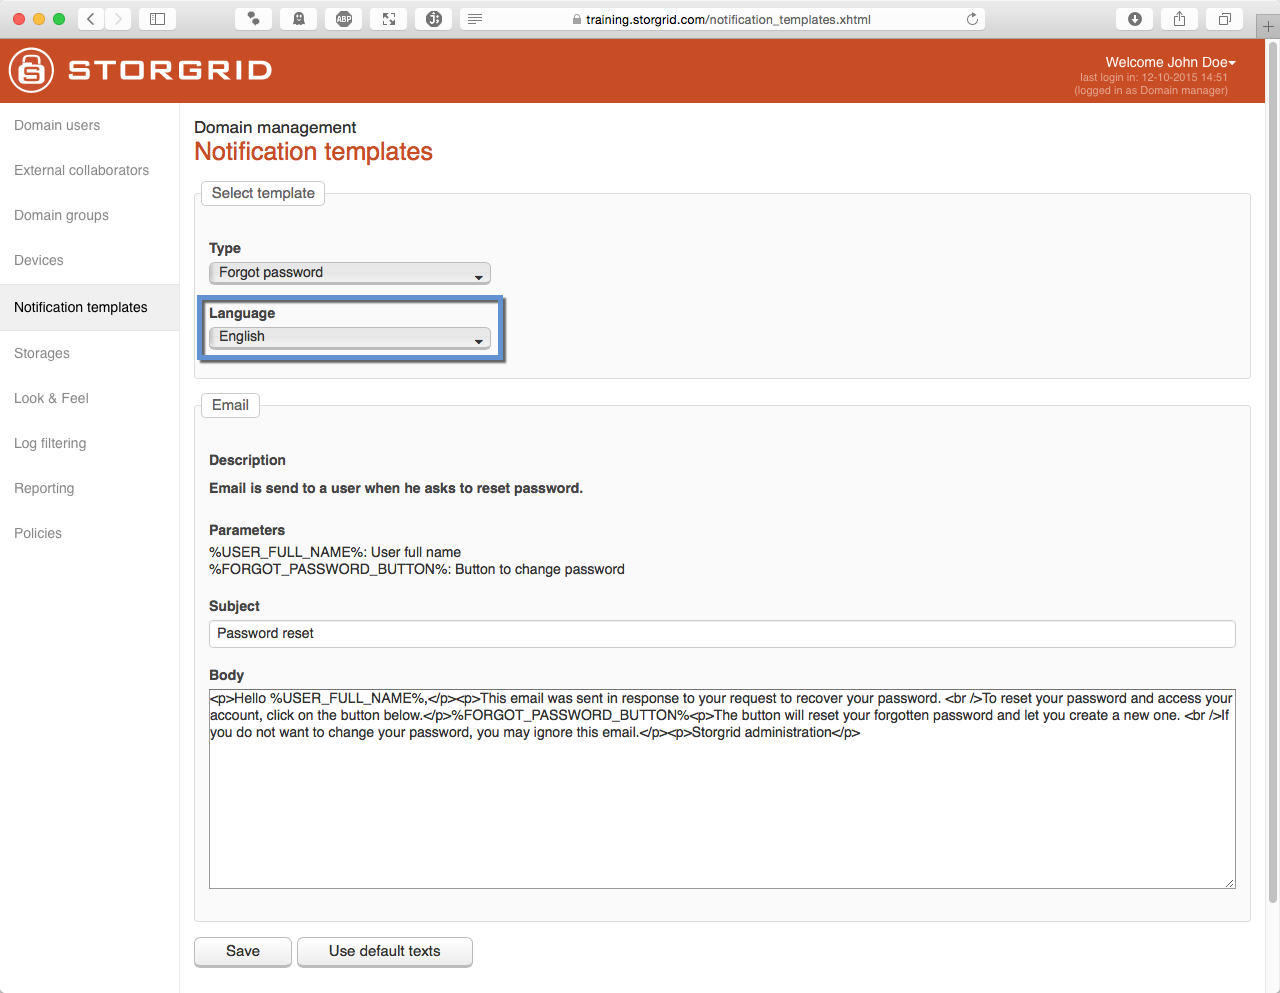
2 |
Template Language |
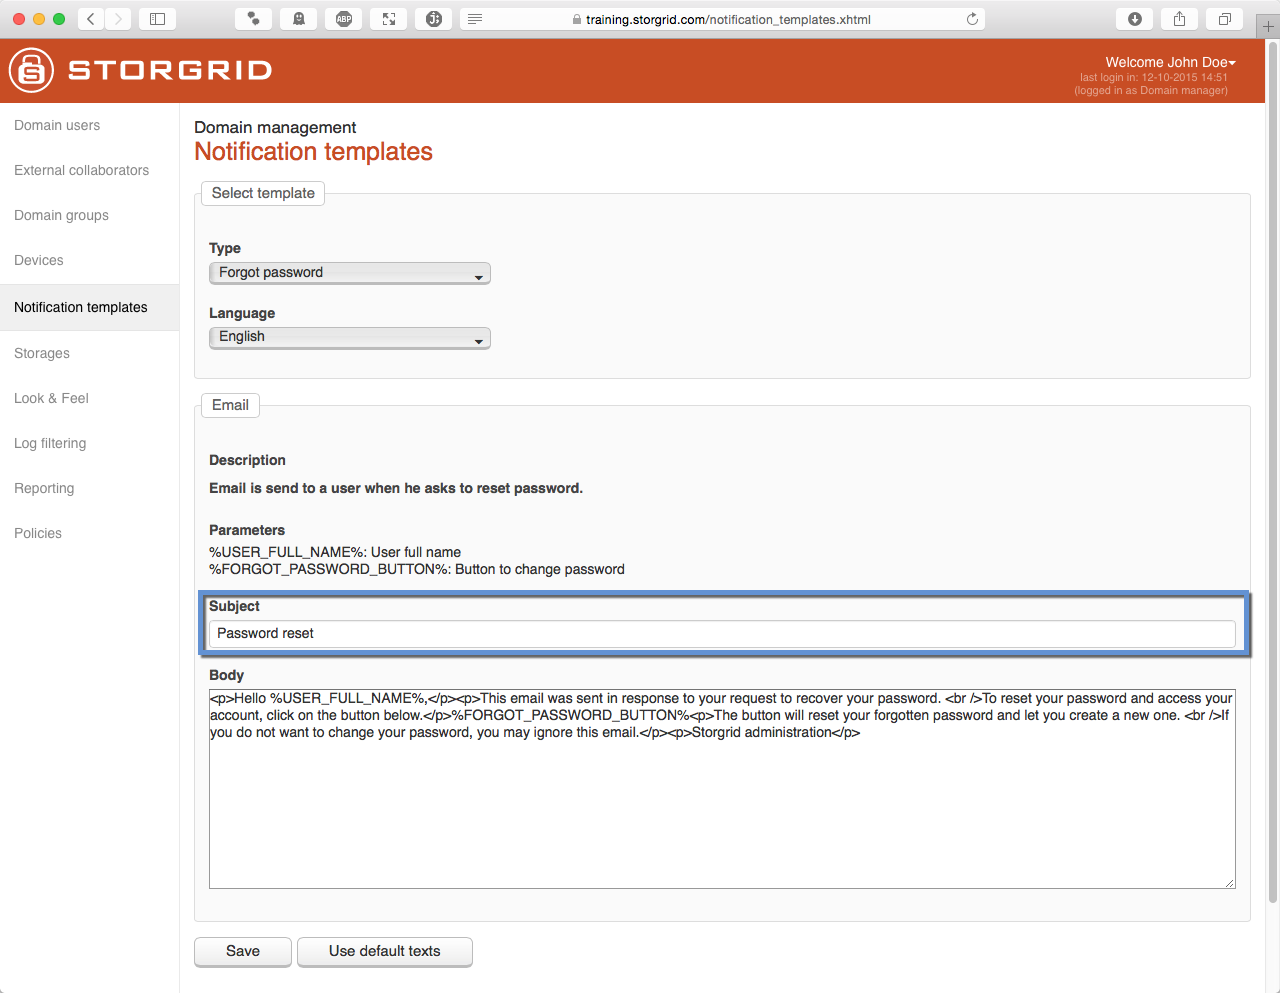
3 |
Template Subject |
4 |
Template Body |
5 |
Save template |
6 |
Reset to default template text |
7 |
Description and Parameters that can be used in template |
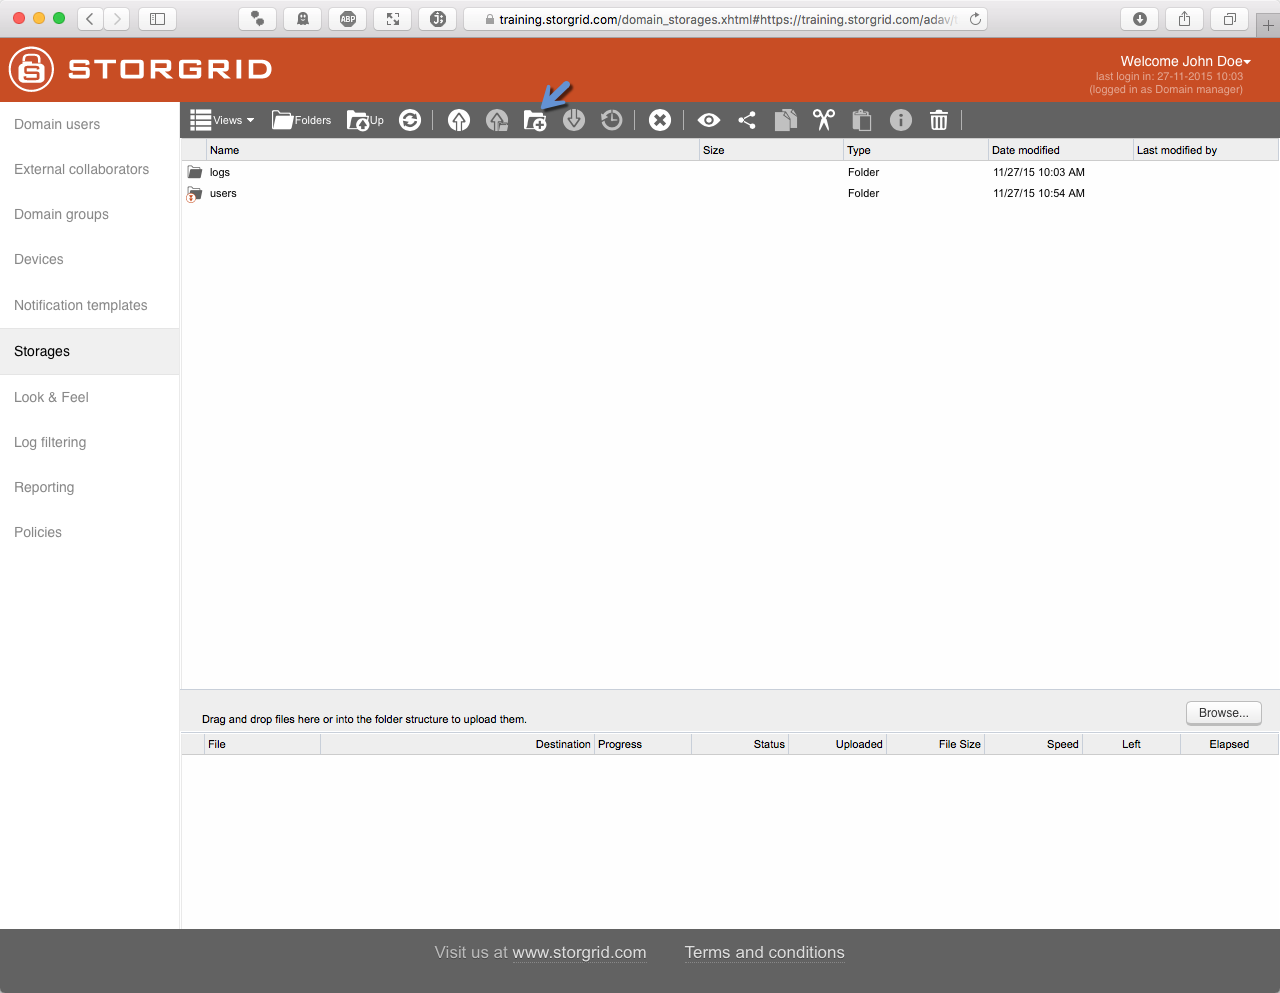
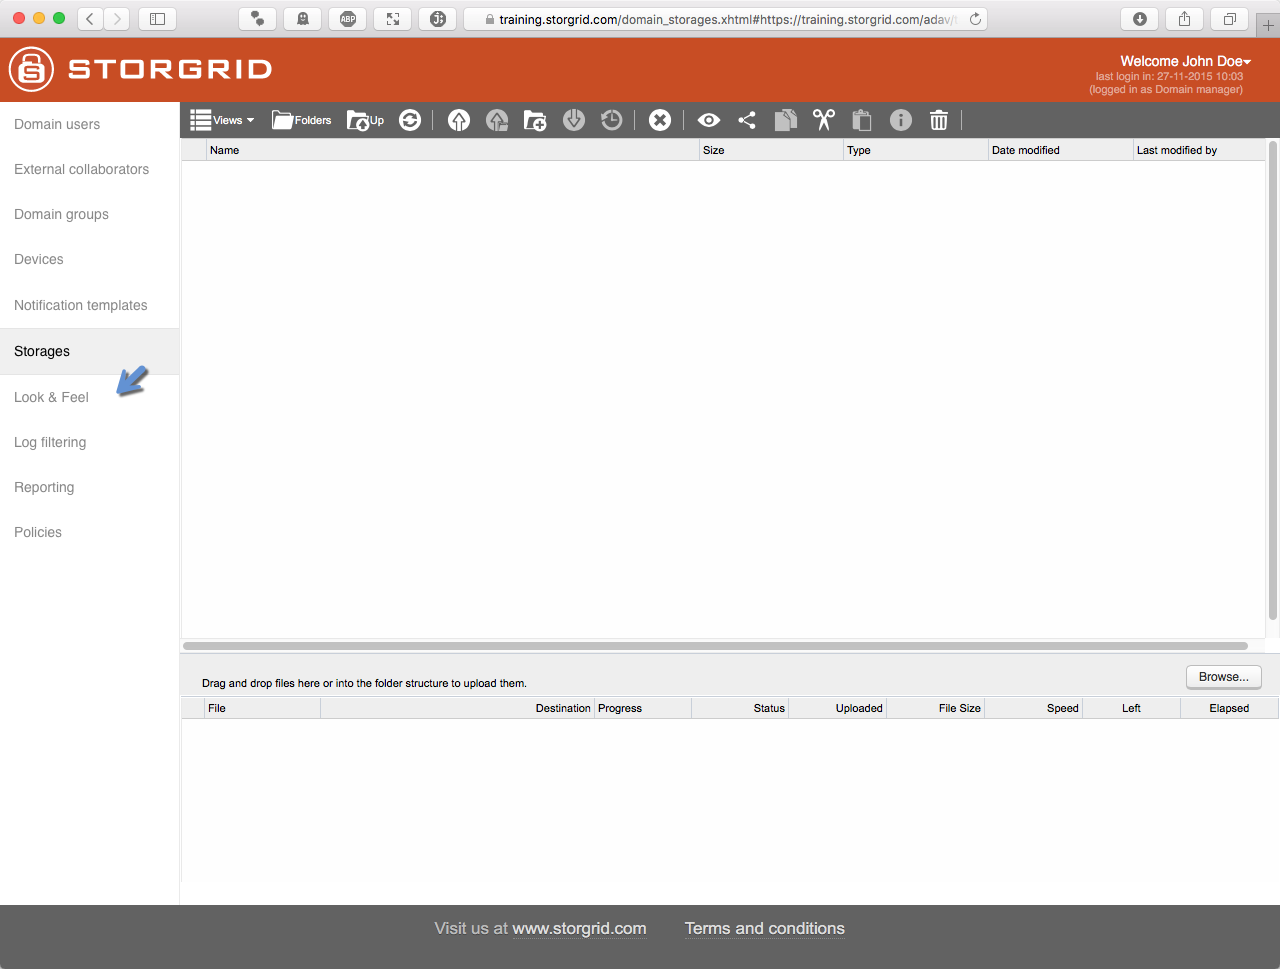
Storages
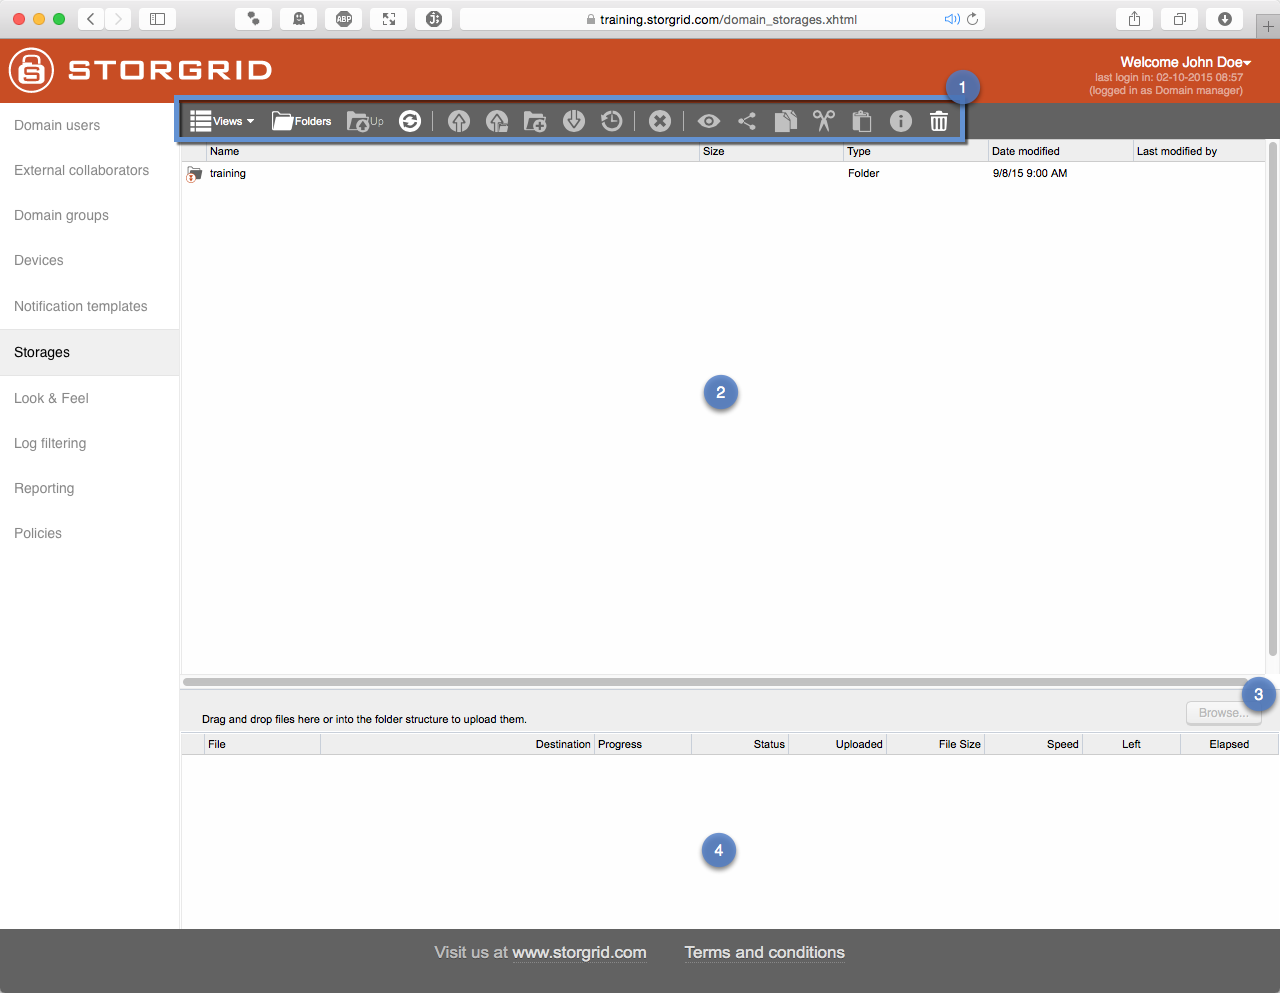
Details:
No. |
Description |
|---|---|
1 |
Storage Navigator |
2 |
Files and directories |
3 |
Browse button, uploads file or directories |
4 |
Progress overview |
Storage Navigator:
Icon |
Description |
|---|---|
|
Displays items using thumbnails or details view |
|
Show or hides navigation tree |
|
Navigates one level up in the folder structure |
|
Refresh content of folder |
|
Uploads files to the selected folder |
|
Uploads local folder with all the contained files to selected folder |
|
Creates new folder |
|
Downloads the selected file |
|
Manages files versions. Download previous file versions, delete and rollback to previous versions |
|
Deletes the selected items |
|
Shows visibility of the selected item |
|
Shares the selected item(s) |
|
Copies the selected items to the clipboard. To put them in the new location use the paste command |
|
Cut the selected items to buffer |
|
Pastes the content of the buffer to the current location |
|
Shows information about the selected item |
|
Shows deleted folders and files |


Log filtering
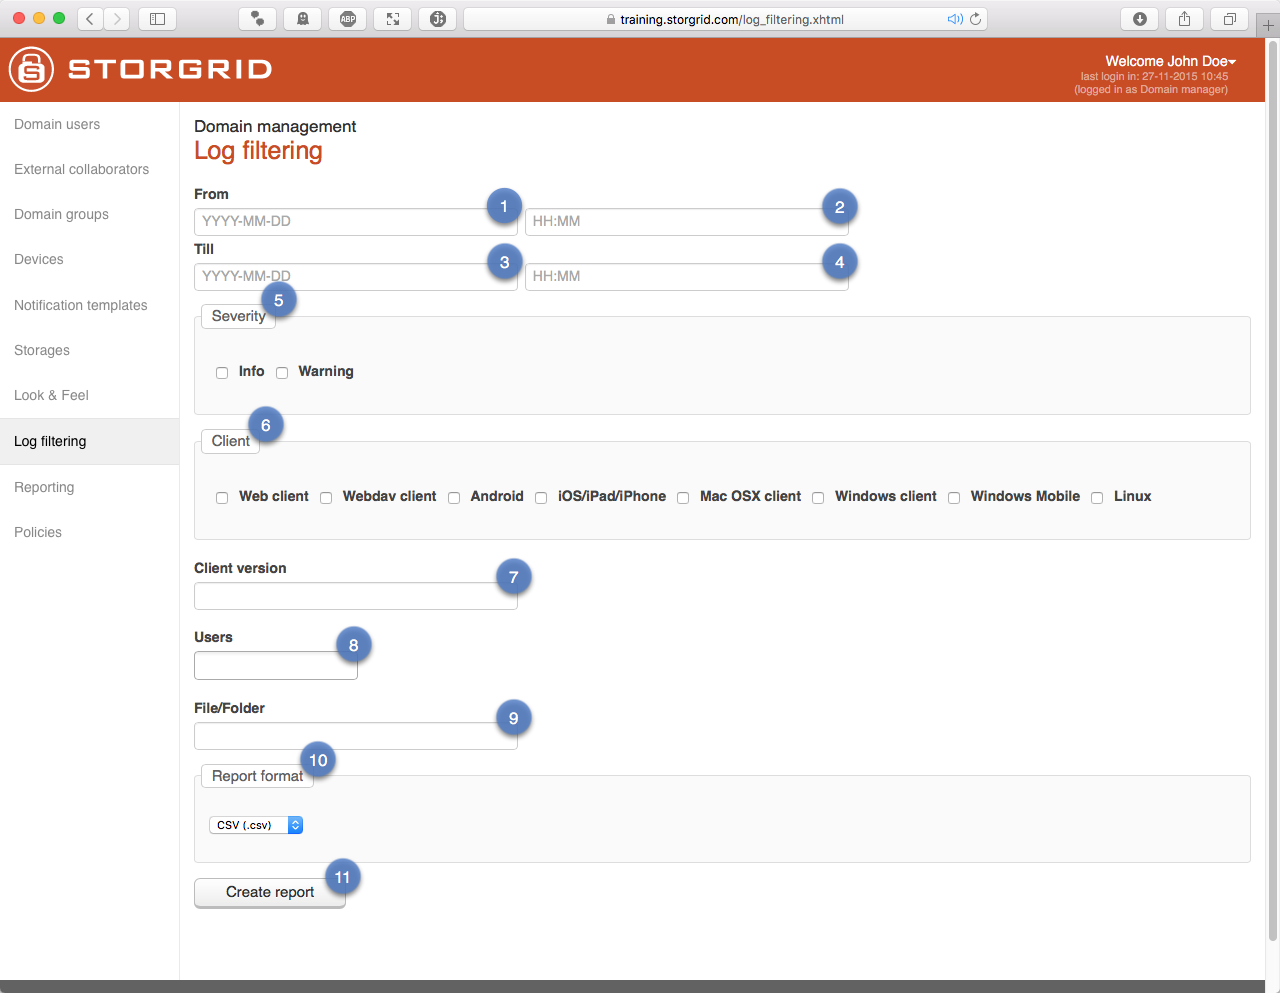
Details:
No. |
Description |
|---|---|
1 |
Start report from this date |
2 |
Start report from this time |
3 |
End report on this date |
4 |
End report on this time |
5 |
Which severity should be in report |
6 |
Which clients should be in the report |
7 |
Which client version |
8 |
Which users should be in report |
9 |
Filter on which file or folder |
10 |
Export in either format CSV or XLSX |
11 |
Create report |
Reporting
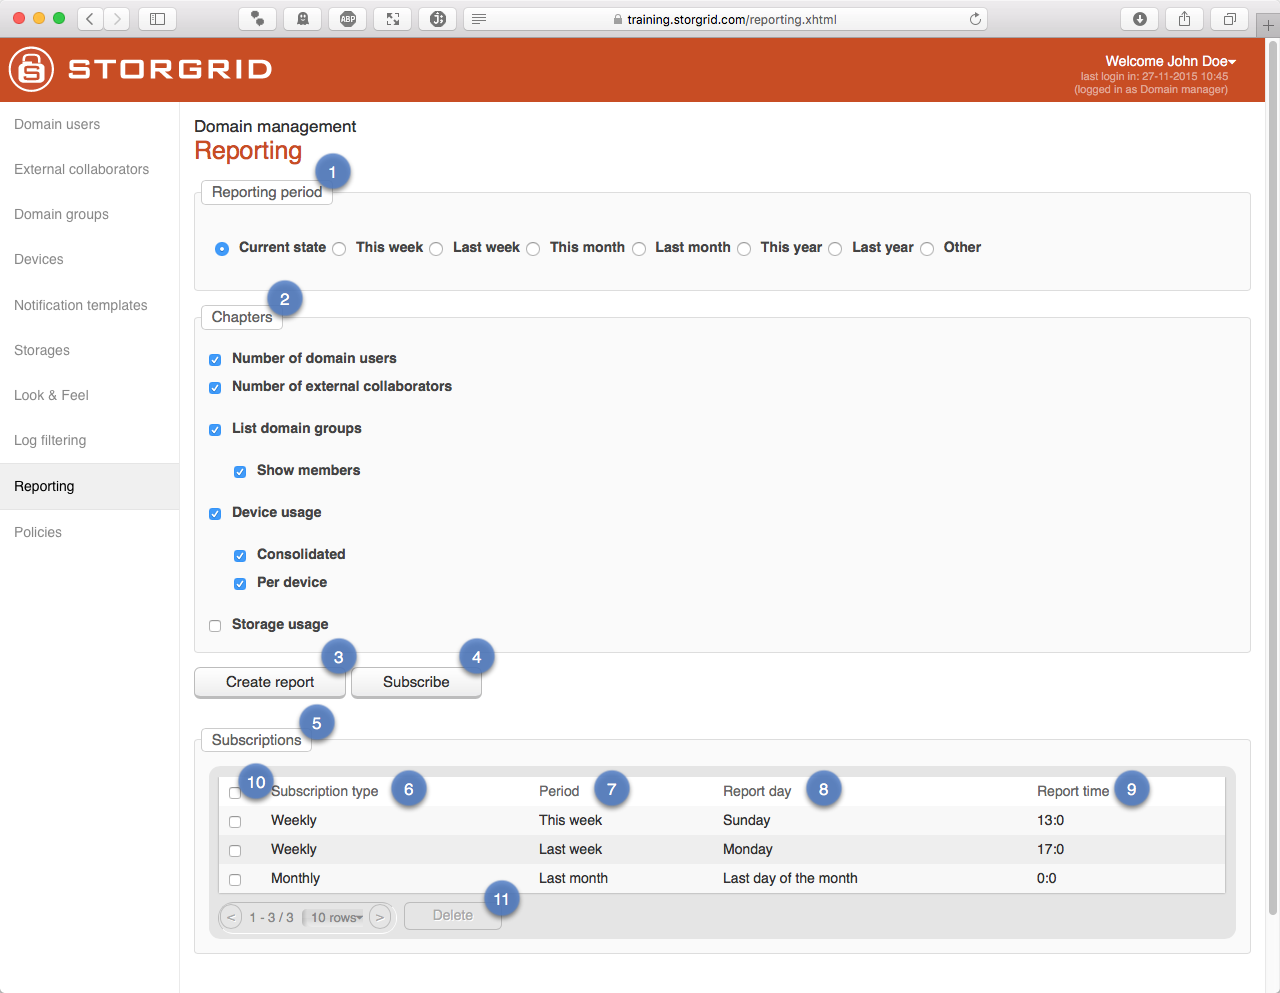
Details:
No. |
Description |
|---|---|
1 |
Select reporting period |
2 |
Indicate which chapters should go in report |
3 |
Create report according to reporting period and chapters |
4 |
Subscribe to a weekly or monthly report |
5 |
List of current subscriptions |
6 |
Subscription type can be weekly or monthly |
7 |
Subscription period as defined in No. 1 |
8 |
The day the subscriber will receive an email |
9 |
The time that a subscriber will receive a report |
10 |
Select box to select either a row or all subscribers |
11 |
Delete button to delete subscription |
Usermanagement
If you need more information about the fields, please see the reference.
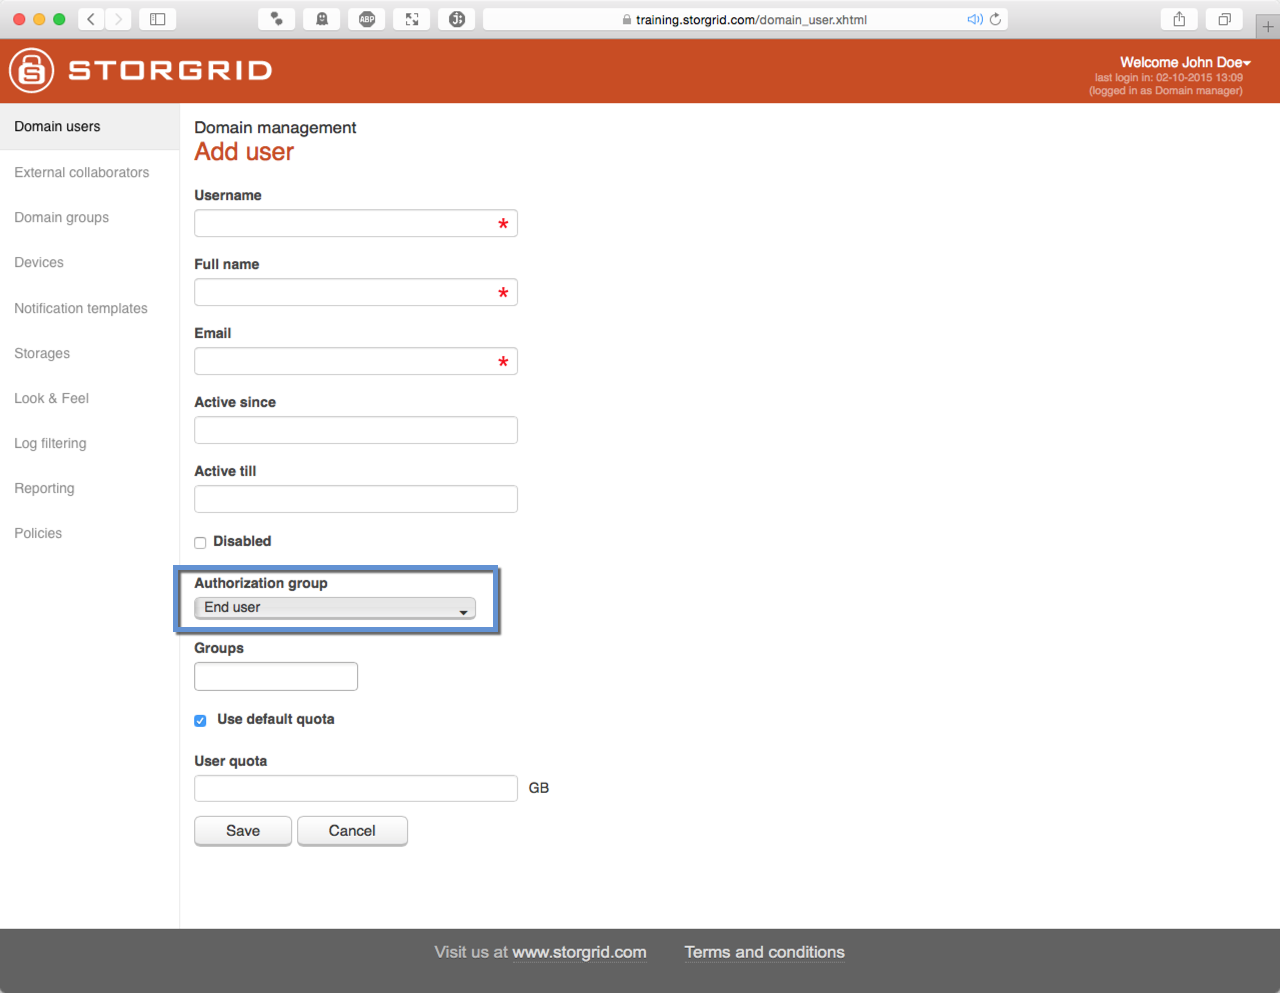
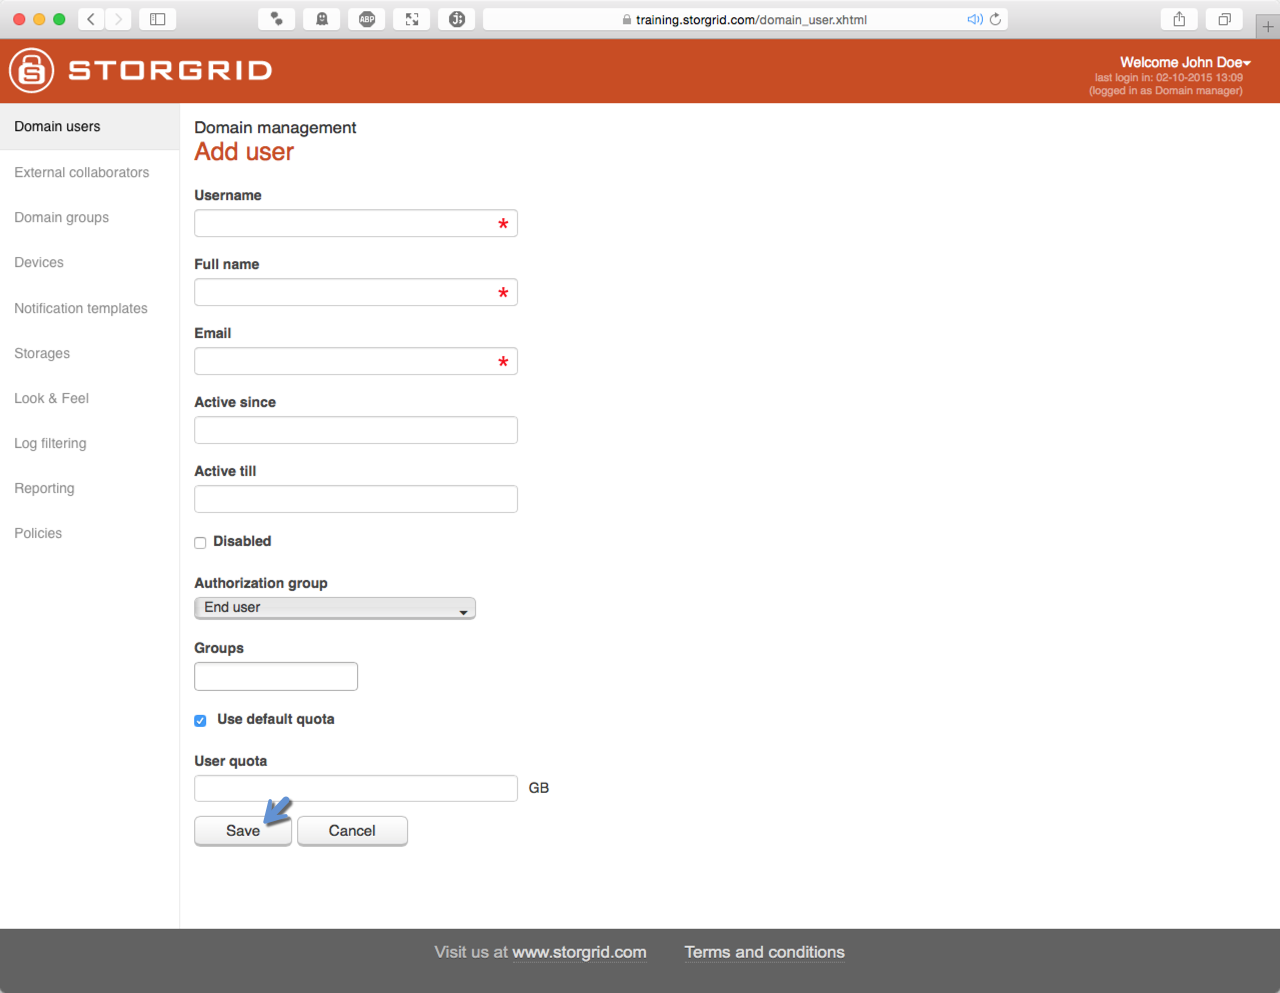
Add User
Step |
Action |
Screenshot |
|---|---|---|
|
||
|
|
|
|
|
|
|
|
|
|
|
|
|
|

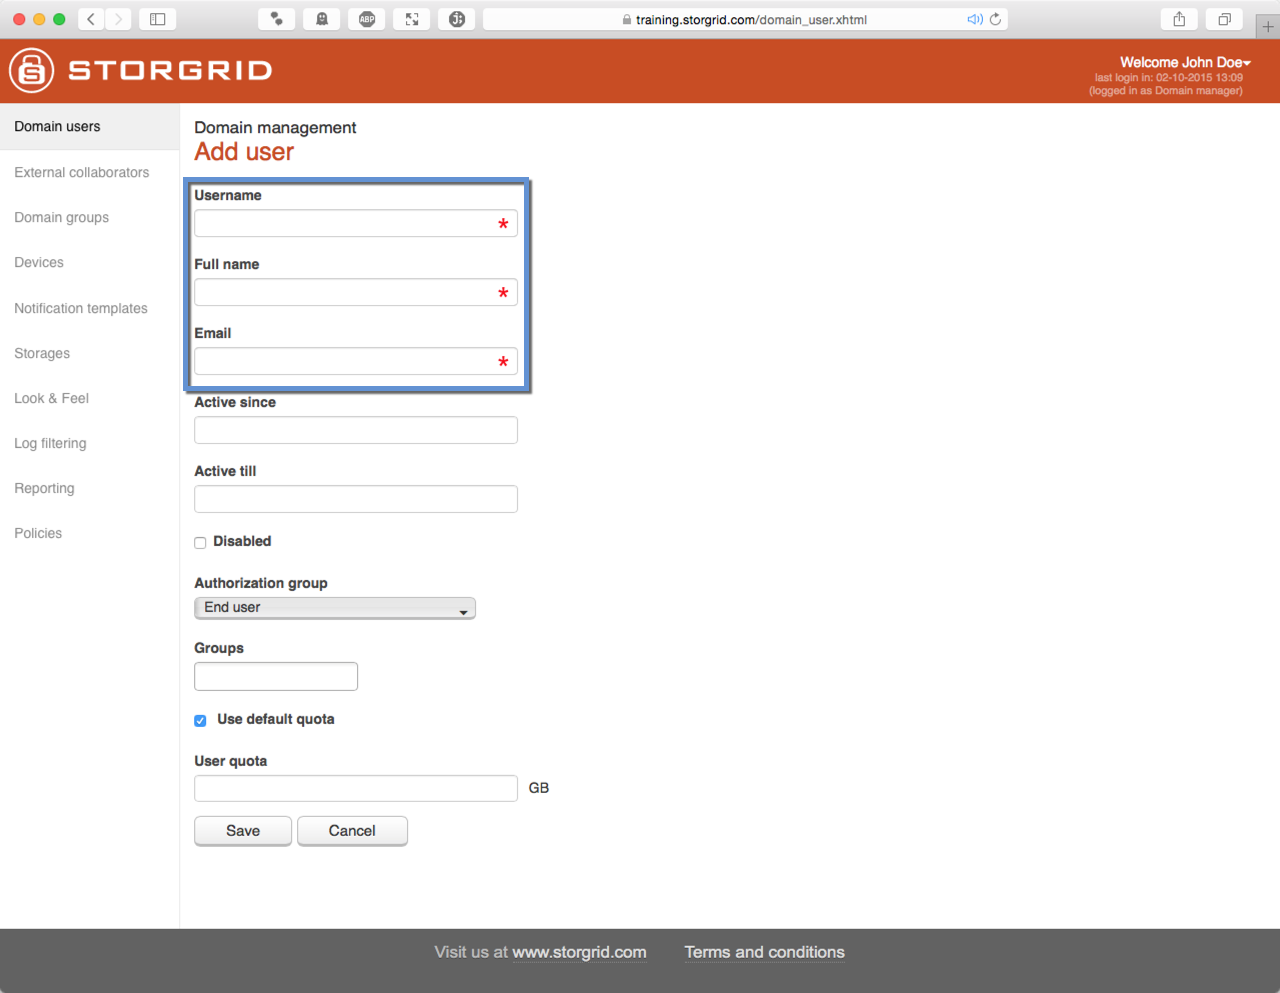
Hint
The username must be unique.
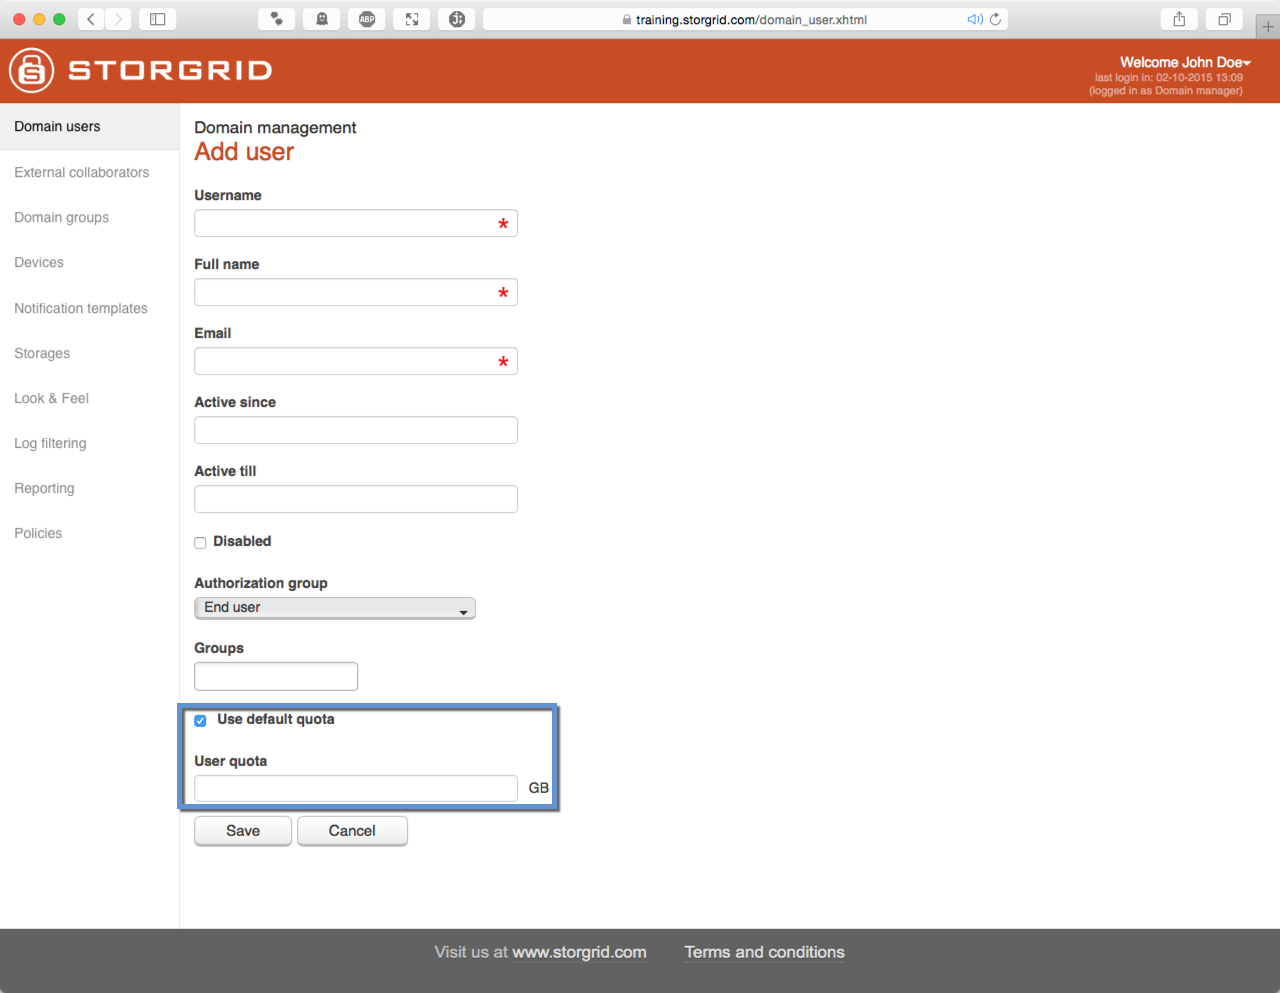
If “Use default quota” is selected, it will use the default quota from the domain.
Modify User
Step |
Action |
Screenshot |
|---|---|---|
|
||
|
|
|
|
|
|
|
|
|
|
|


Delete User
Step |
Action |
Screenshot |
|---|---|---|
|
||
|
|
|
|
|
|
|
|
|
|
|
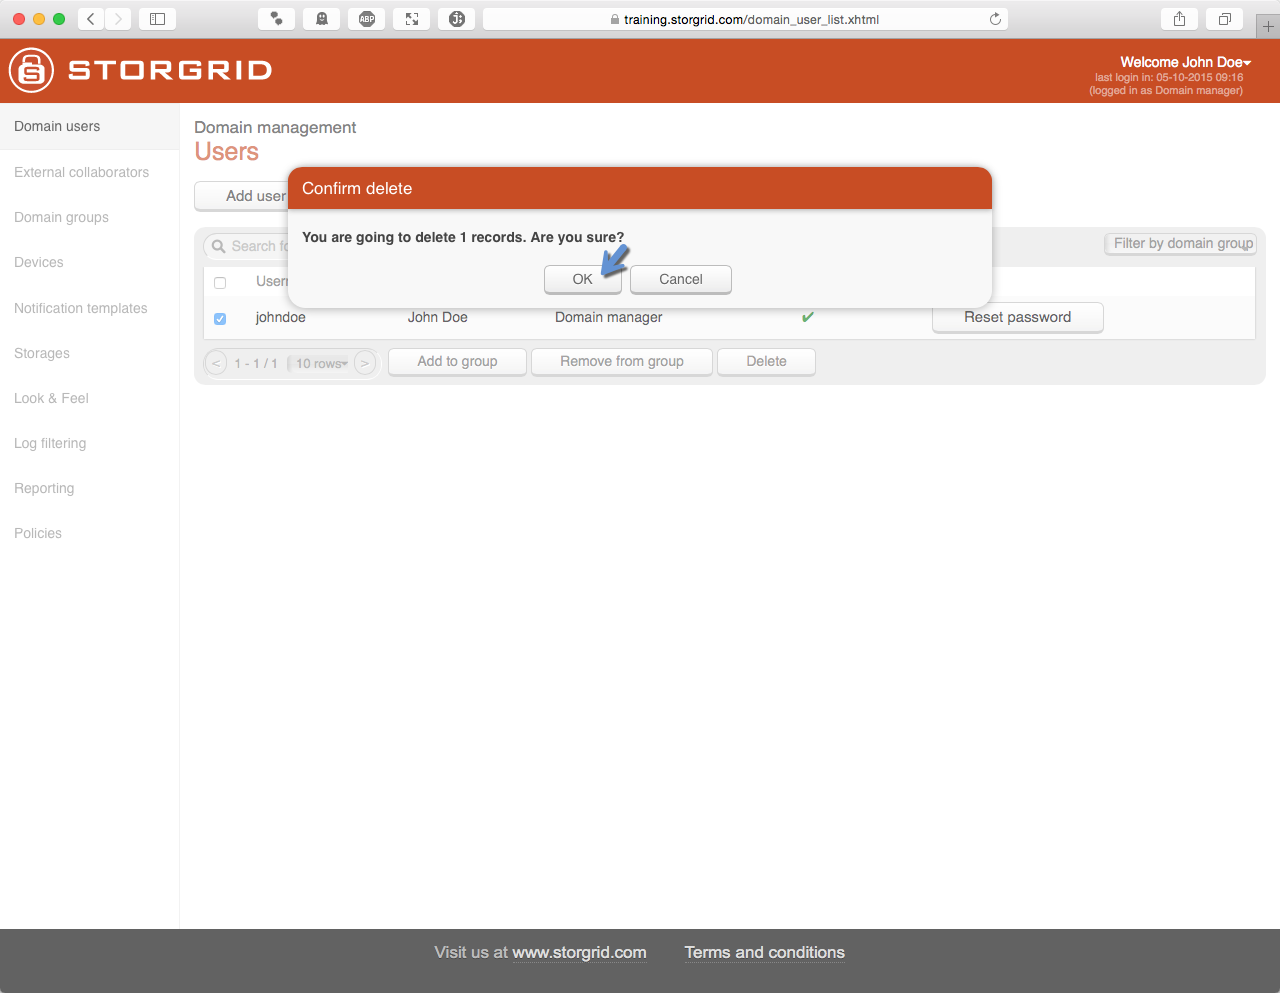
Caution
You can’t undo this action.
Make user member of group
- This is possible in two ways:
Modify user and enter group name in the “Groups” field
Select user(s) from user list and add it to the relevant group
Step |
Action |
Screenshot |
|---|---|---|
|
||
|
|
|
|
|
|
|
|
|
|
|
|
|
|

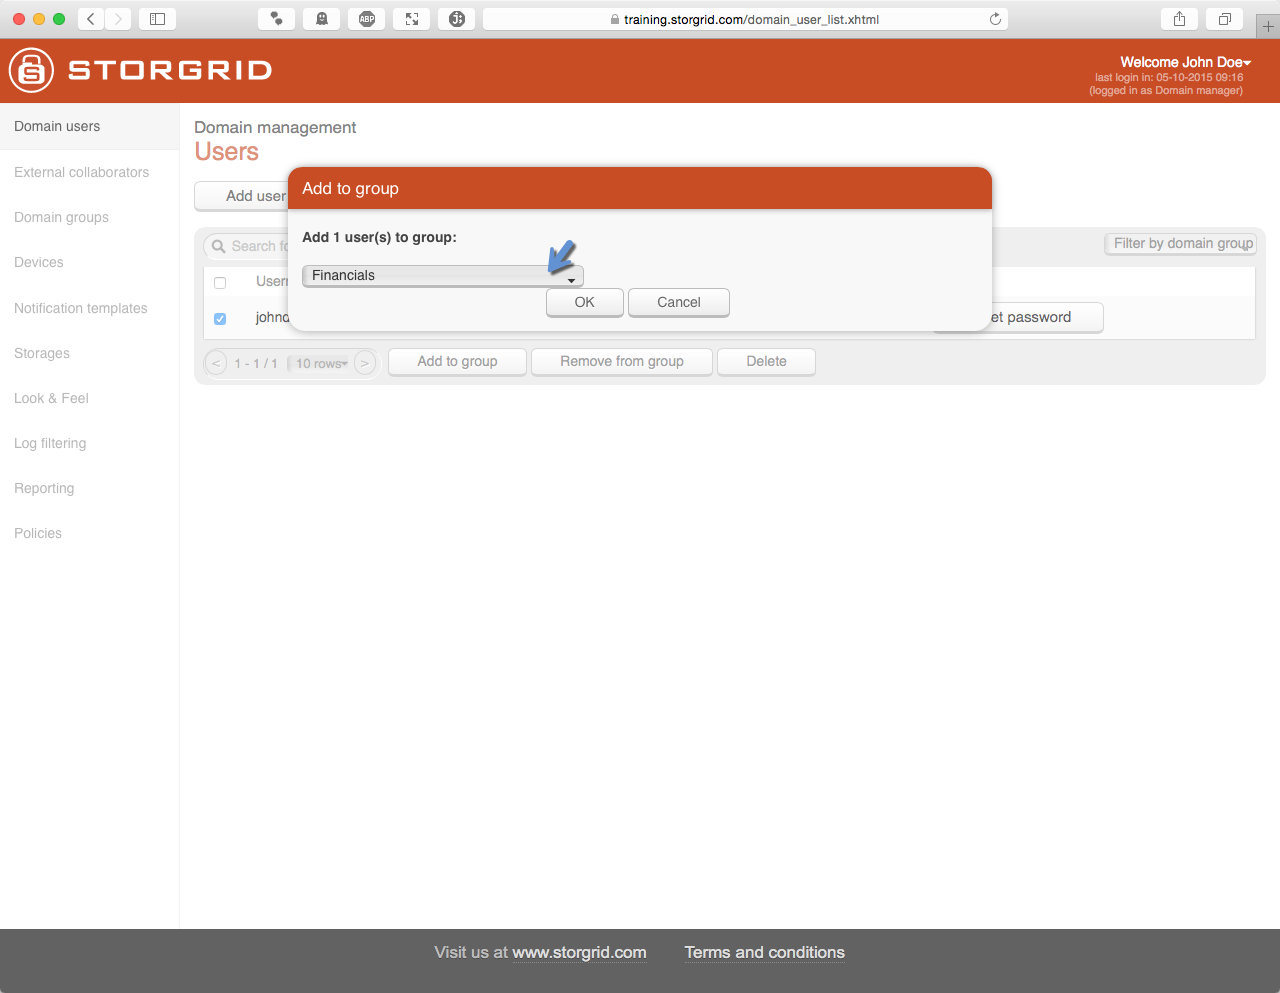
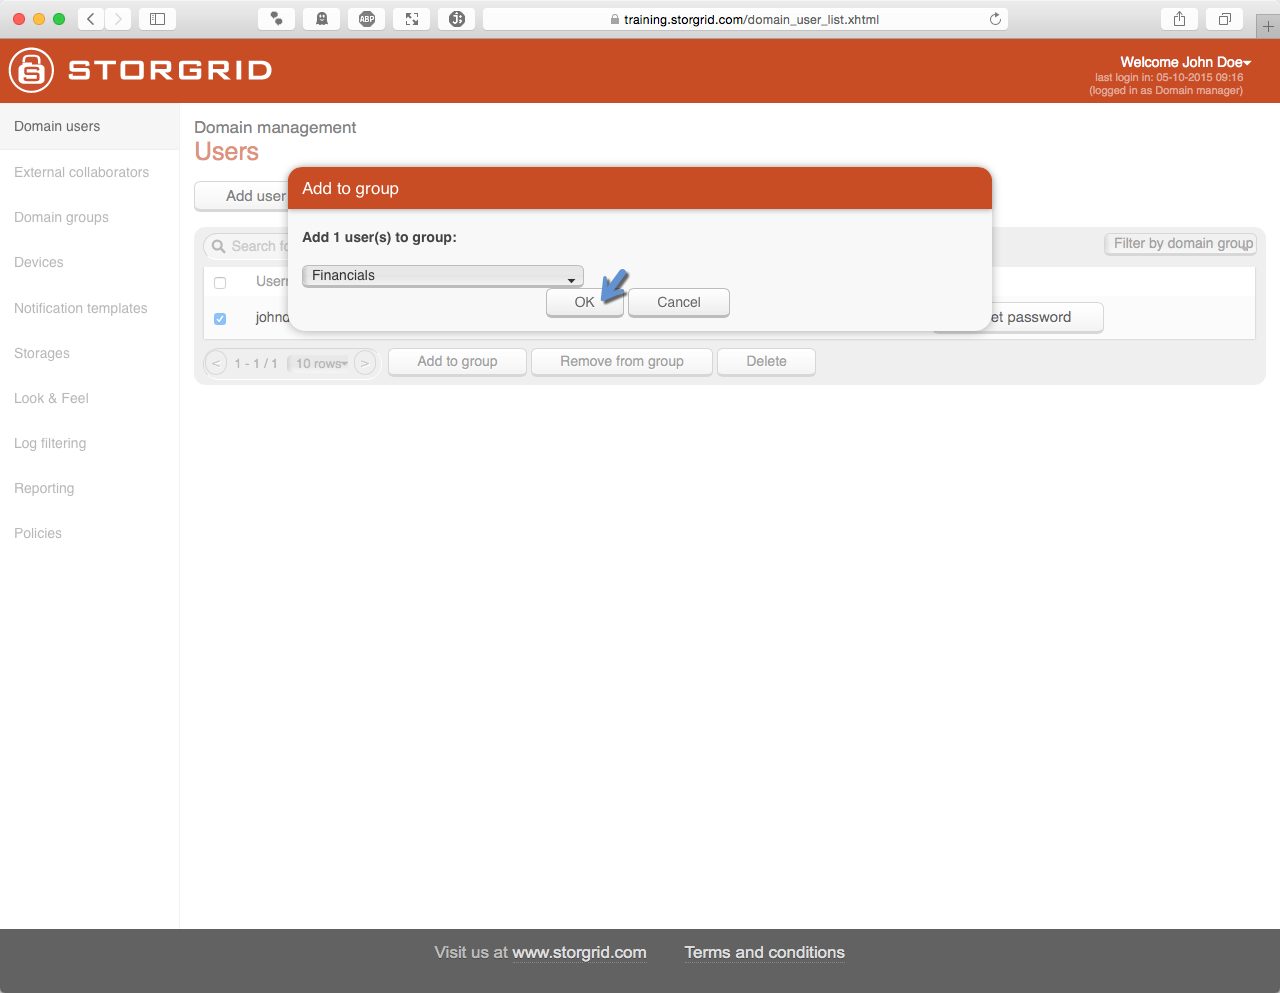
Hint
Make sure you’ve created at least one group.
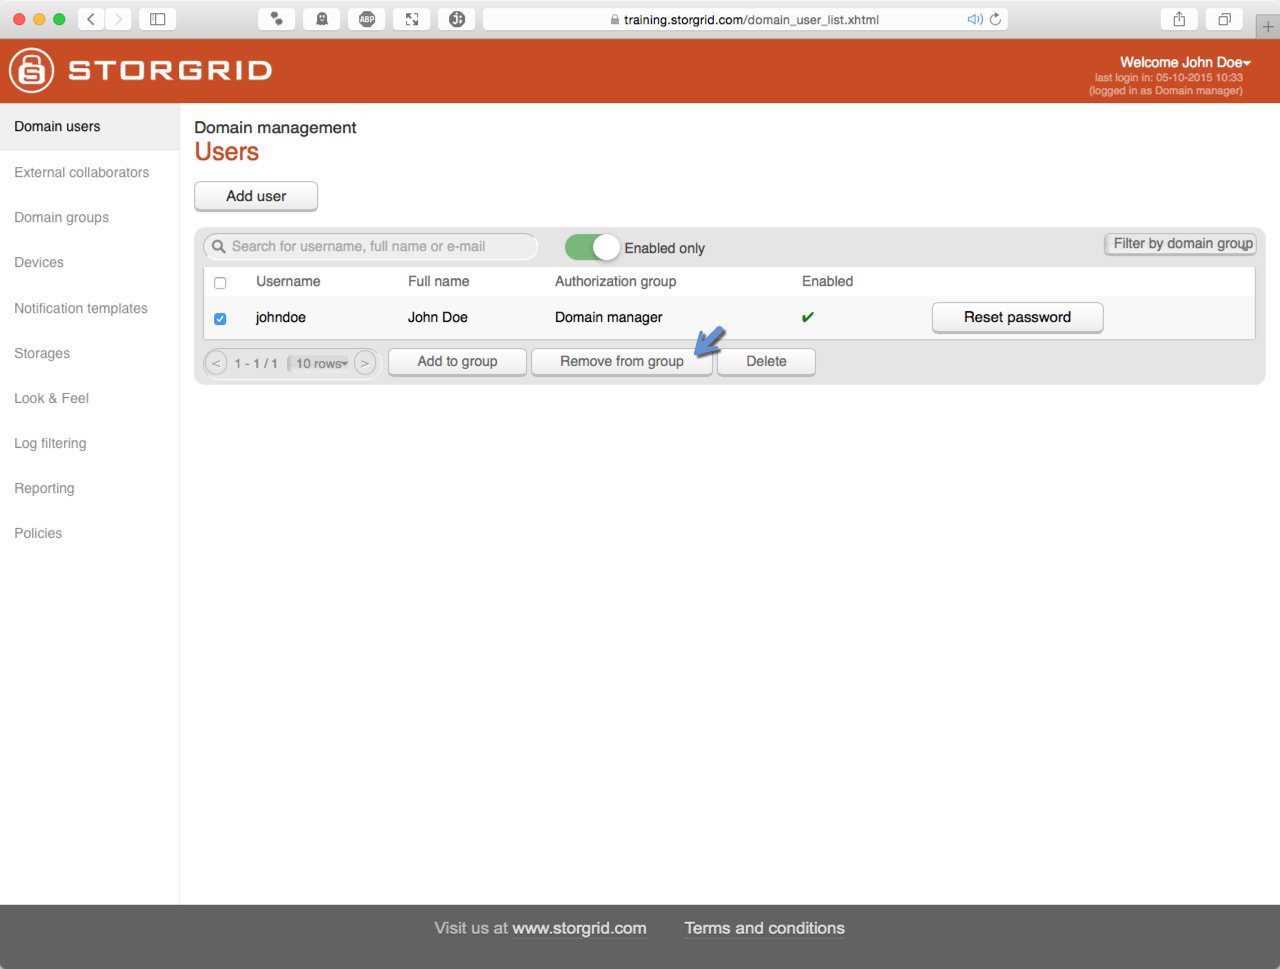
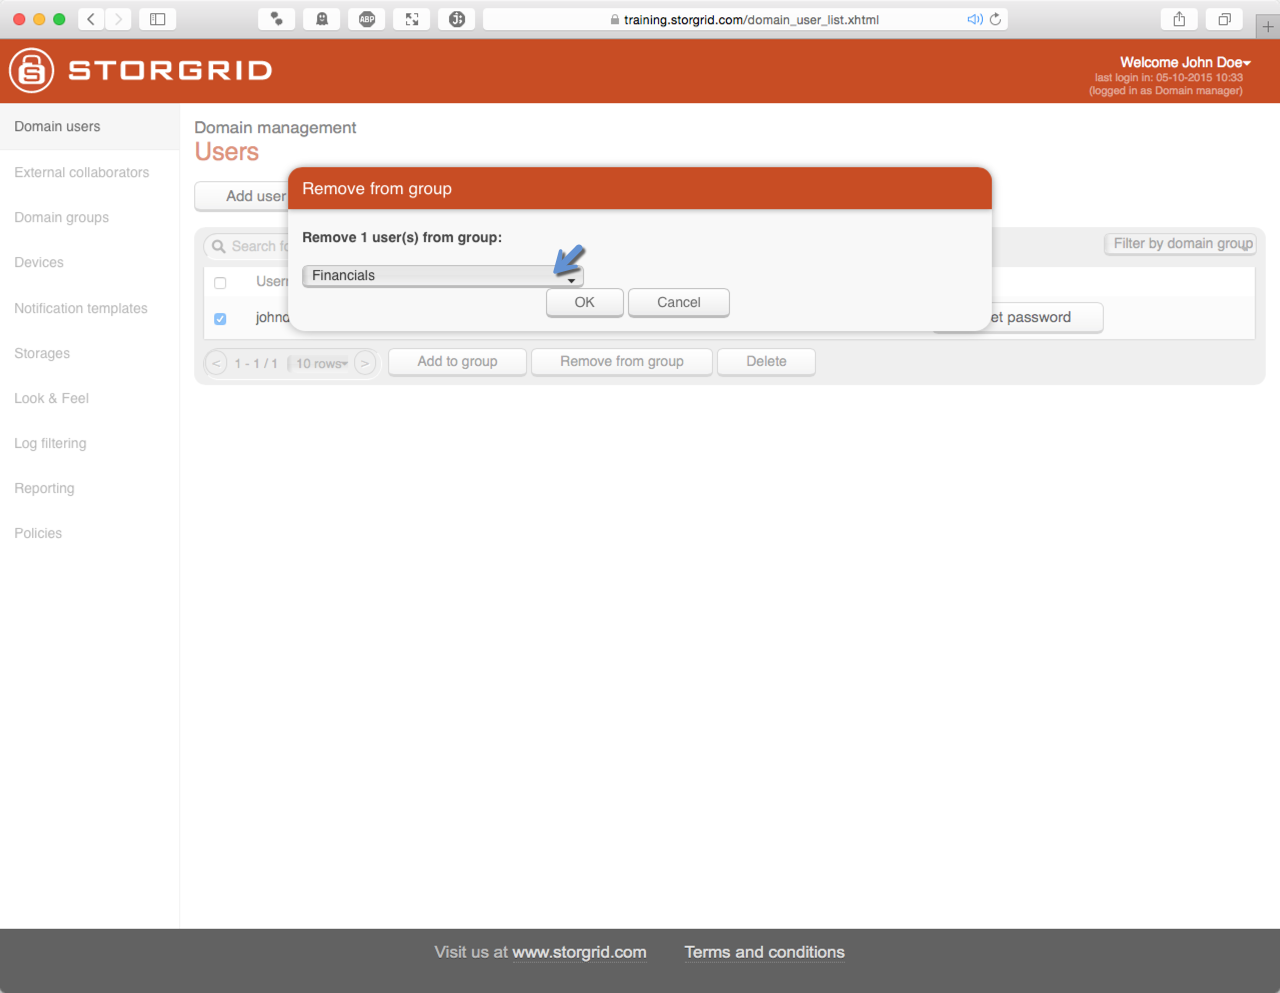
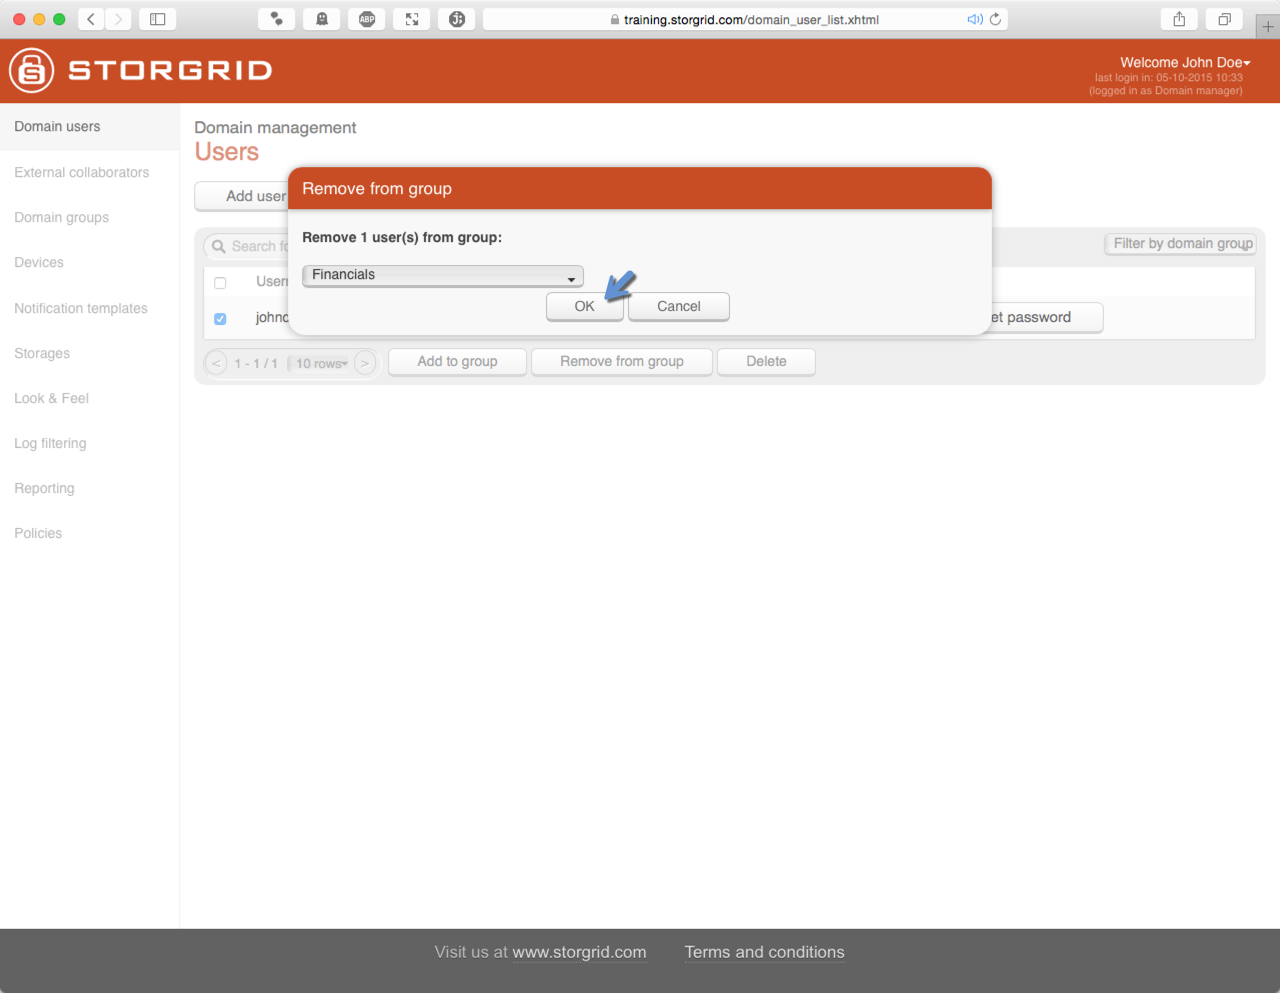
Remove membership of group
- This is possible in two ways:
Modify user and remove relevant group from user
Select user(s) from user list and add it to the relevant group
Step |
Action |
Screenshot |
|---|---|---|
|
||
|
|
|
|
|
|
|
|
|
|
|
|
|
|
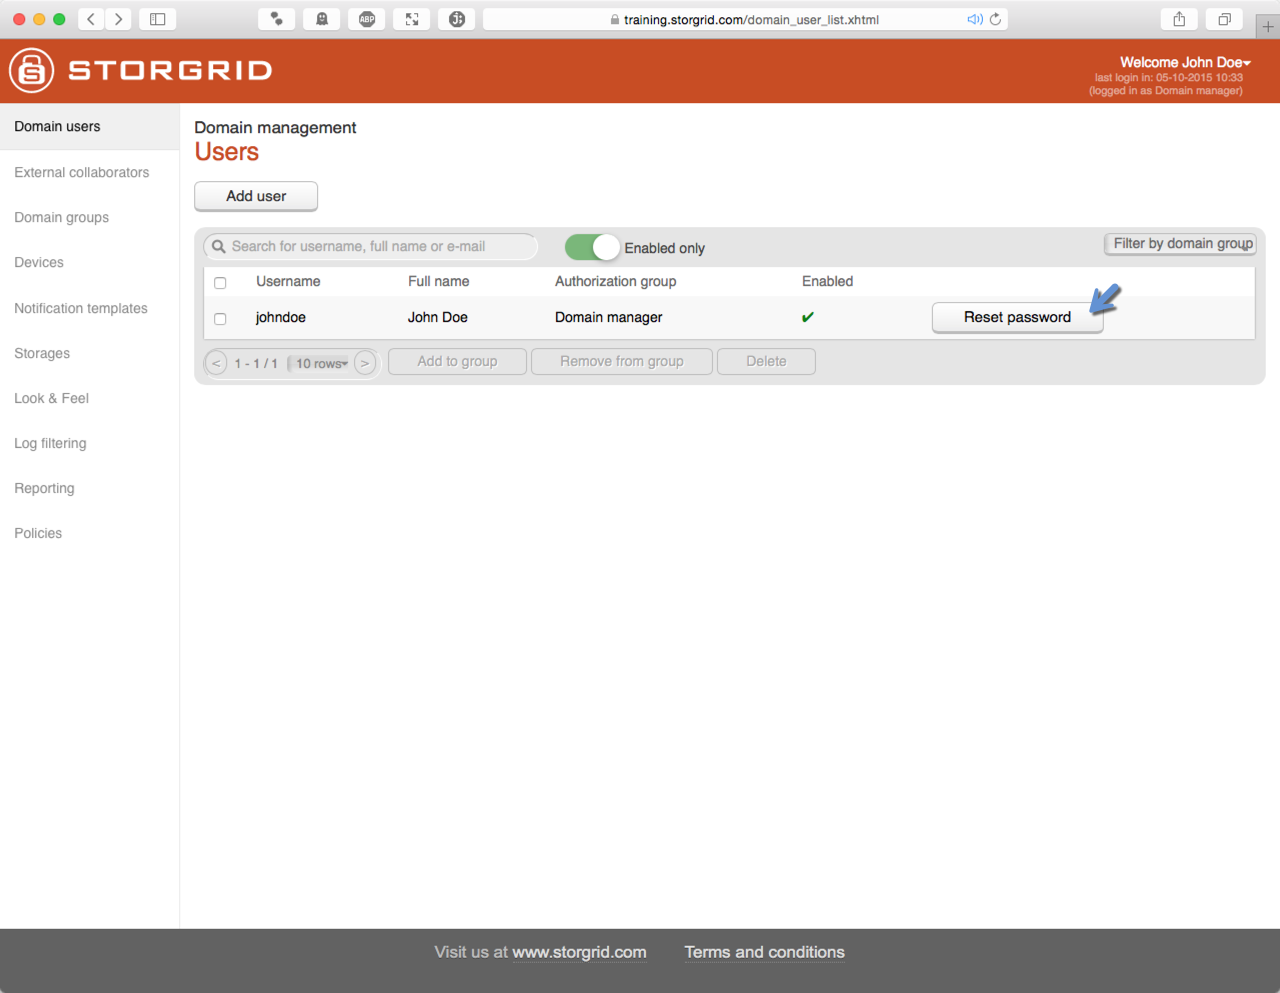
Reset User Password
When this functionality is used. The relevant user will receive an email with instructions how to reset the password.
Step |
Action |
Screenshot |
|---|---|---|
|
||
|
|
|
|
|
External Collaborators Management
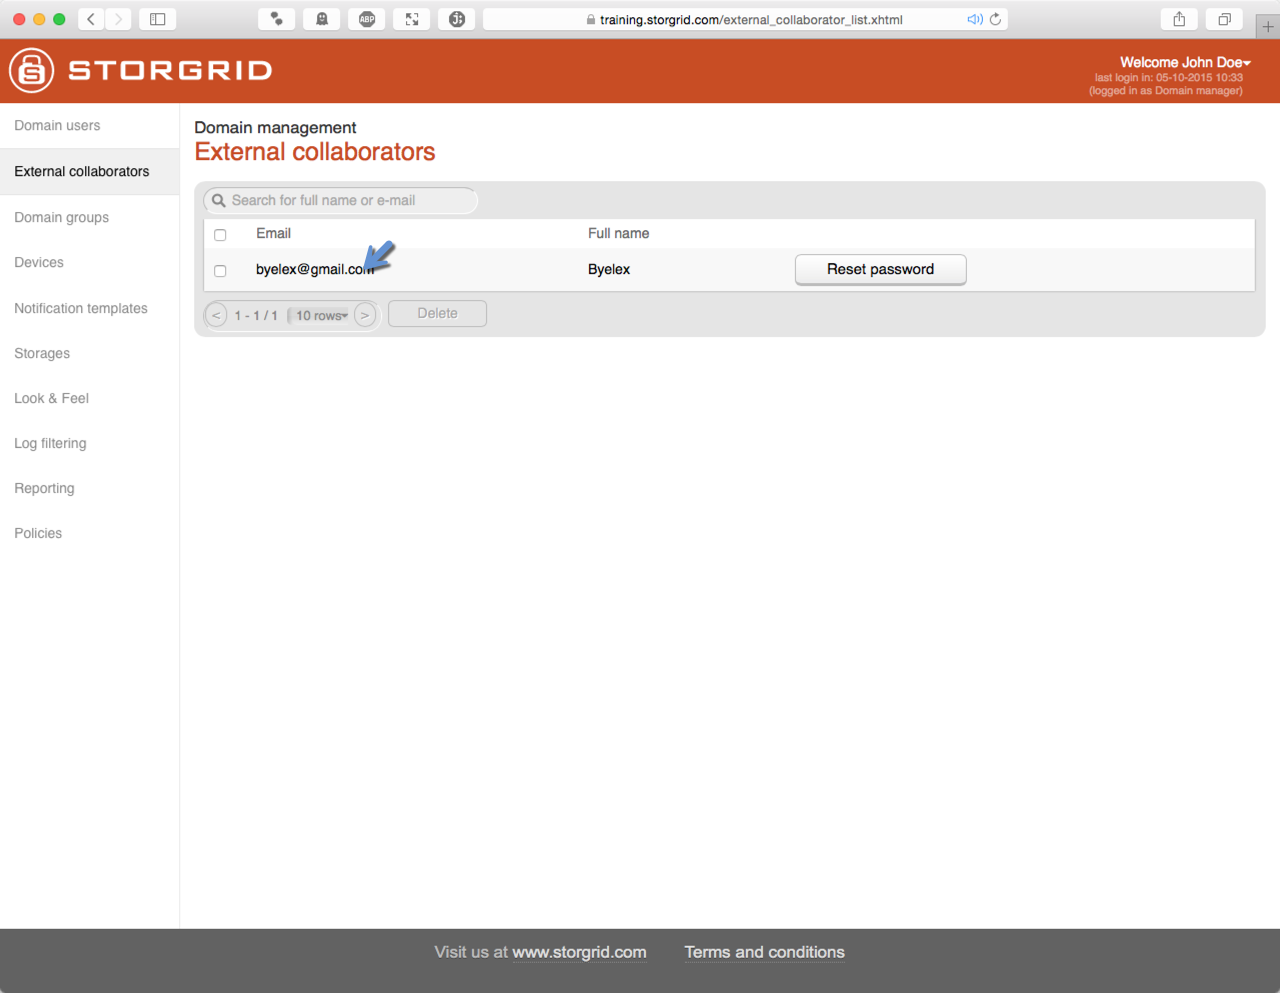
An external collaborator is created when a Storgrid user shares data with an external user with download/upload rights and the external collaborator registers to upload content.
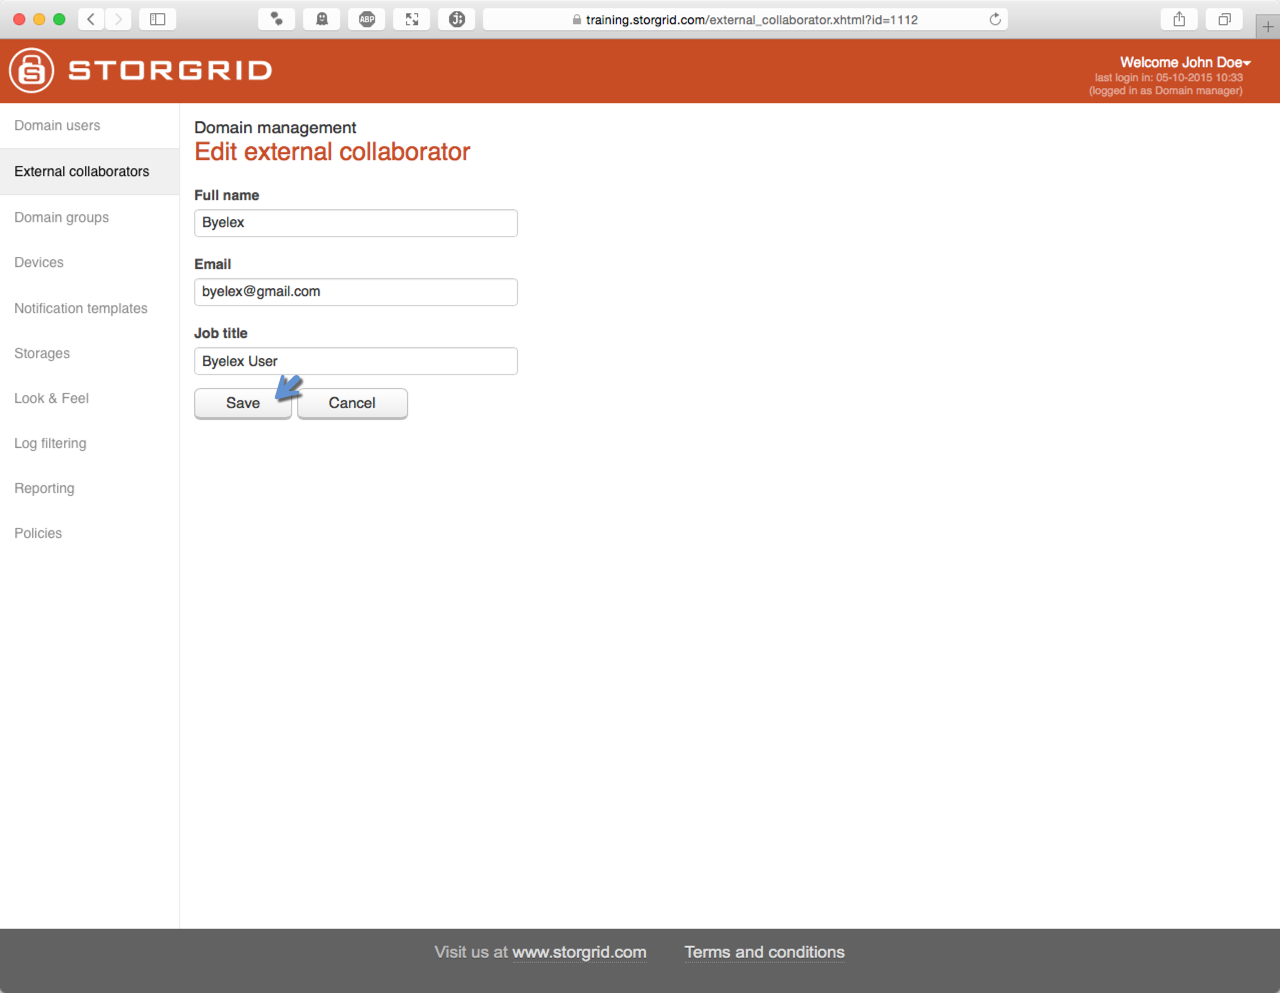
Modify External Collaborator
Step |
Action |
Screenshot |
|---|---|---|
|
||
|
|
|
|
|
|
|
|
|
|
|
|
|
|


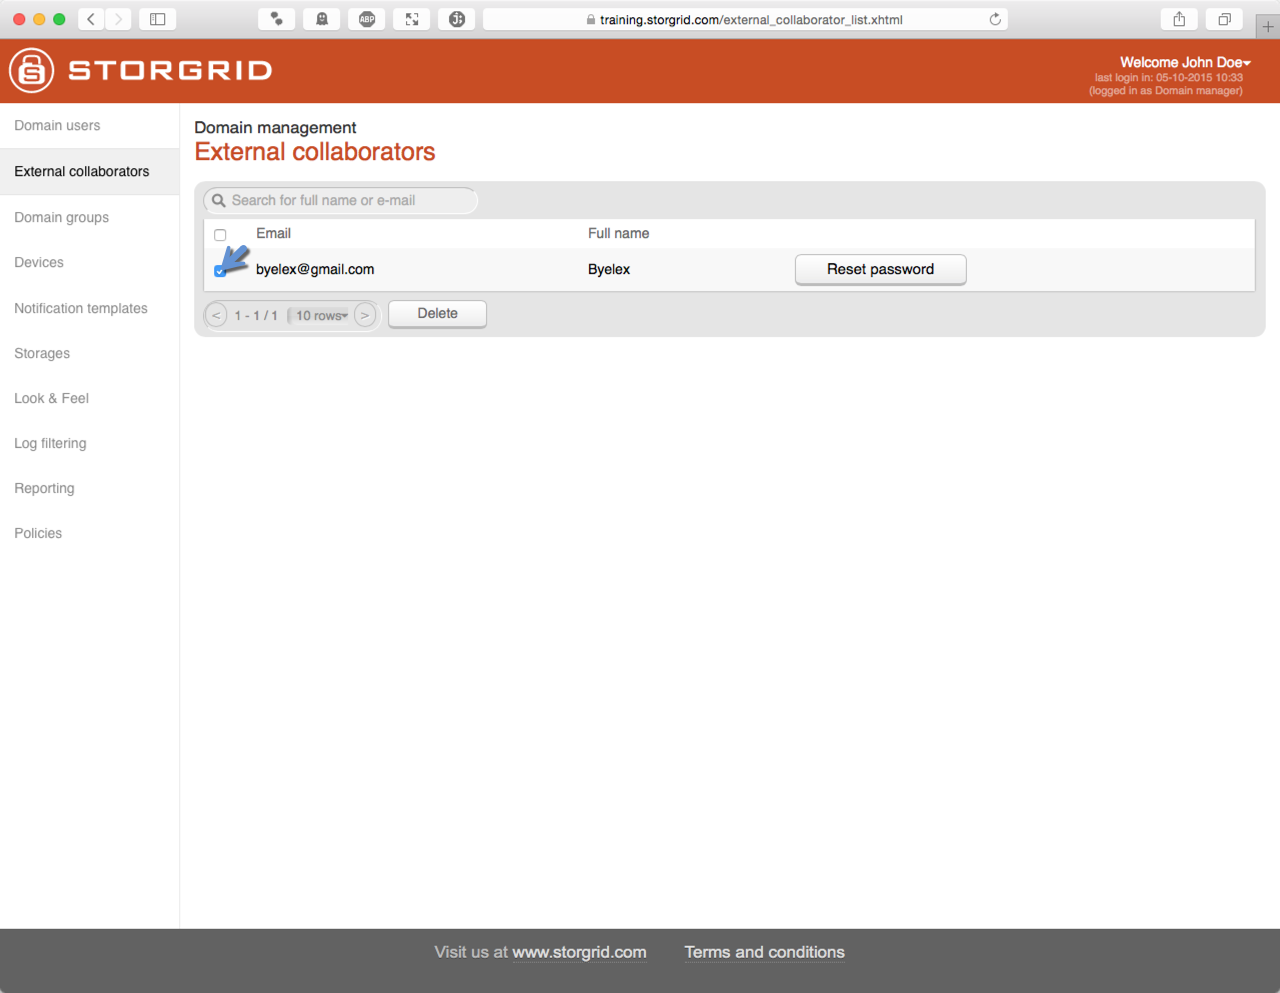
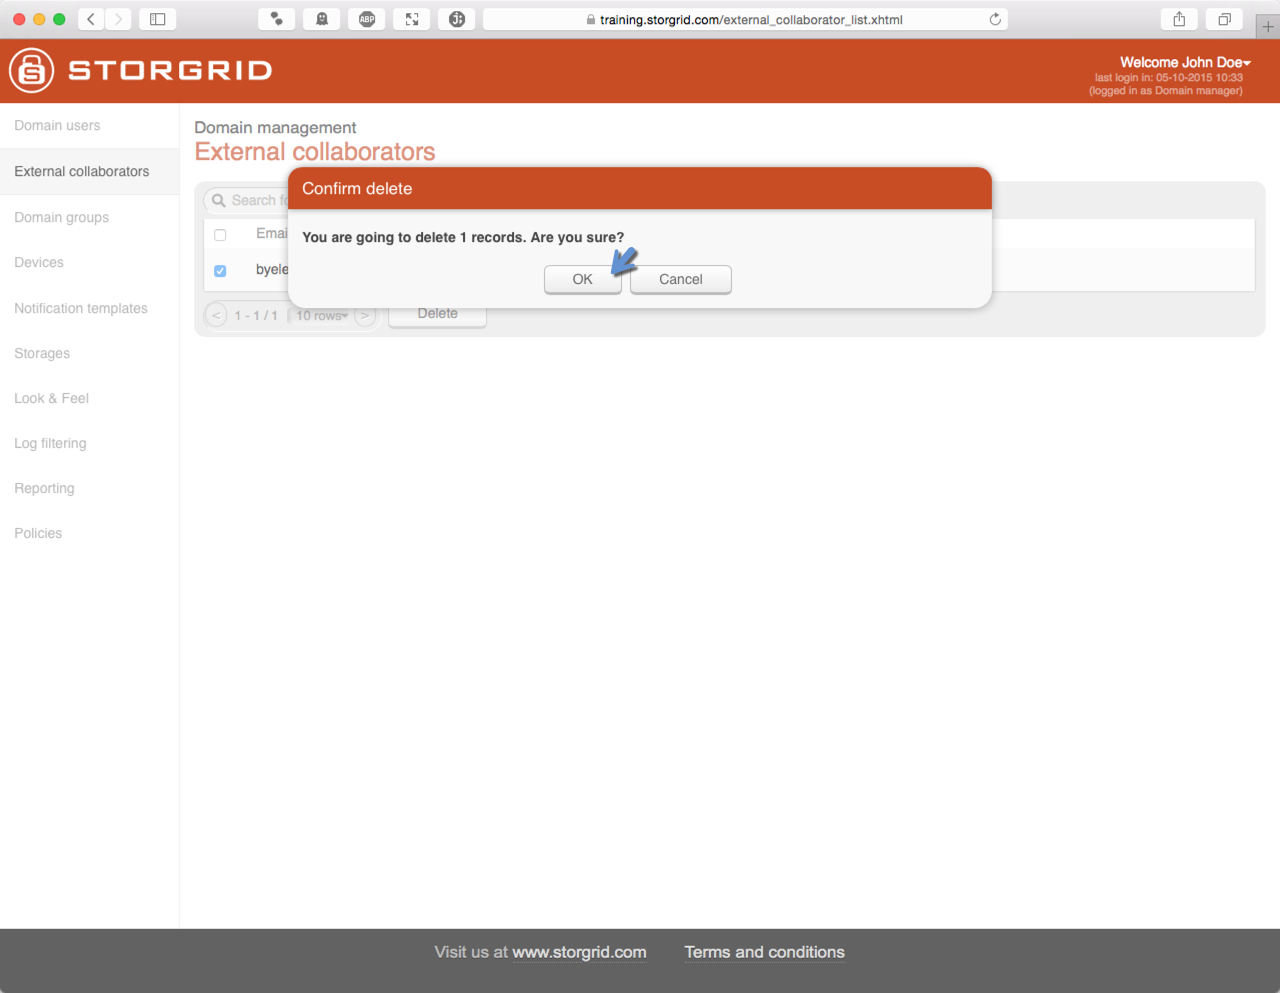
Delete External Collaborator
Step |
Action |
Screenshot |
|---|---|---|
|
||
|
|
|
|
|
|
|
|
|
|
|
|
|
|

Reset Password External Collaborators
When this functionality is used. The relevant user will receive an email with instructions how to reset the password.
Step |
Action |
Screenshot |
|---|---|---|
|
||
|
|
|
|
|
|
|
|
Manage Domain Groups
Domain groups are used to add Storgrid members or even Storgrid groups. These groups can then be used to share files with.
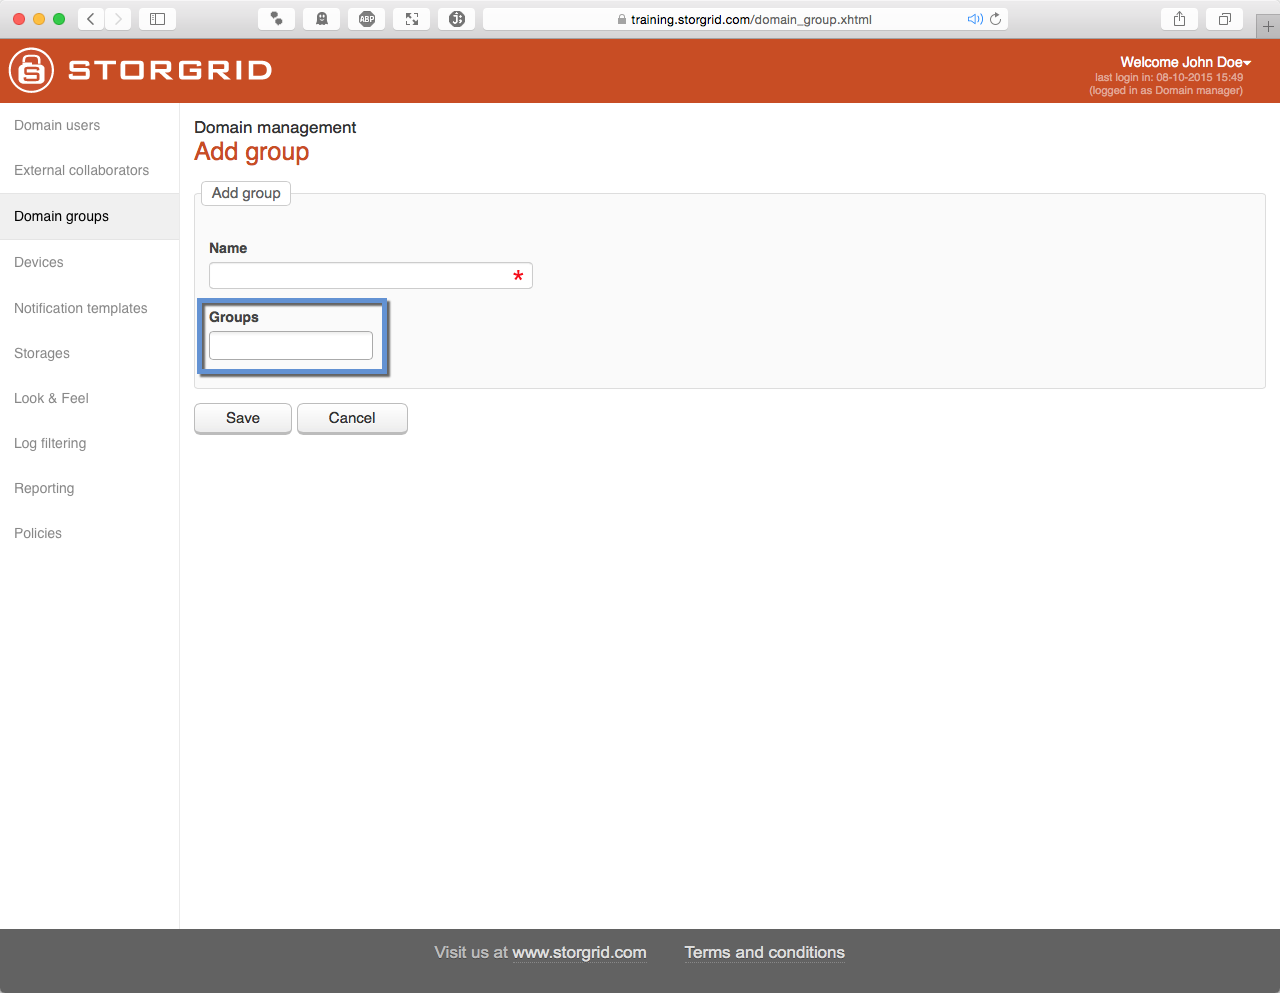
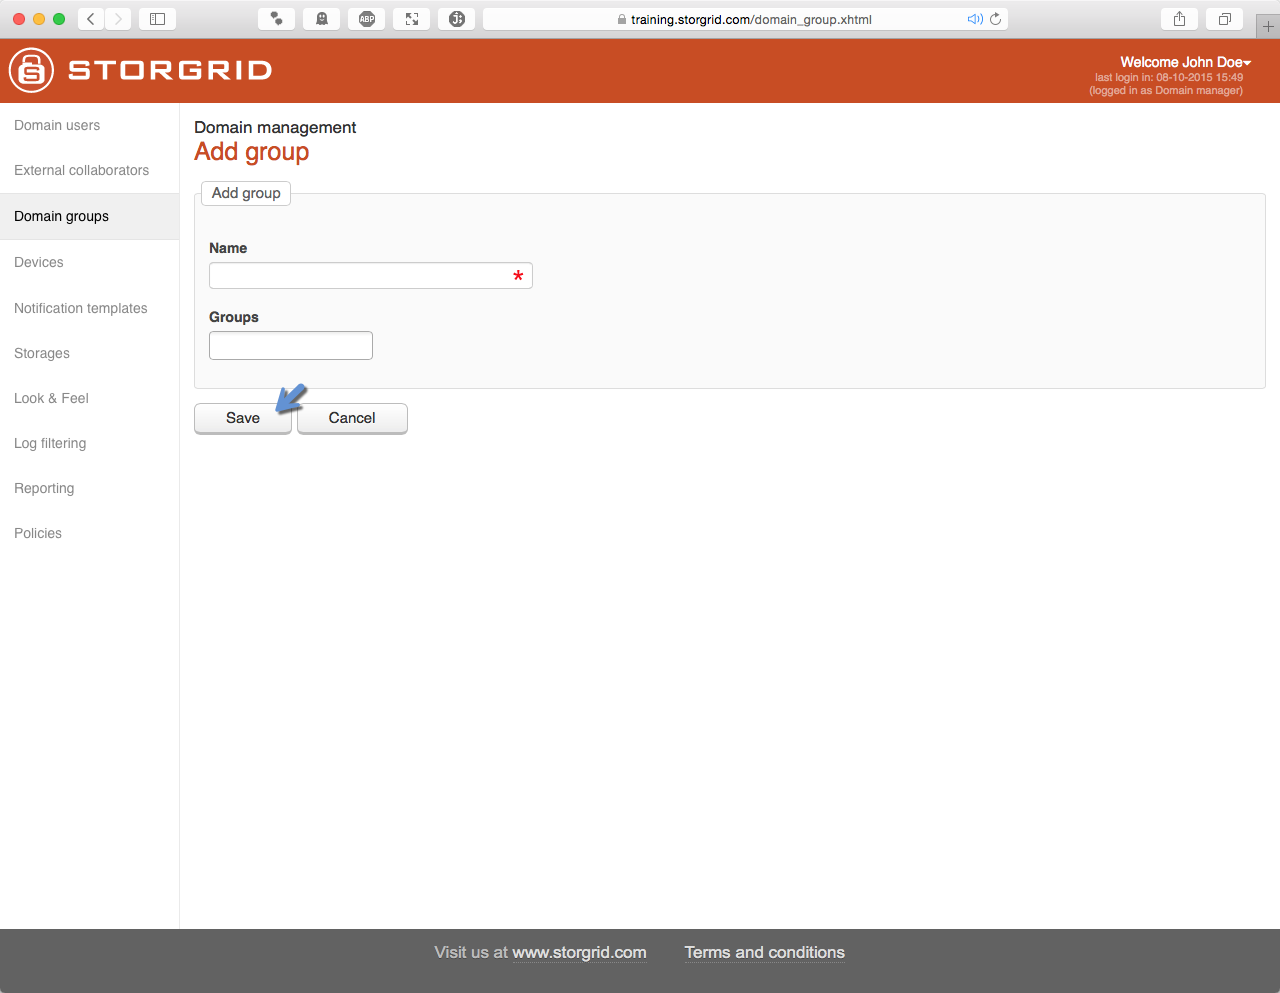
Add Group
Step |
Action |
Screenshot |
|---|---|---|
|
||
|
|
|
|
|
|
|
|
|
|
|
|
|
|
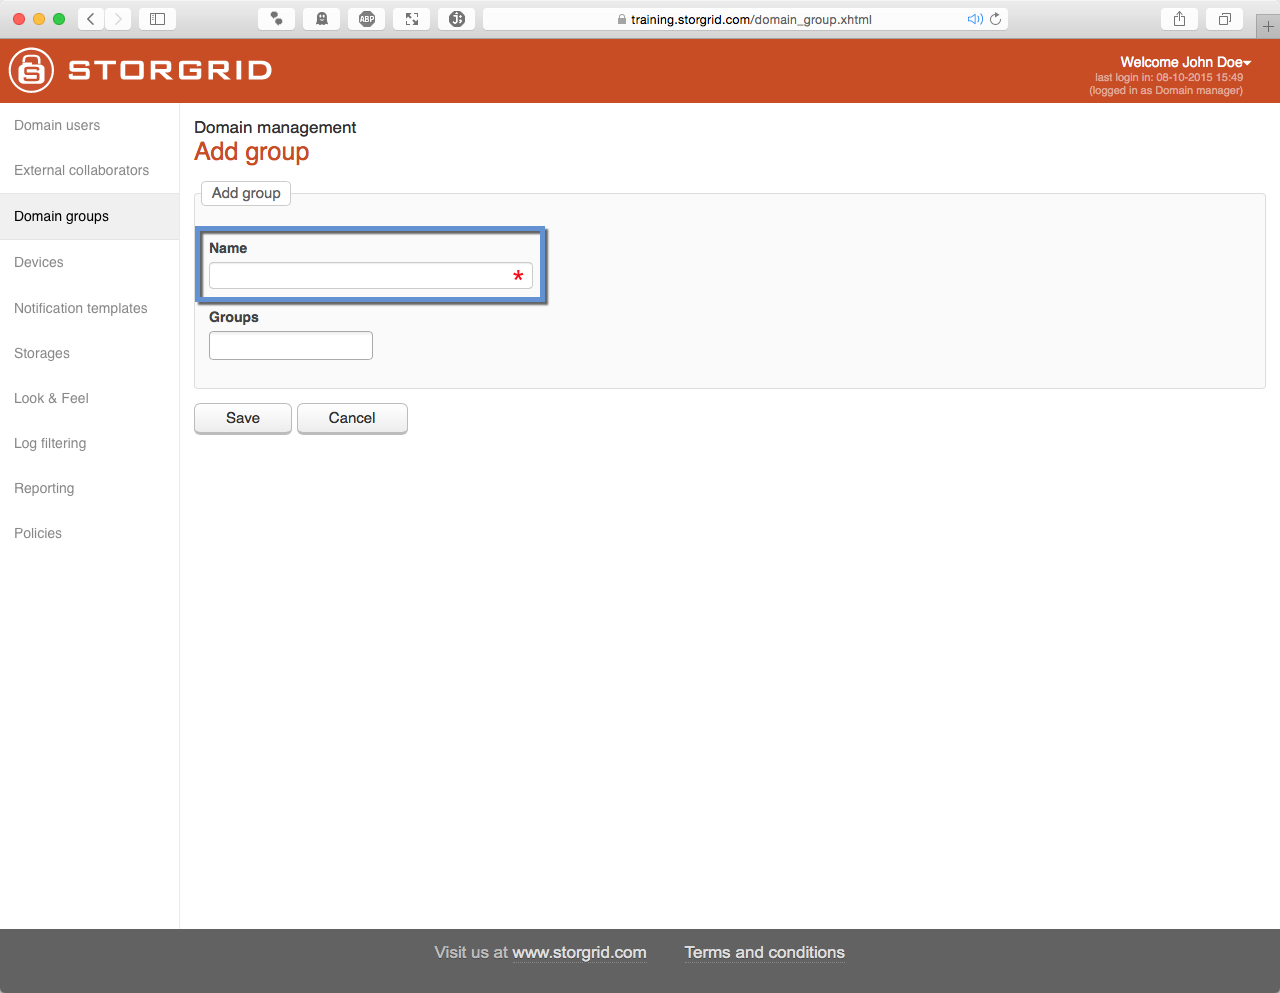
Warning
The Group name must be unique
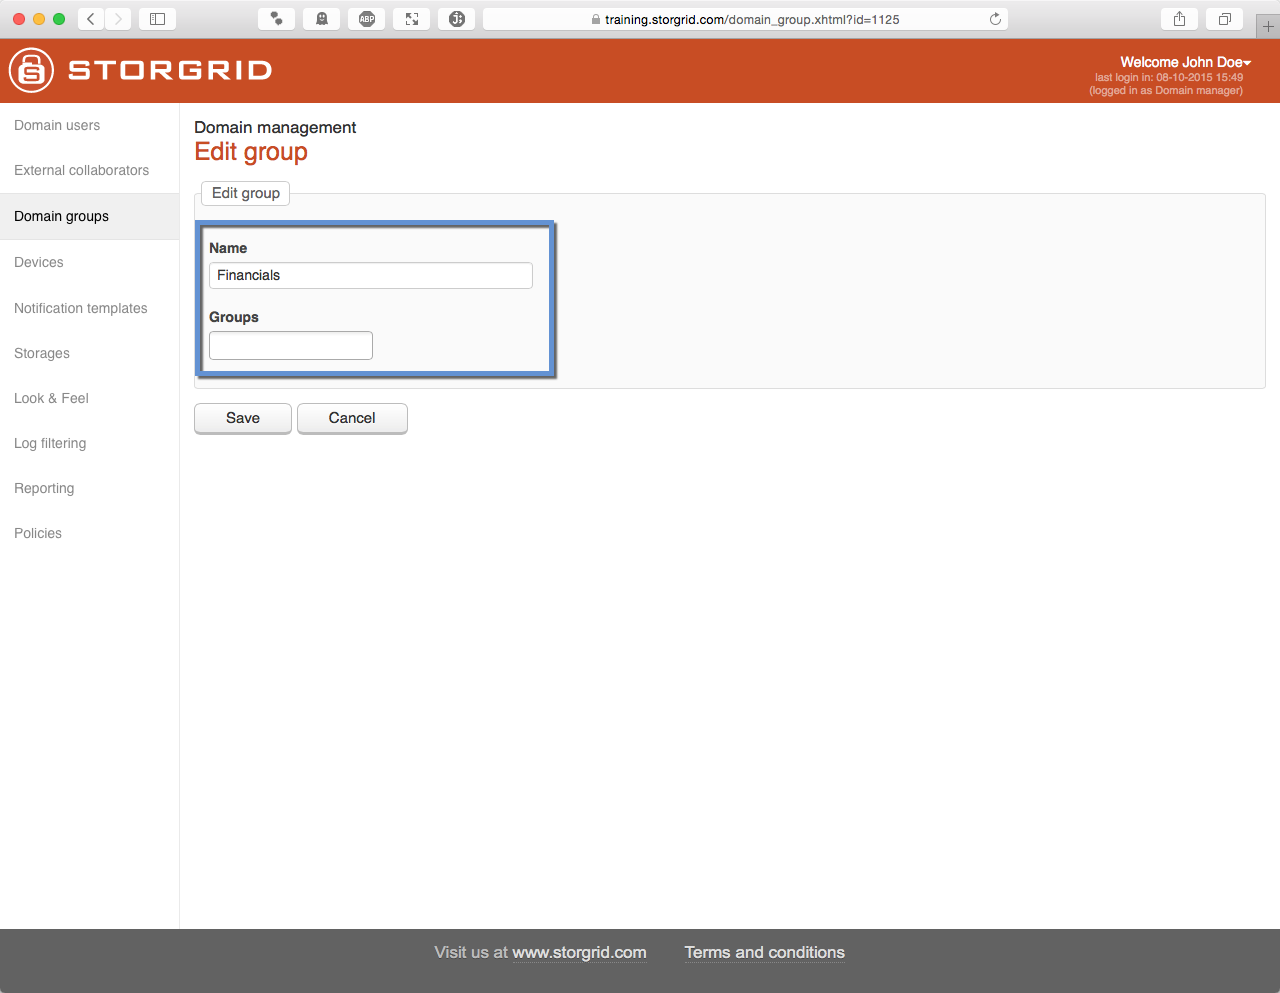
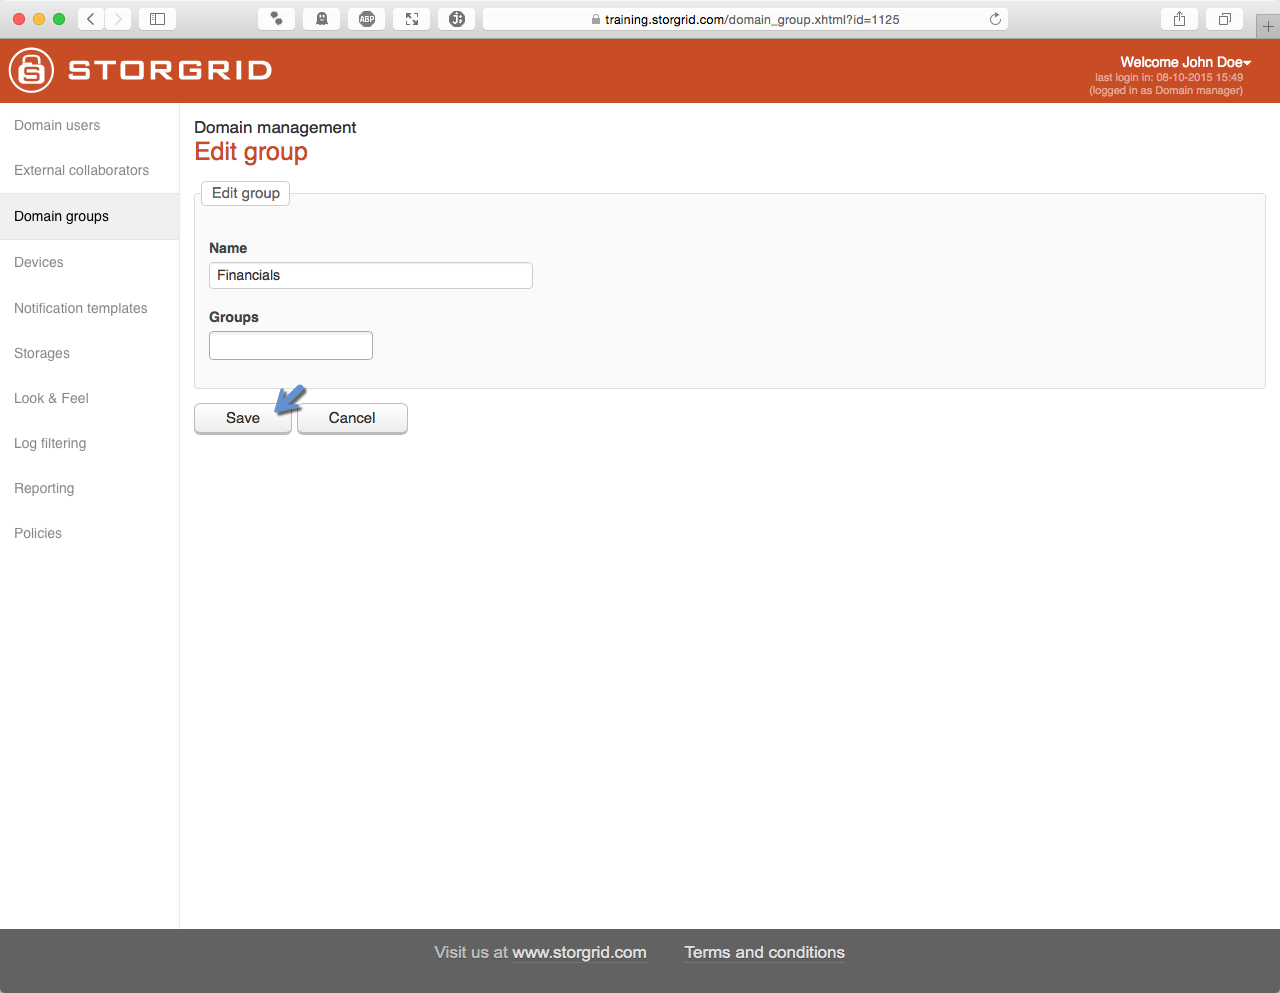
Modify Group
Besides modifying the group. This function also lets you see the group details.
Step |
Action |
Screenshot |
|---|---|---|
|
||
|
|
|
|
|
|
|
|
|
|
|
|
|
|
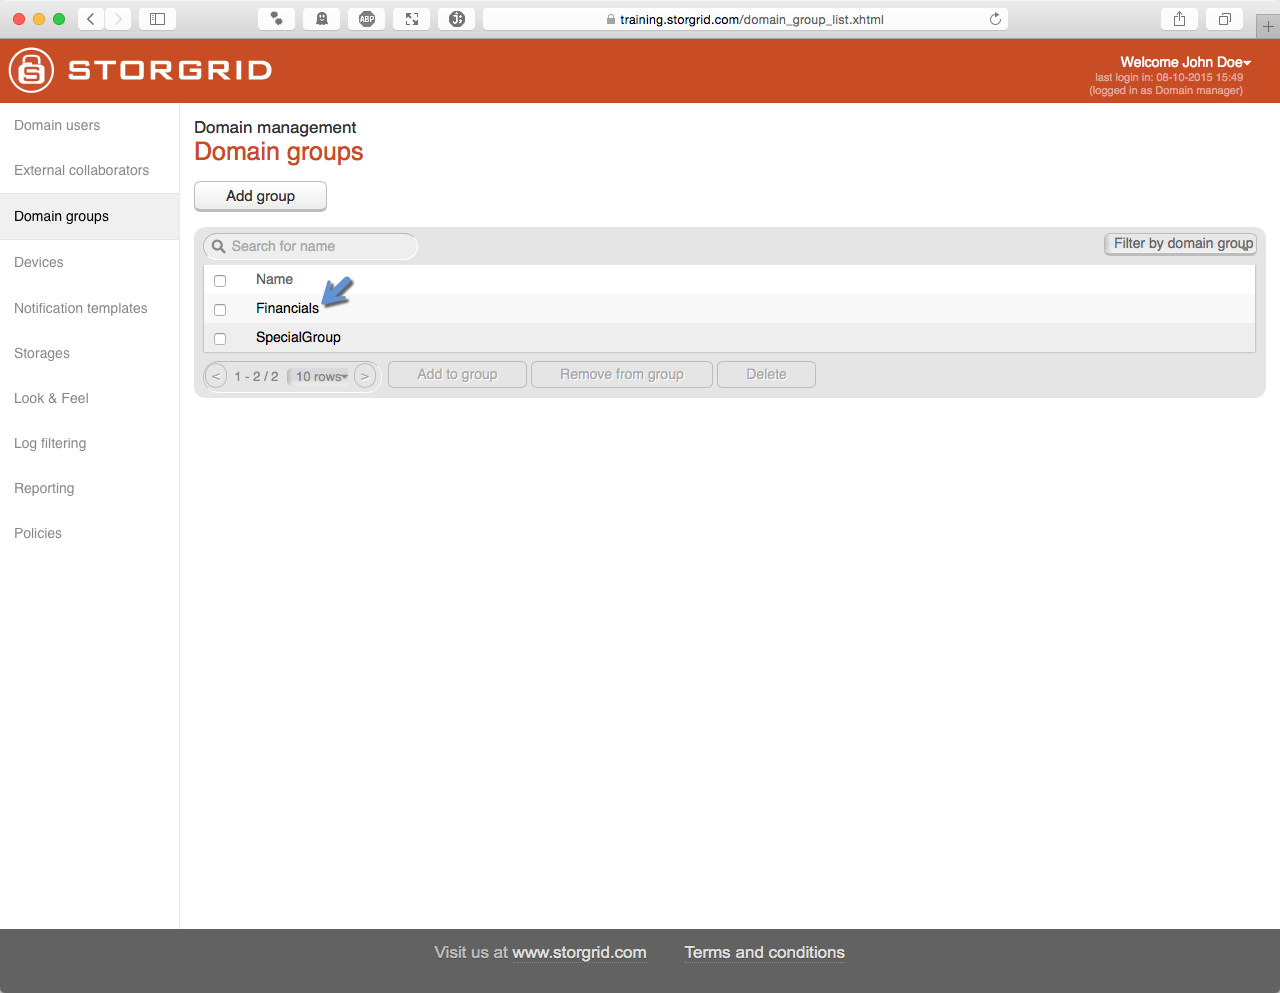
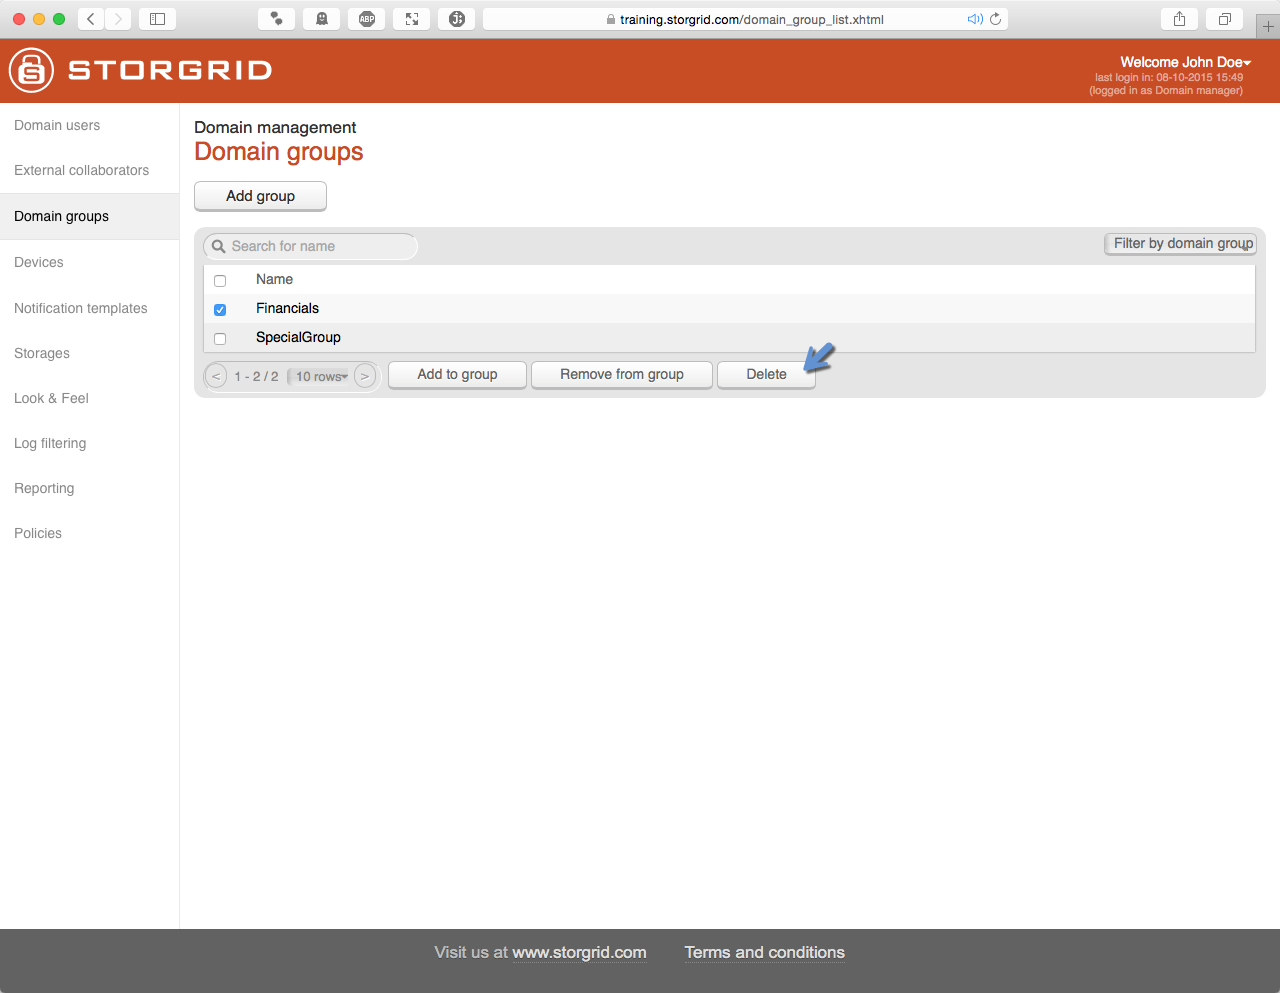
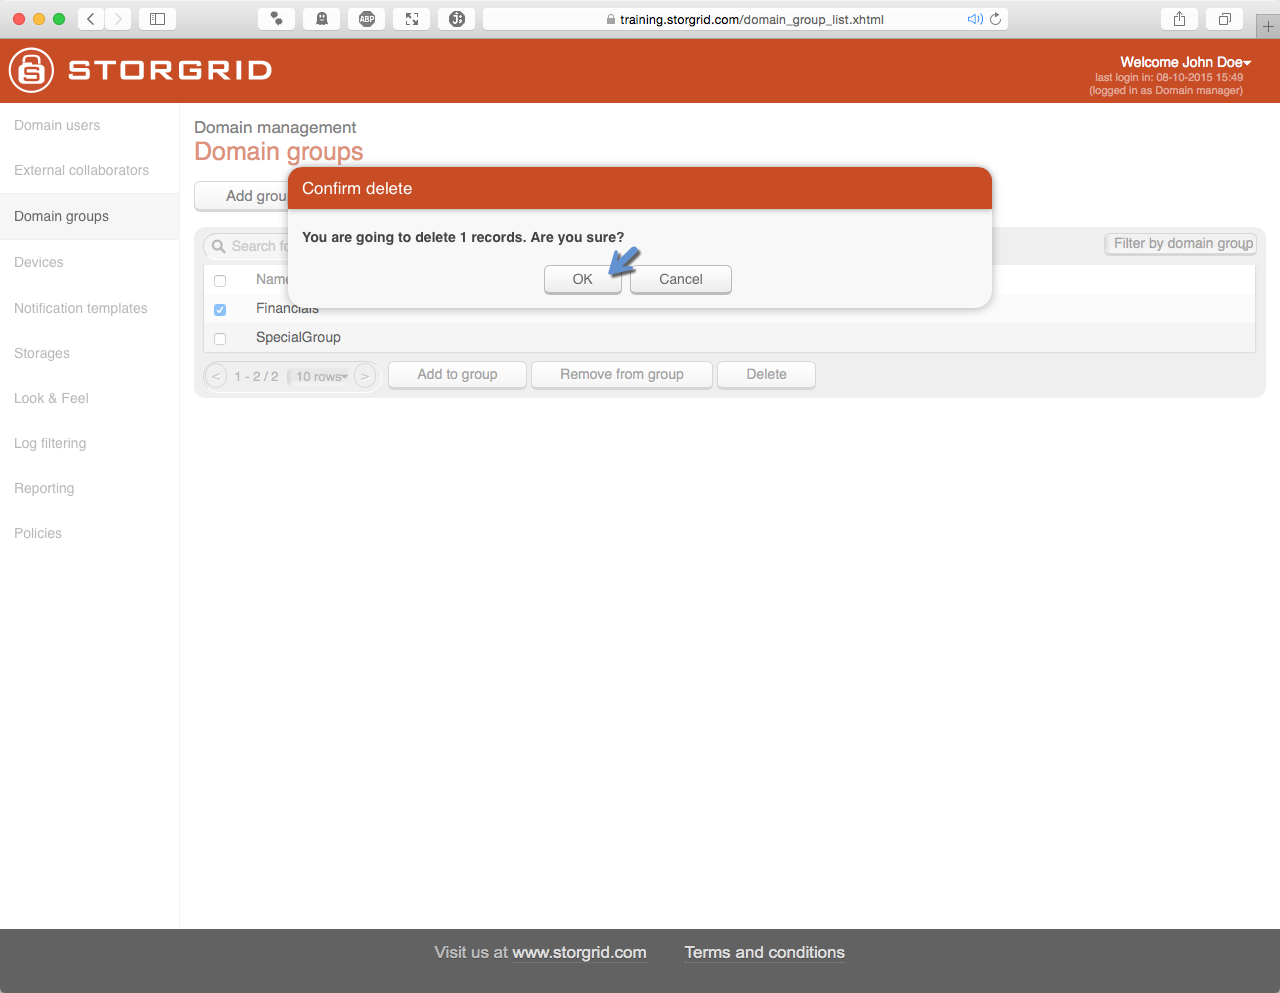
Delete Group
Step |
Action |
Screenshot |
|---|---|---|
|
||
|
|
|
|
|
|
|
|
|
|
|
|
|
|

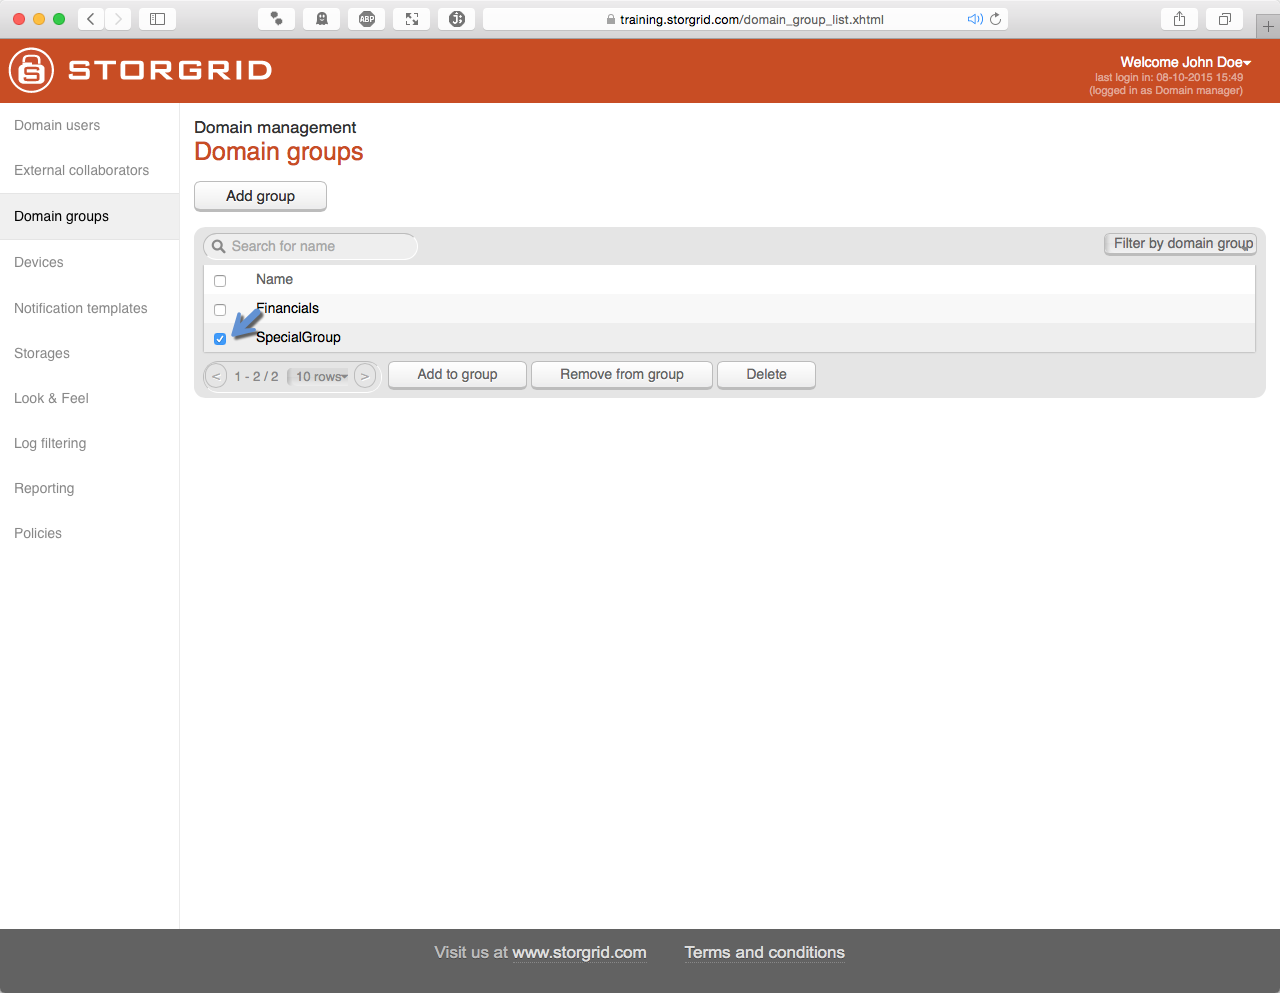
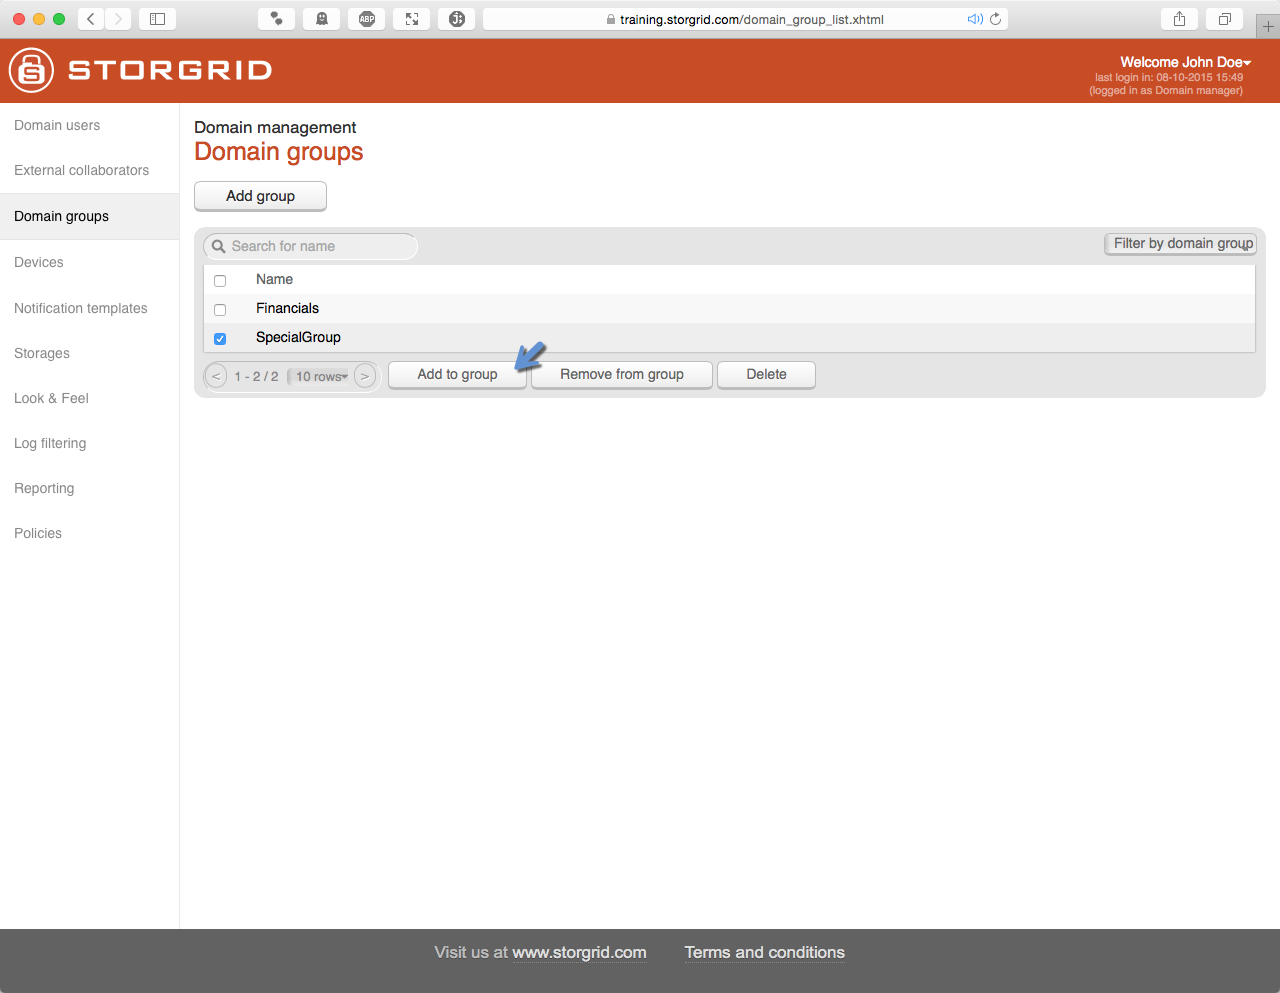
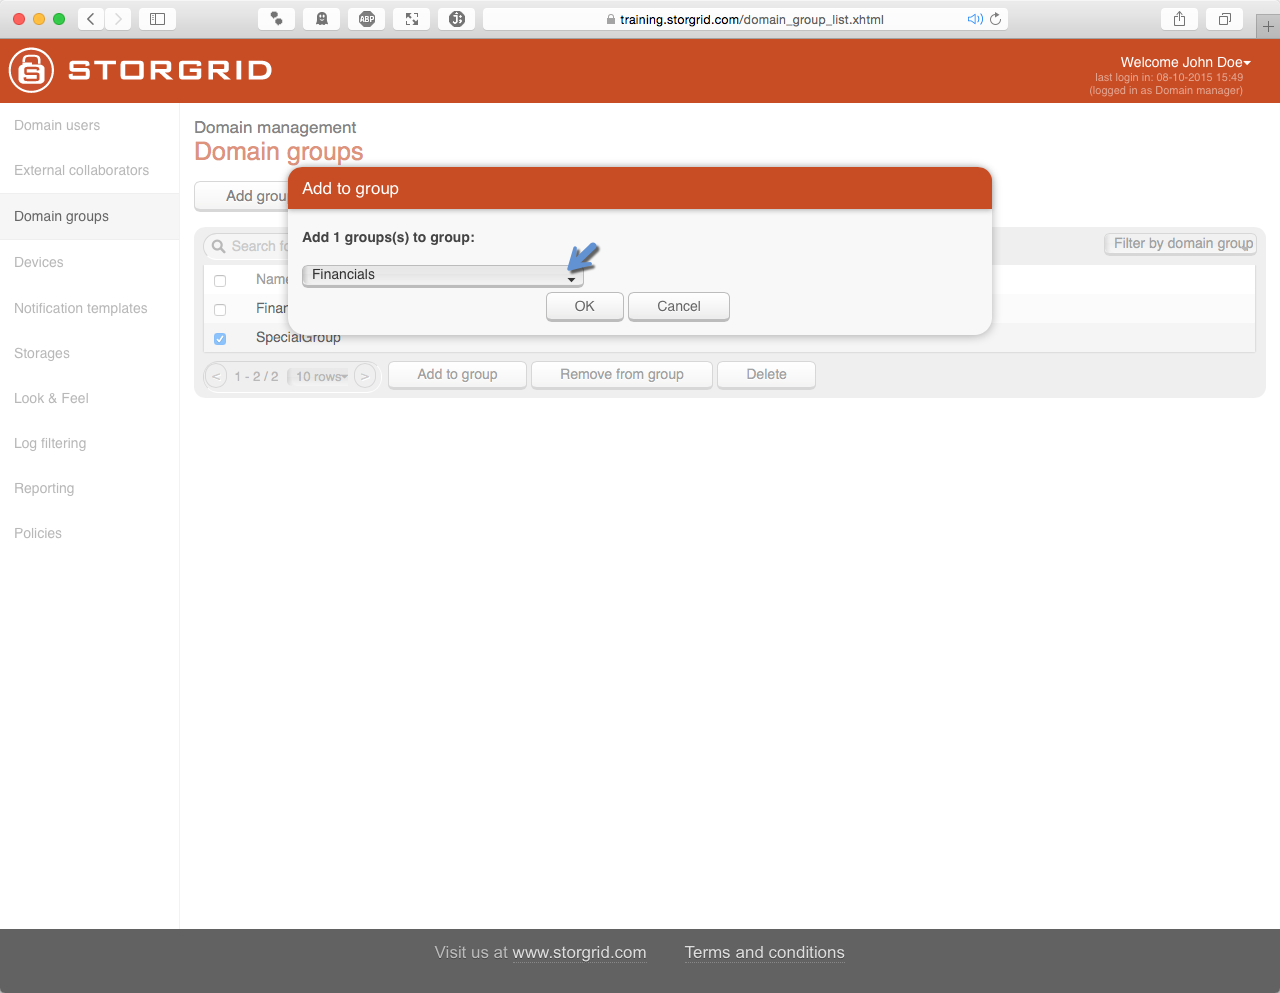
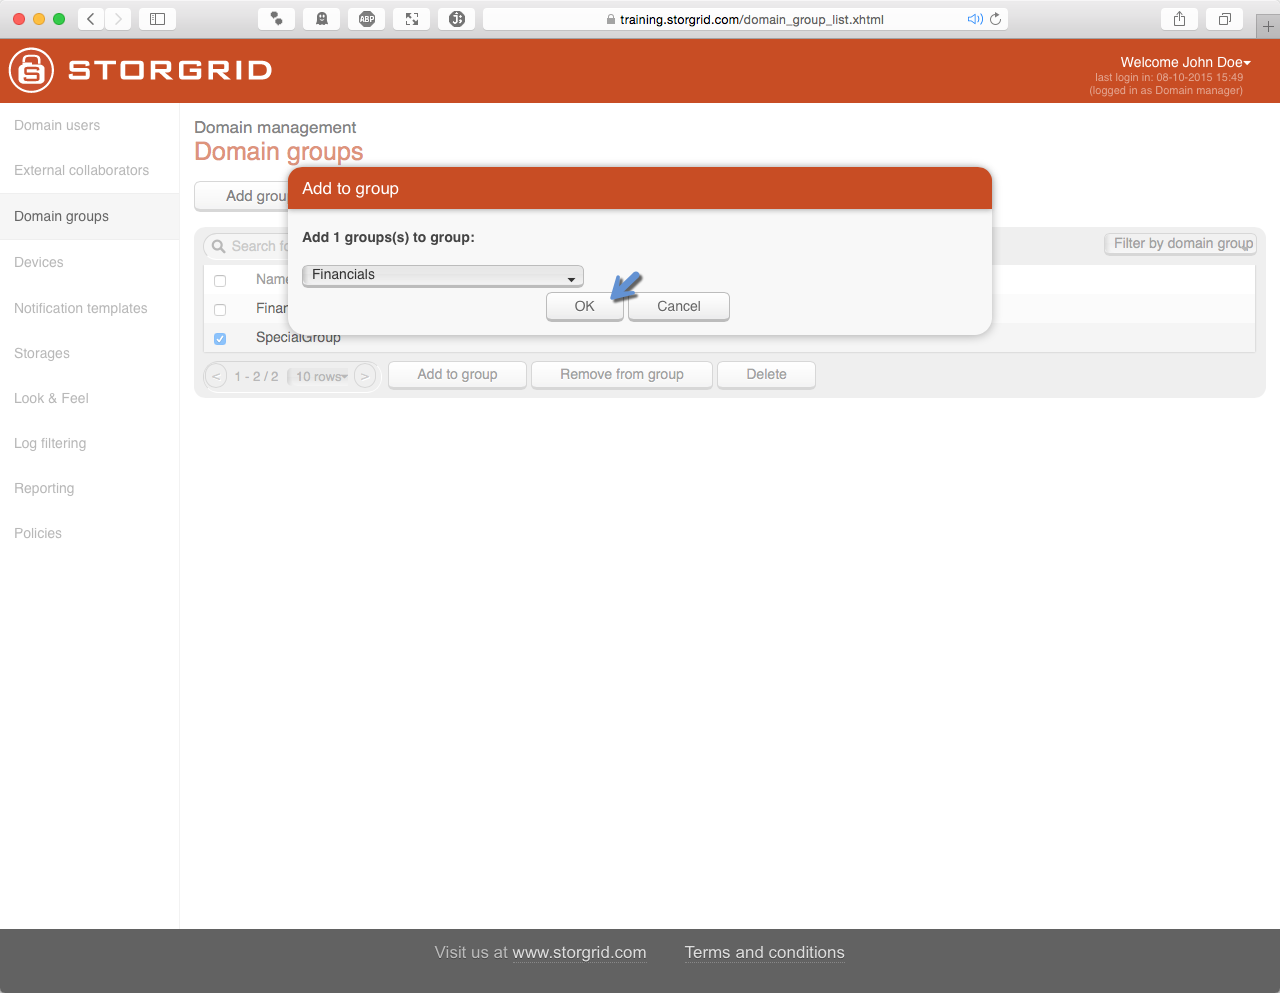
Add to group
Step |
Action |
Screenshot |
|---|---|---|
|
||
|
|
|
|
|
|
|
|
|
|
|
|
|
|
|
|
|
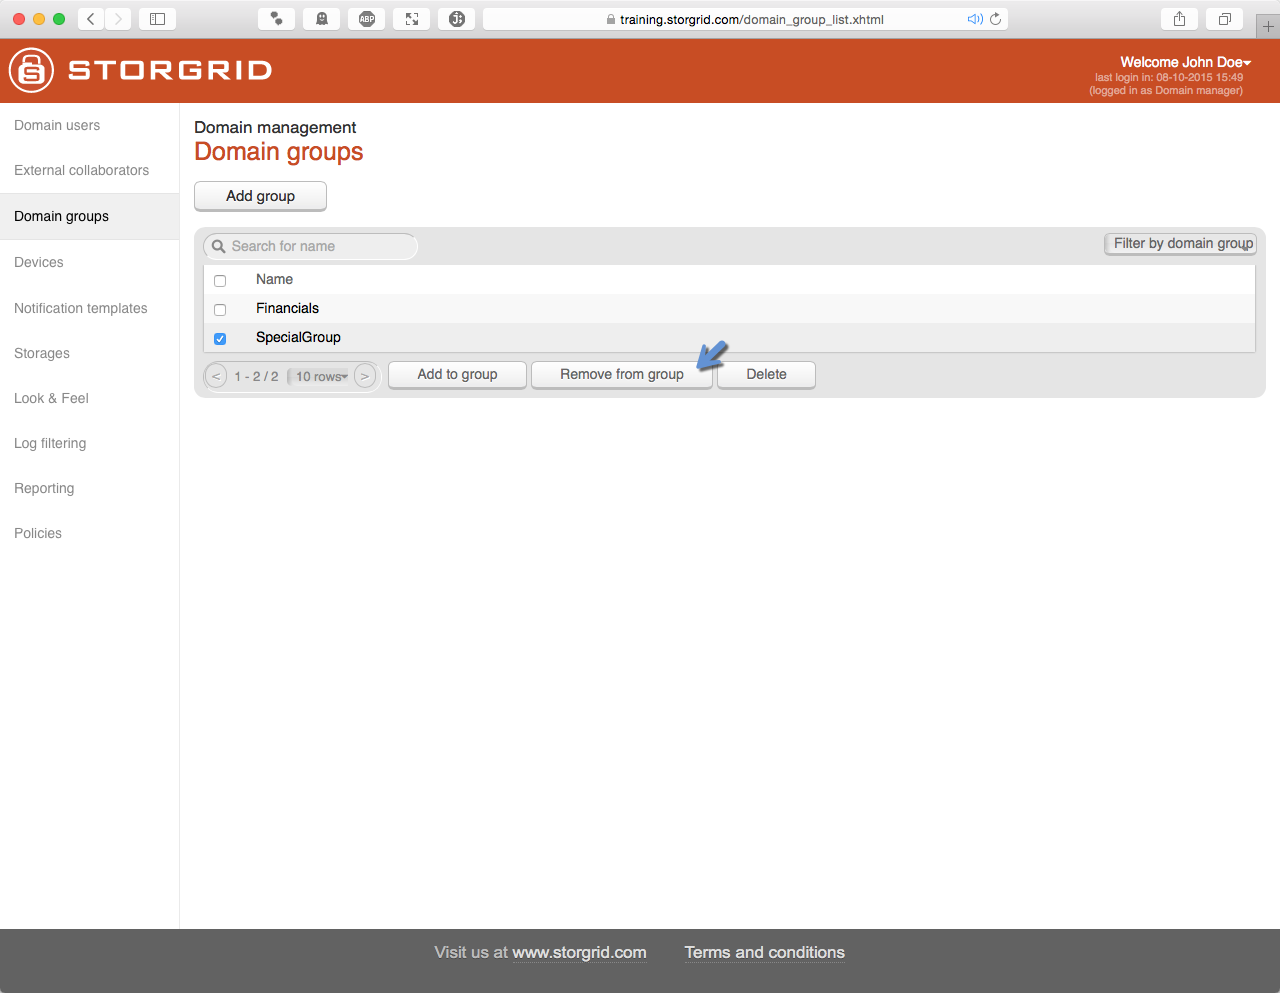
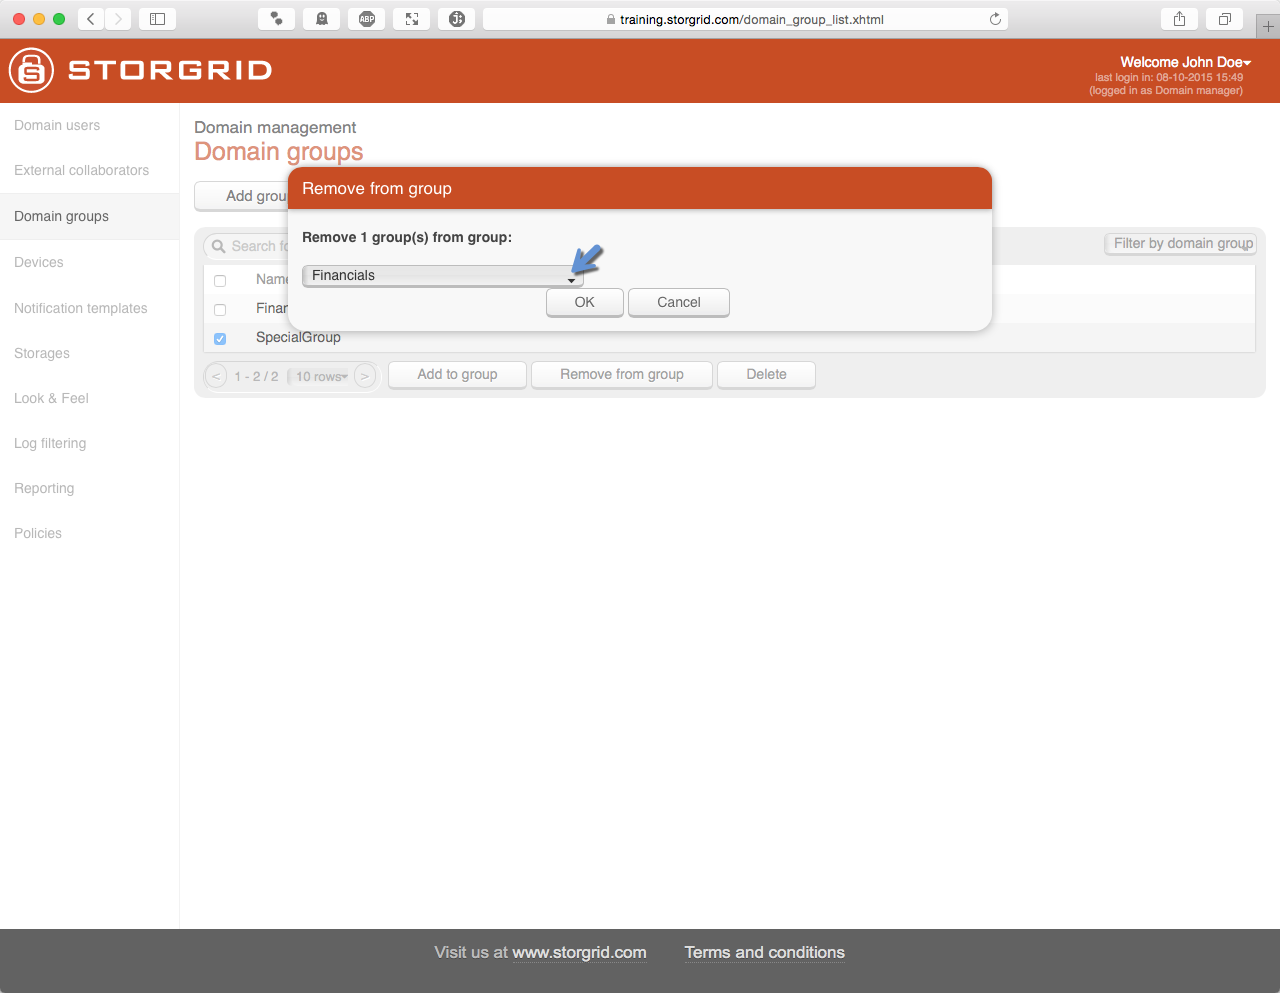
Remove from group
Step |
Action |
Screenshot |
|---|---|---|
|
||
|
|
|
|
|
|
|
|
|
|
|
|
|
|
|
|
|

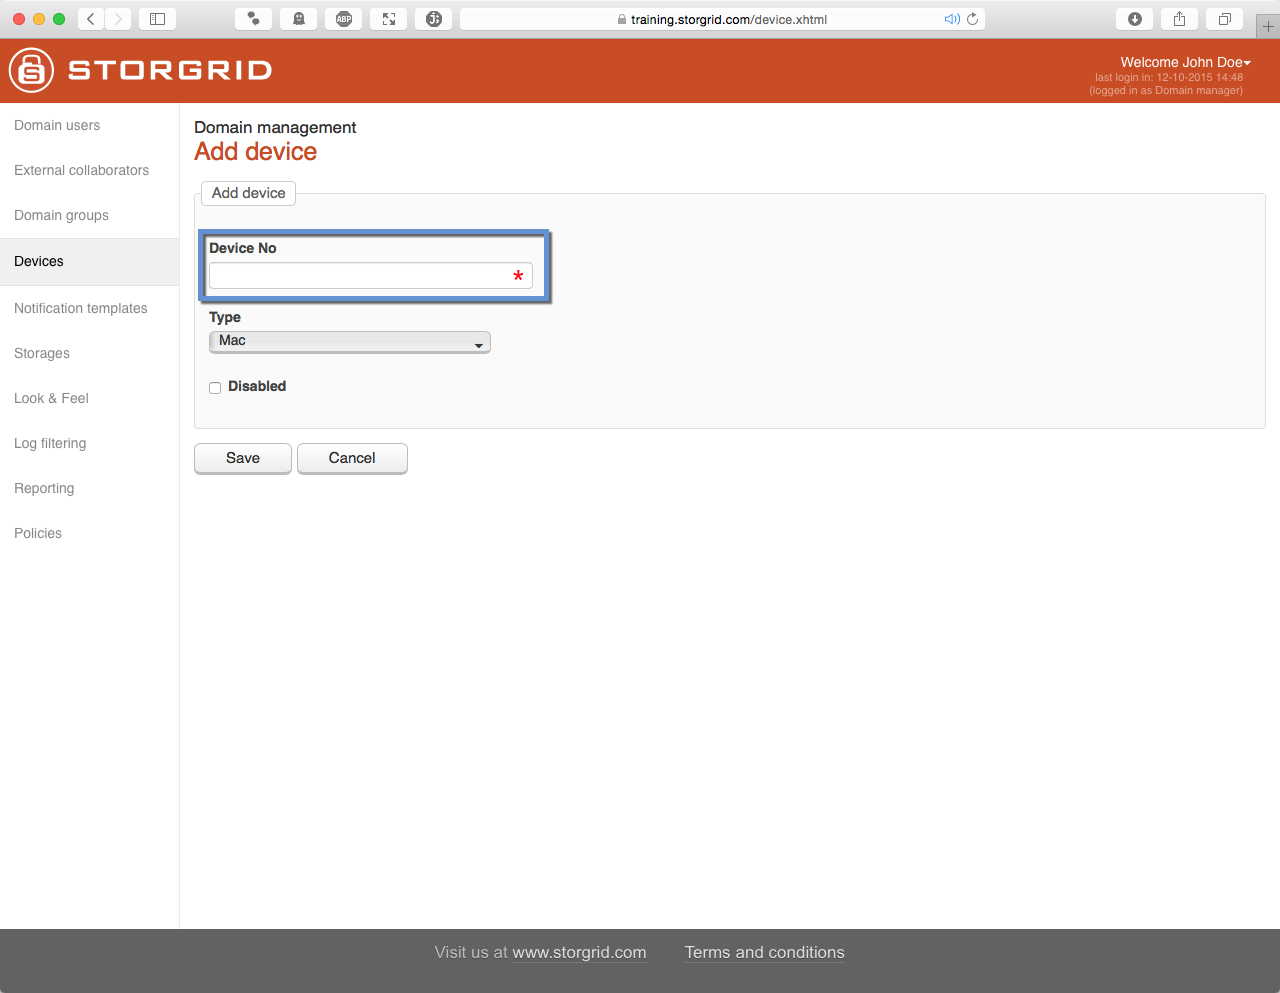
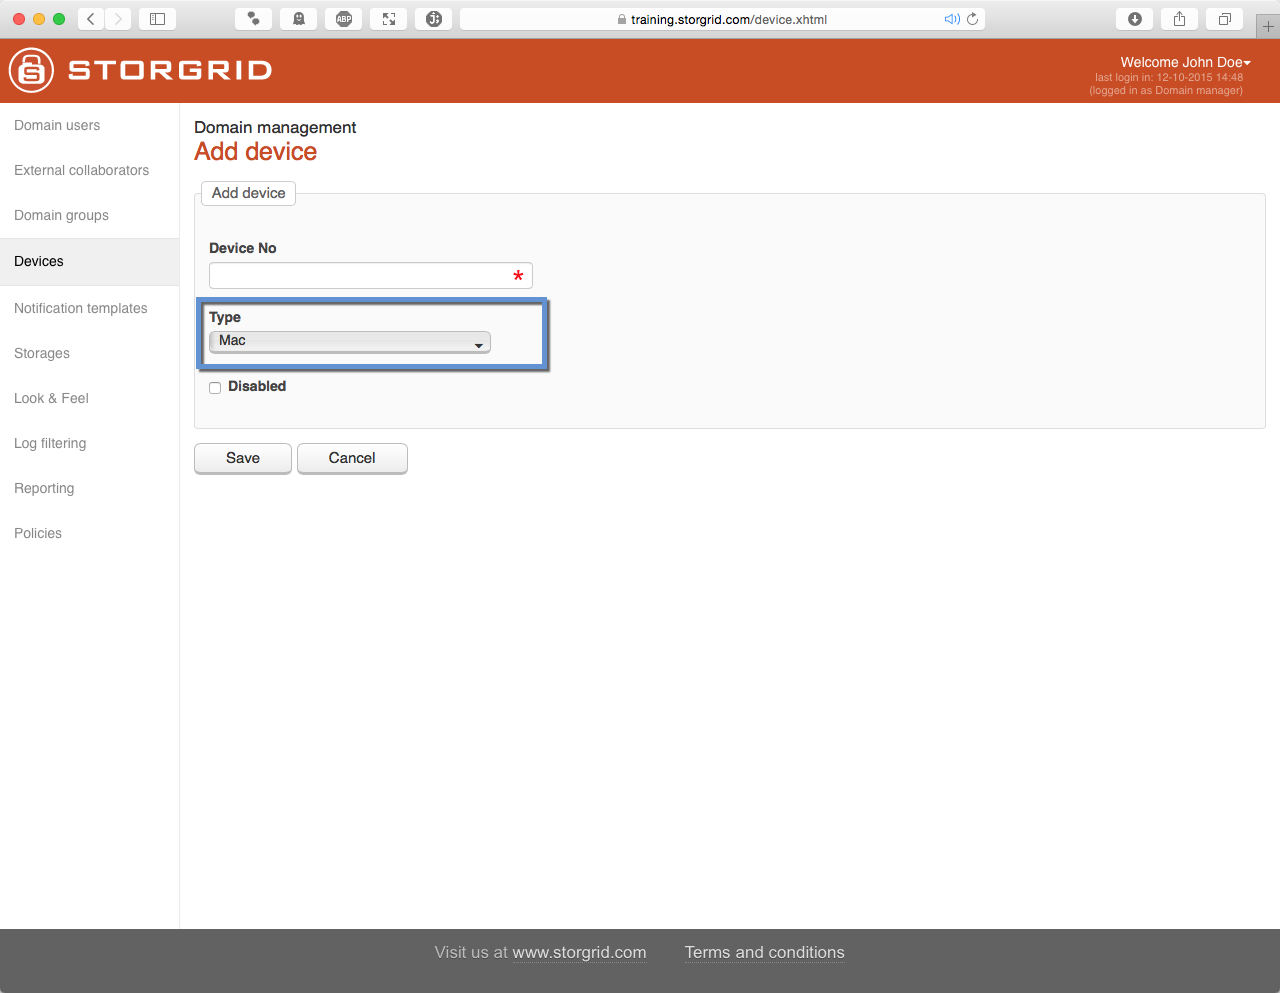
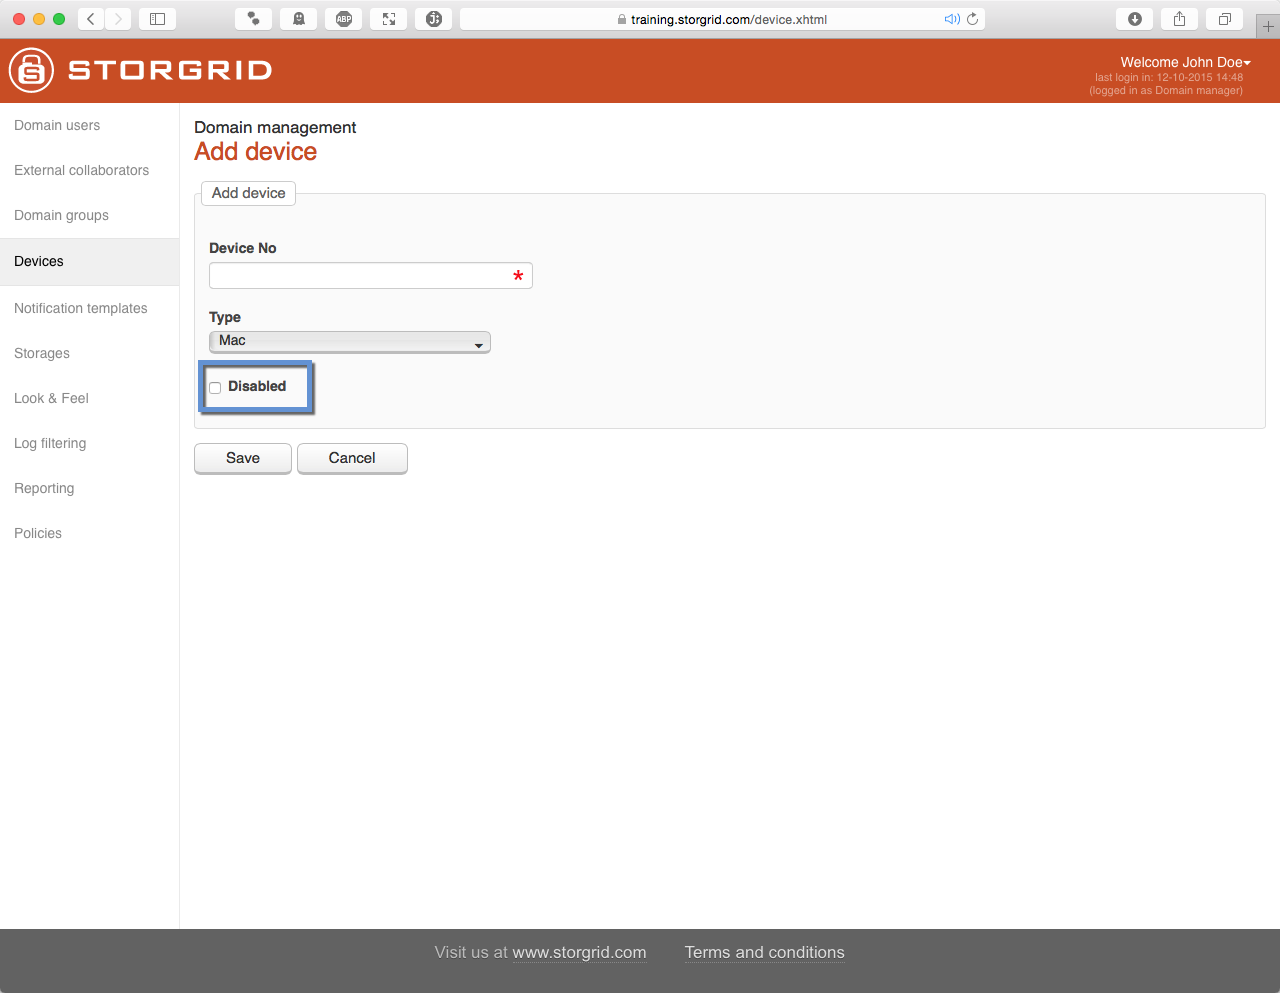
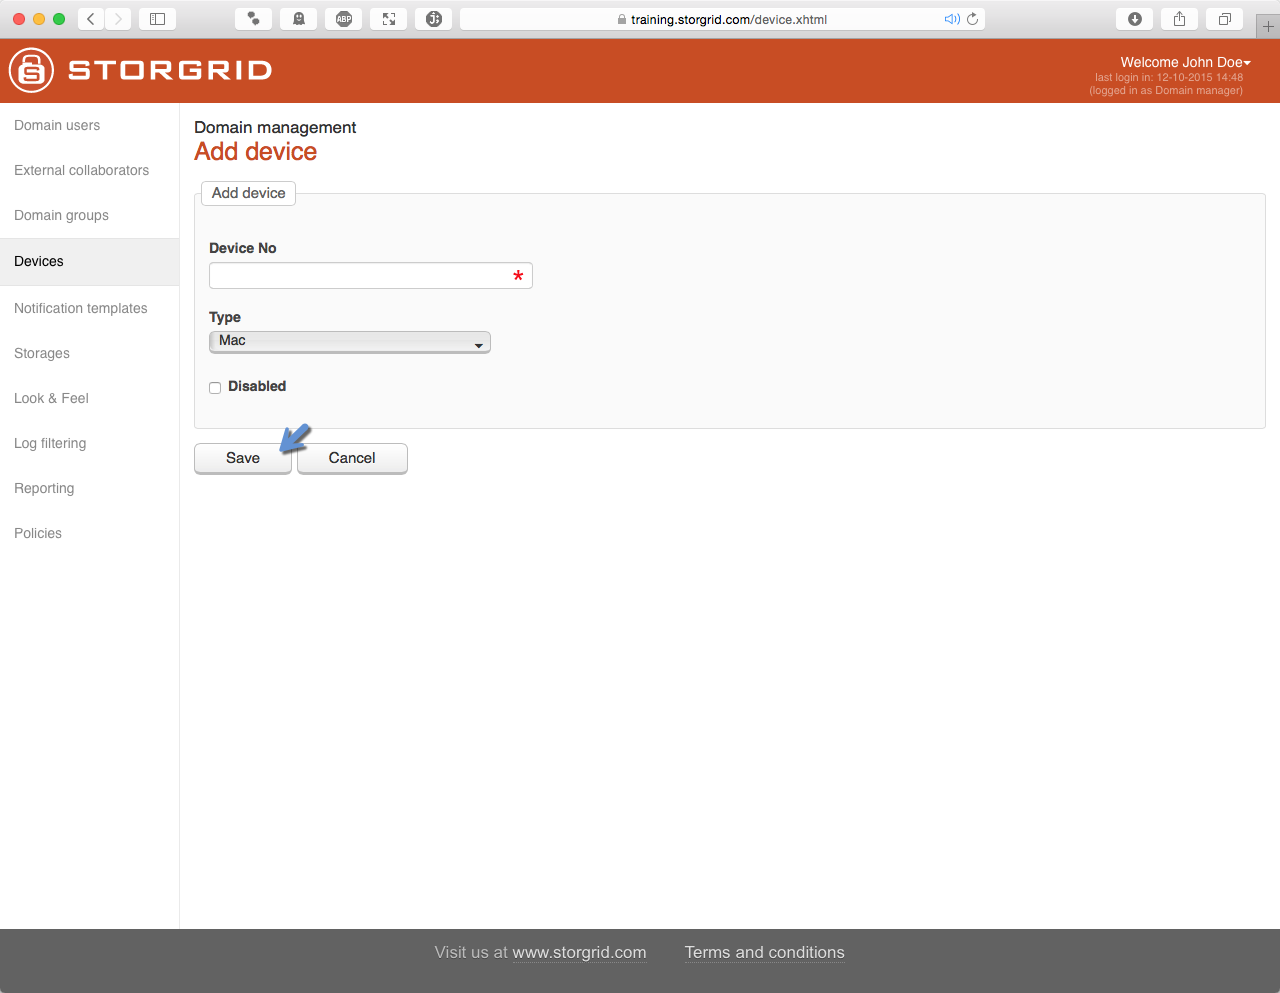
Manage Devices
Add Device
Step |
Action |
Screenshot |
|---|---|---|
|
||
|
|
|
|
|
|
|
|
|
|
|
|
|
|
|
|
|
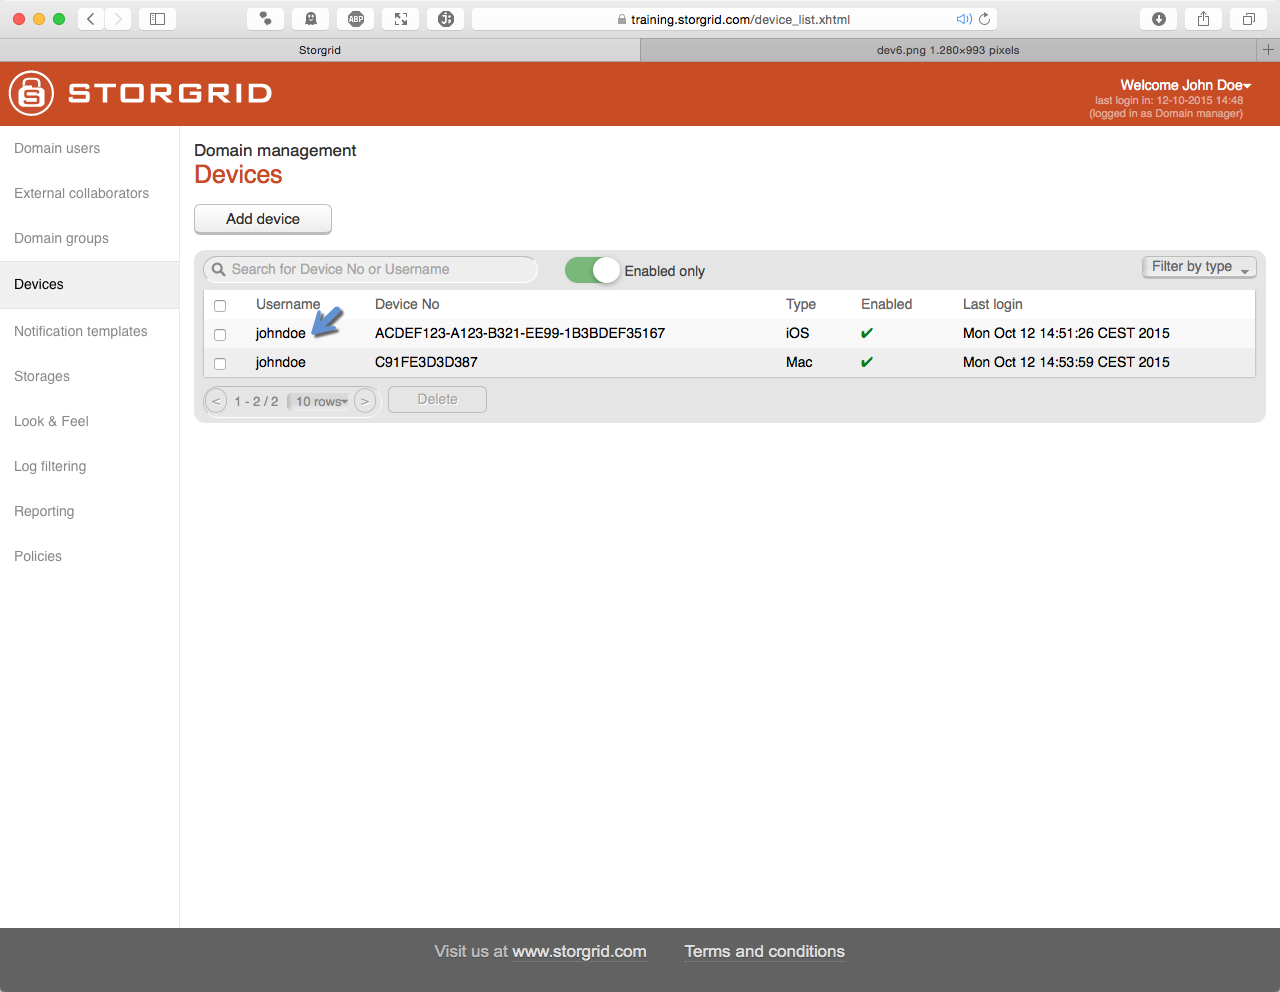
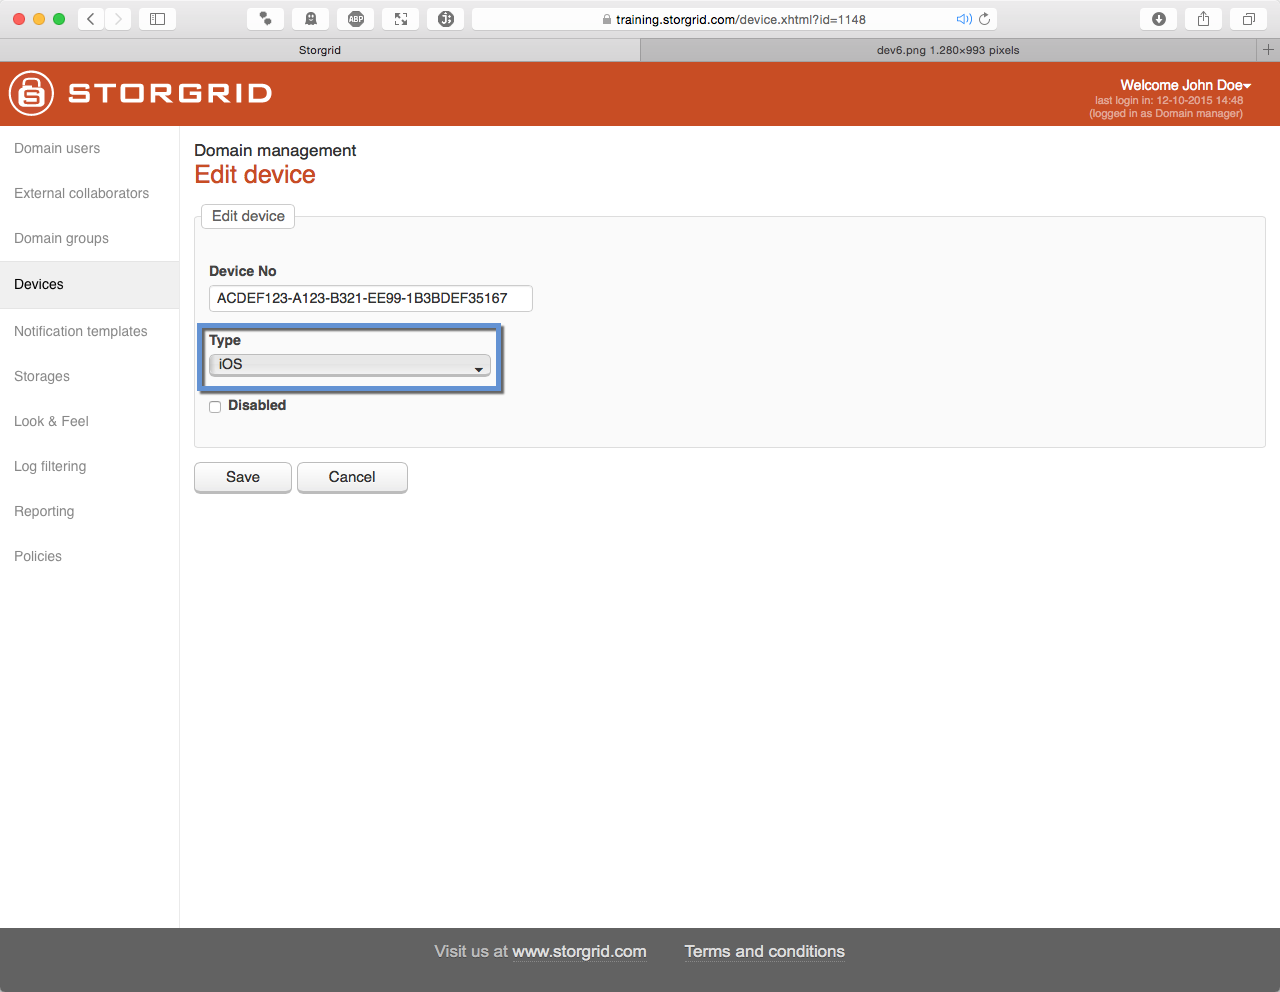
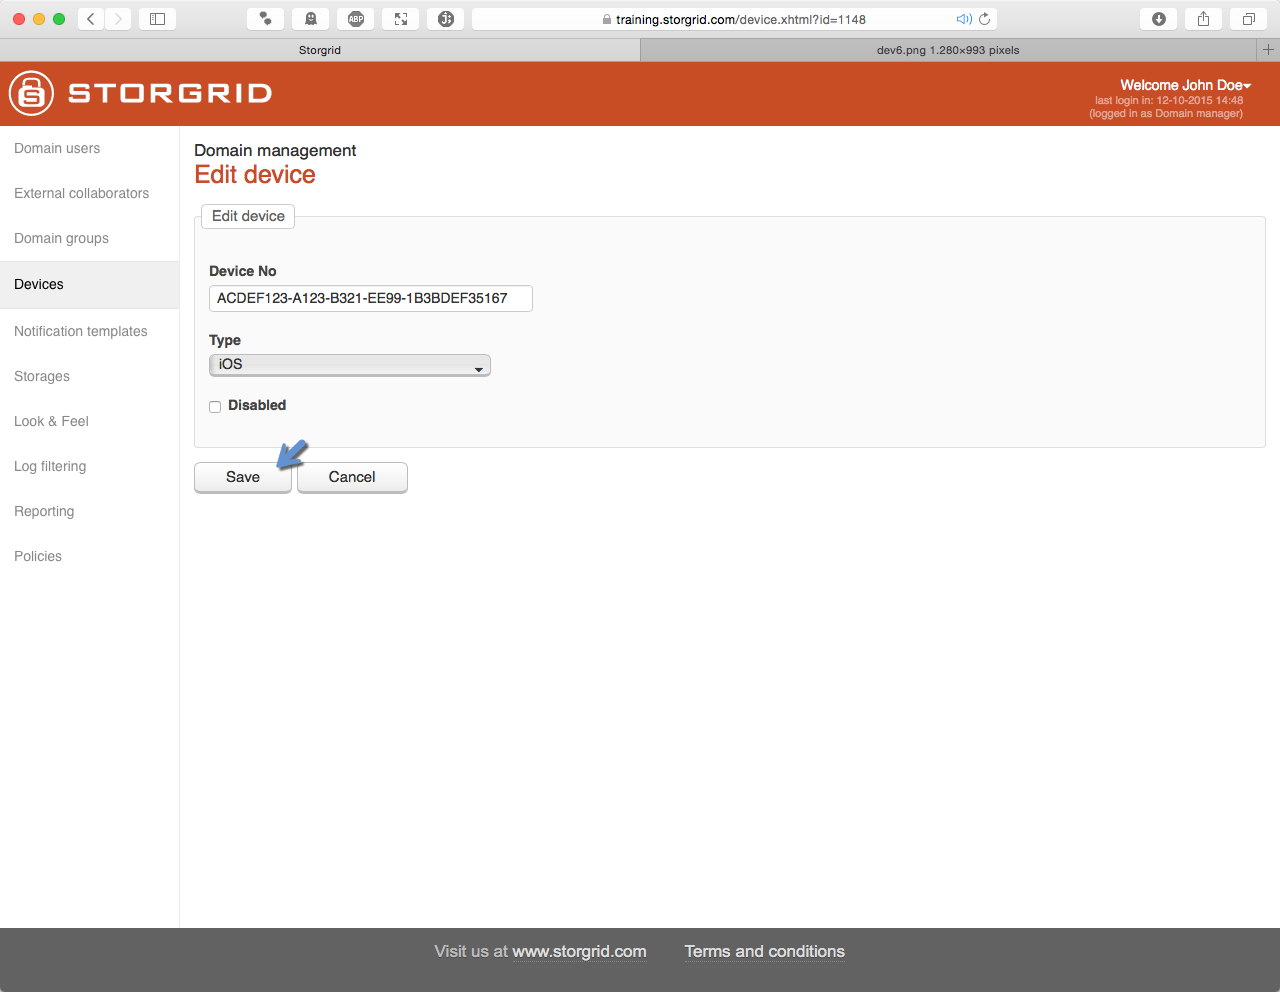
Modify Device
Step |
Action |
Screenshot |
|---|---|---|
|
||
|
|
|
|
|
|
|
|
|
|
|
|
|
|
|
|
|
|
|
|


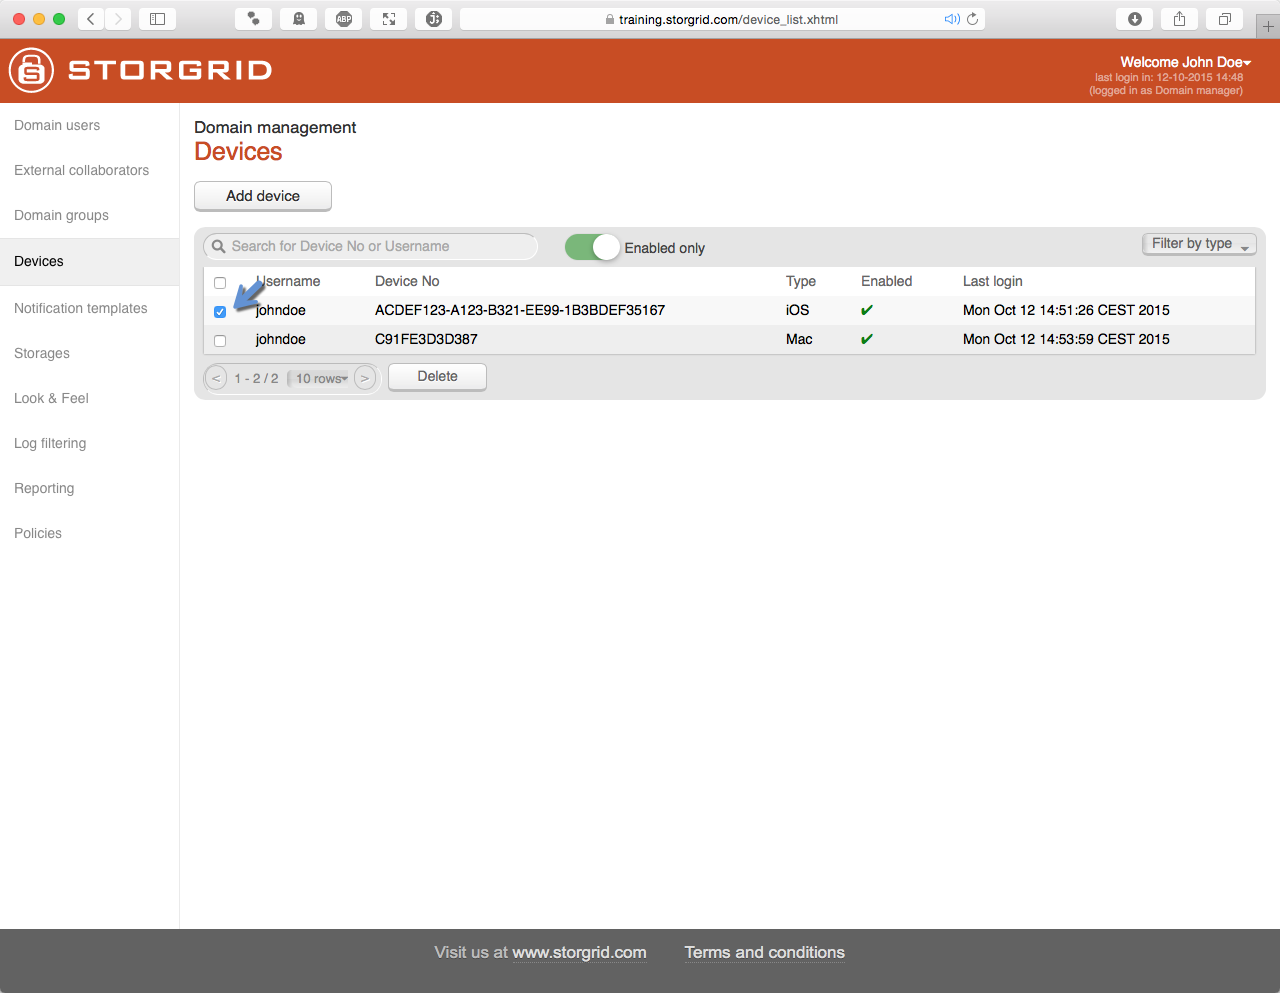
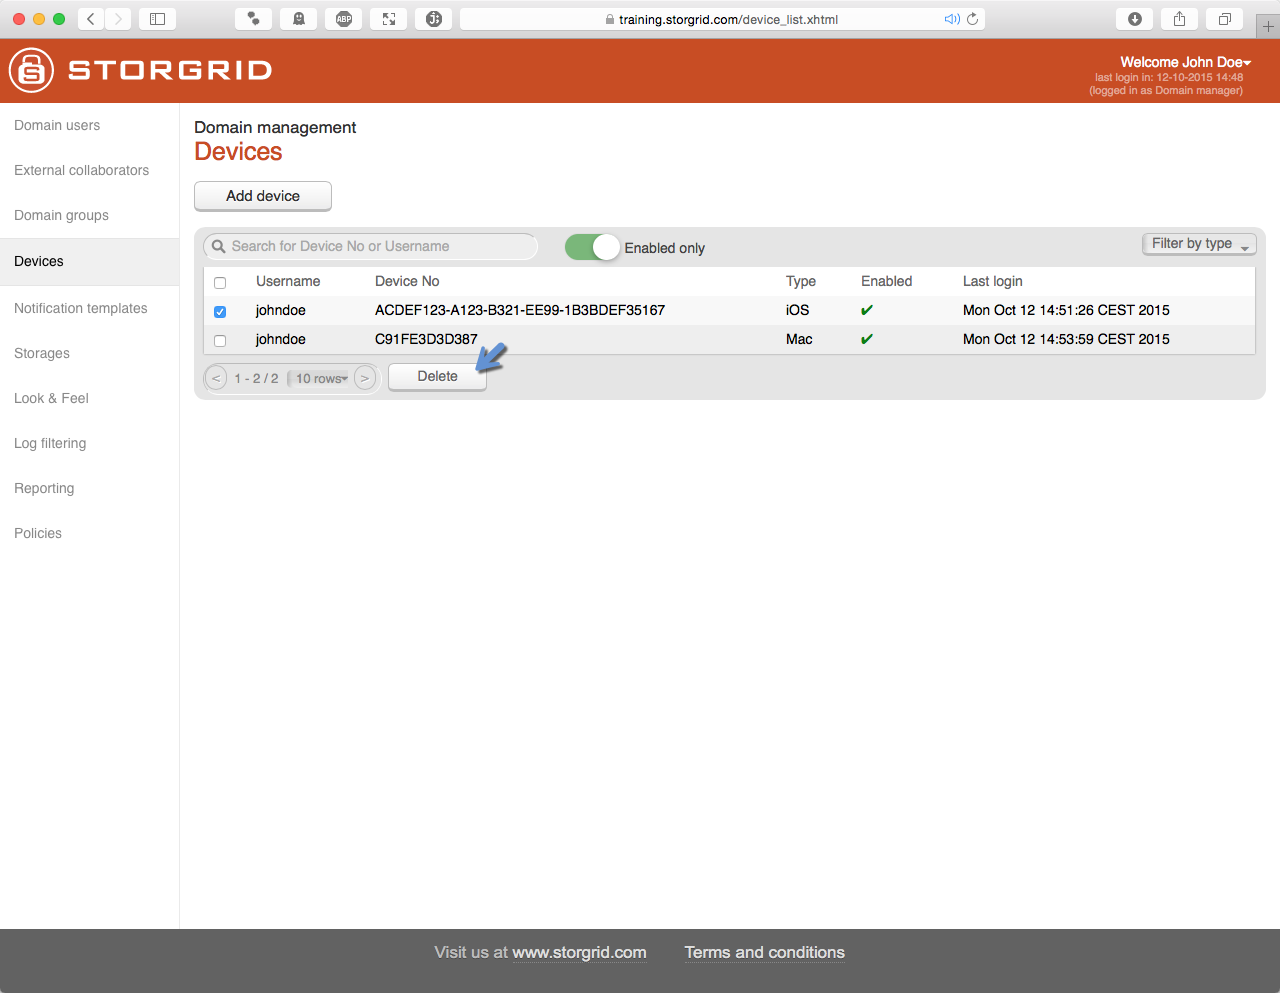
Delete Device
Step |
Action |
Screenshot |
|---|---|---|
|
||
|
|
|
|
|
|
|
|
Notification templates
You can create your own notification templates in Storgrid. Currently the following template types are supported:
Types
New user account
New user has registered
Forgot password
Sharing notification
External sharing notification
License validity notification
License exceeded notification
External user opened share
Shared file changed notification
Languages
English
Dutch
German
Spanish
Korean
Within the subject of the template and the body you can use so called parameters, which differ per notification. A parameter will be replaced by the underlying text when it is sent. Additionally its possible to use HTML in the body.
Example
In the following example we’ll assume that we add a user with the full name “John Doe”.
Type: New user account
Subject: New User invite
Body: Hi %USER_FULL_NAME%, welcome to Storgrid.

Will translate into:

Body: Hi John Doe, welcome to Storgrid.
Modify Template
Step |
Action |
Screenshot |
|---|---|---|
|
||
|
|
|
|
|
|
|
|
|
|
|
|
|
|
|
|
|

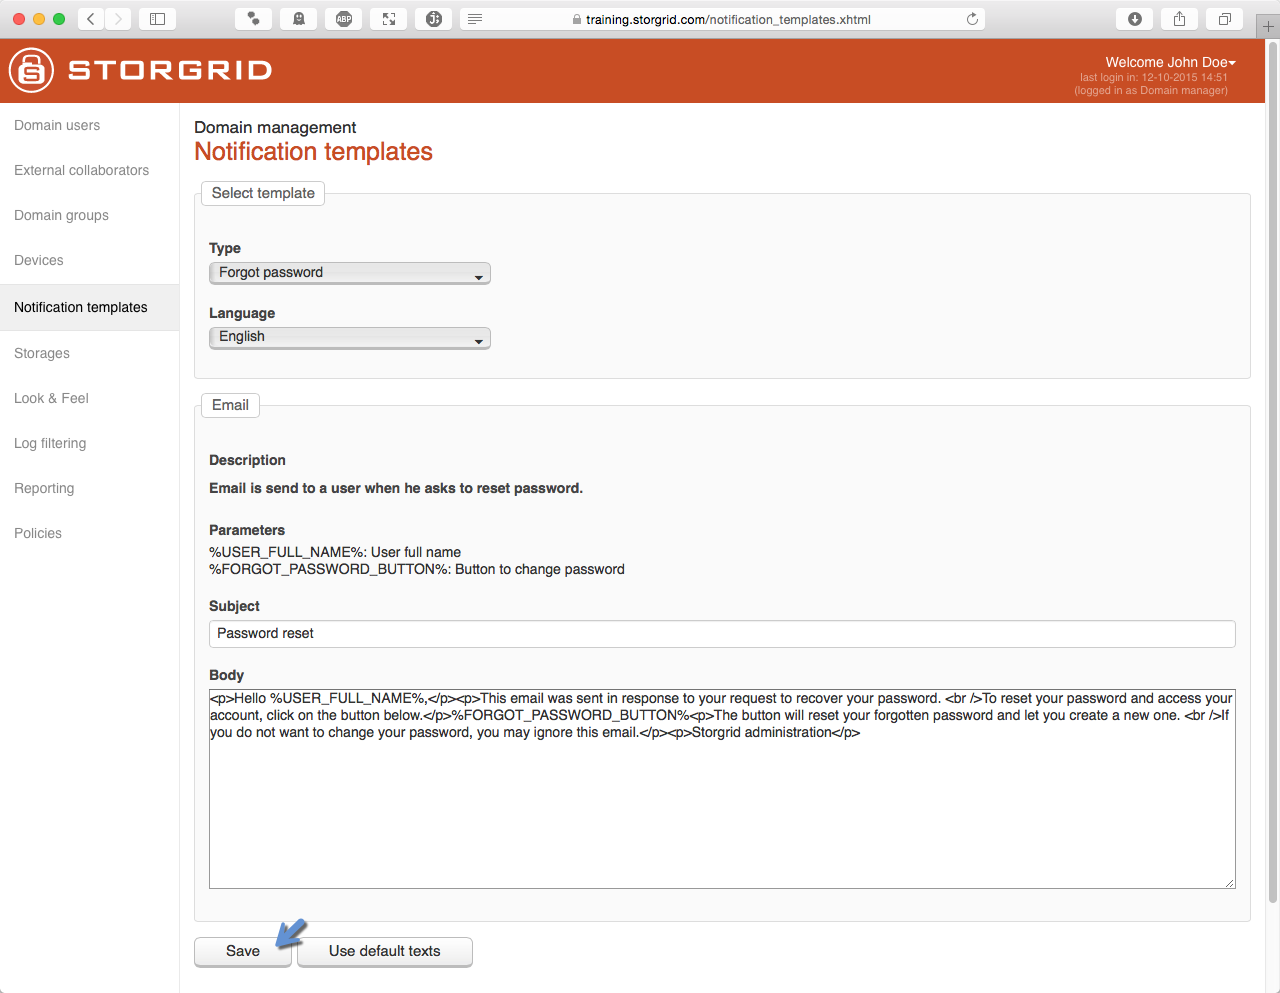
Hint
Use the “Use defaults texts” button to revert to system default text.
Storages
From Storages you will be able to see and manage all storage stored on the system. Only the “Domain Manager” has this access.
The following activities are possible from this context:
Exploring/Copy/Move/Delete/Rename Files/Directory (See Storage Navigator)
File or Directory sharing
Disk Quotas
It’s possible to configure disk quotas on Storgrid. Currently Storgrid supports the following types of disk quotas:
User Quota (A user quota defines how much storage a user is allowed to write to the disk. The limit only applies to the user’s home directory.)
Share Quota (The shared quota is a disk storage limit which applies to a share which is shared with another user. So basically it’s a separate limit which is not related to the user quota, which only applies to a user’s home directory.)
For example, the user quota could be 25GB, but a folder which is shared with this user could be 50GB. When you are a domain manager you can change both quota types.
A shared quota can be changed easily by going to the share in question and right click on the file or folder and then share. You will see the current configured value (if any) under domain manager settings.
A user quota can only be changed on a user’s home directory. So this can also be achieved from the Storages context. Click on the file storage in question and then click on users. There will be a list of users, if not, you can create one. Then right click on a user and click on share. Under “Domain manager settings” you will see the “User quota” but you can also assume the default quota if its configured in the domain settings.
To see the current “Used space” of the user. Select user and right click and select properties to see the current space being used.
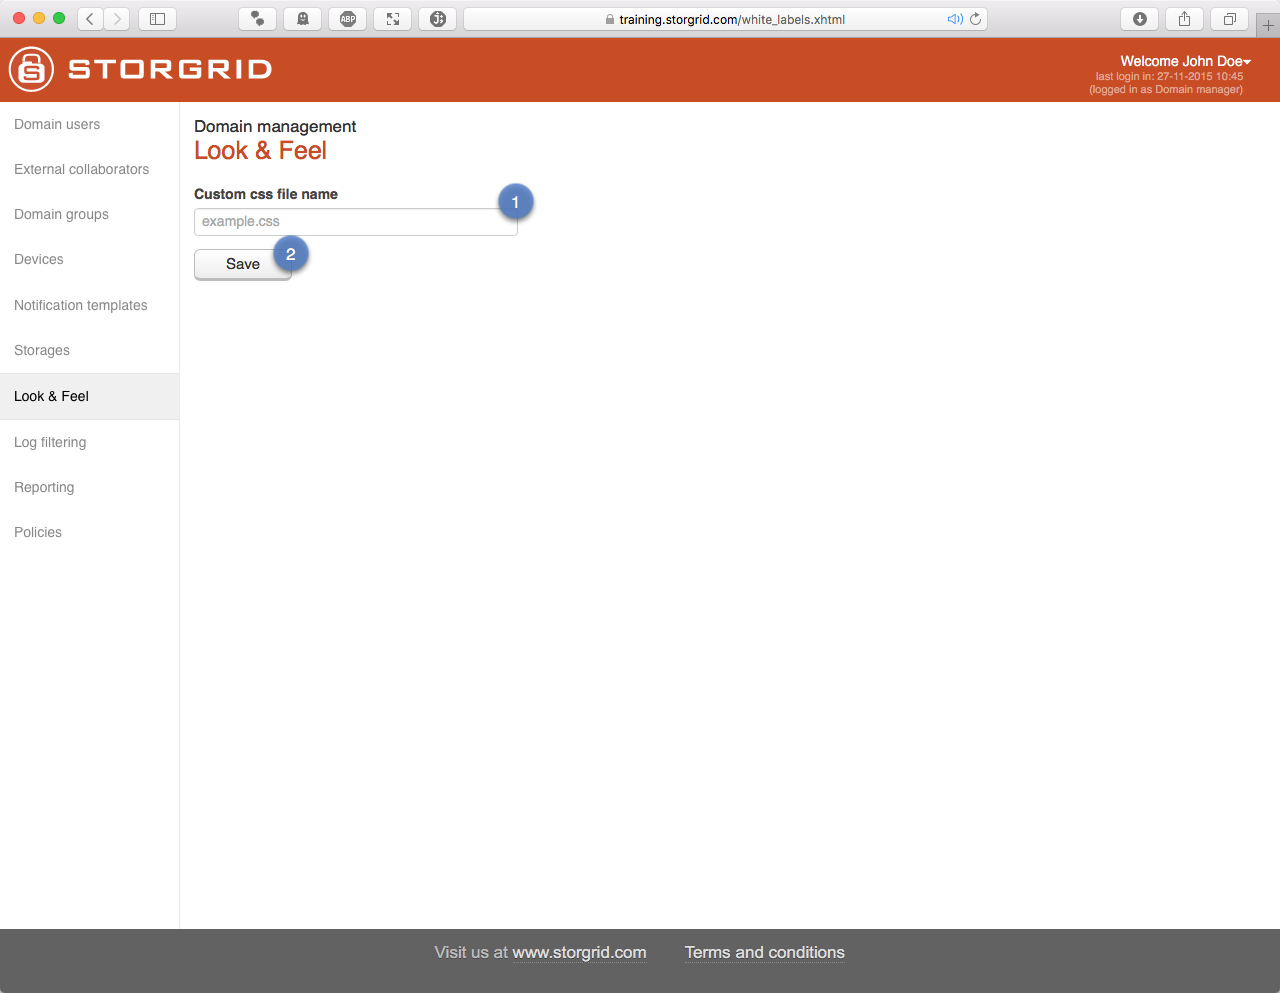
Look & Feel
Here you can define your own look and feel to your Storgrid installation. For now this functionality is very limited and can break the look and feel of the site. We’re not responsible if you’re willing to change this on your own.
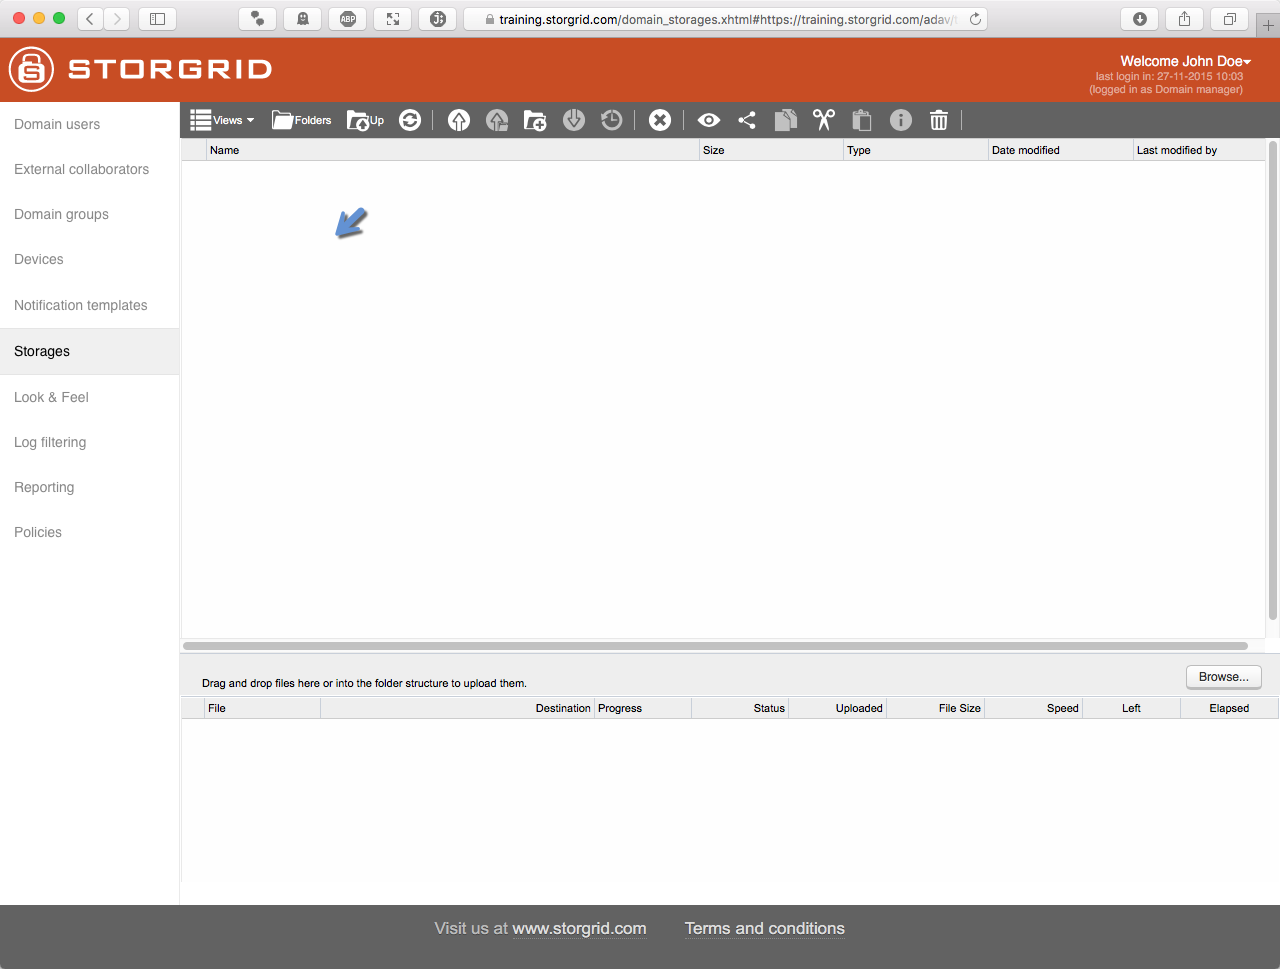
The complete process looks as follows:
We assume here that the “whitelabel” folder doesn’t exist and that there is nothing configured.
Step |
Action |
Screenshot |
|---|---|---|
|
||
|
|
|
|
|
|
|
|
|
|
|
|
|
|
|
|
|
|
|
|
|
|
|
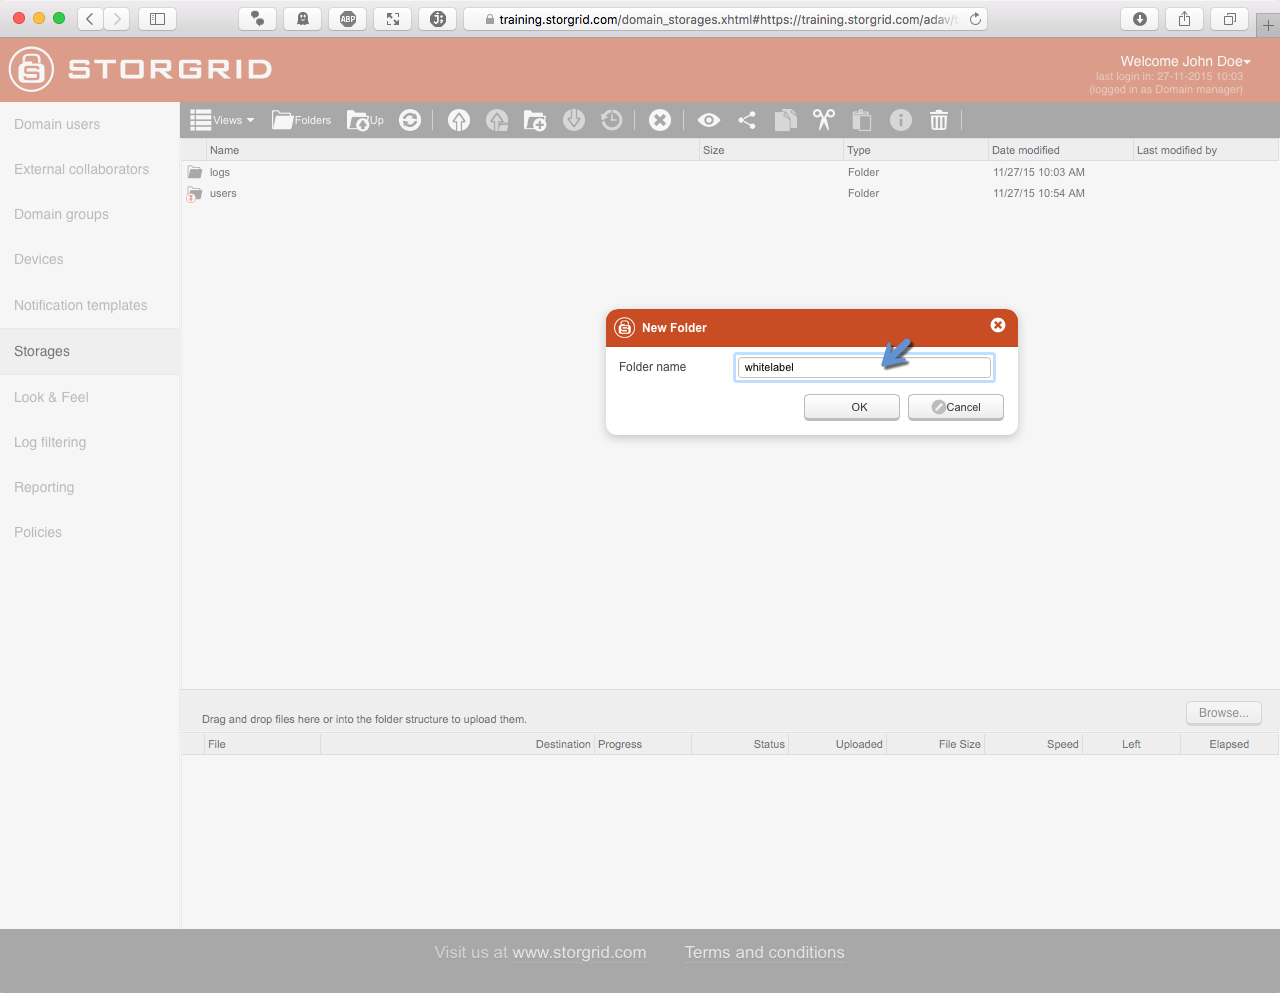

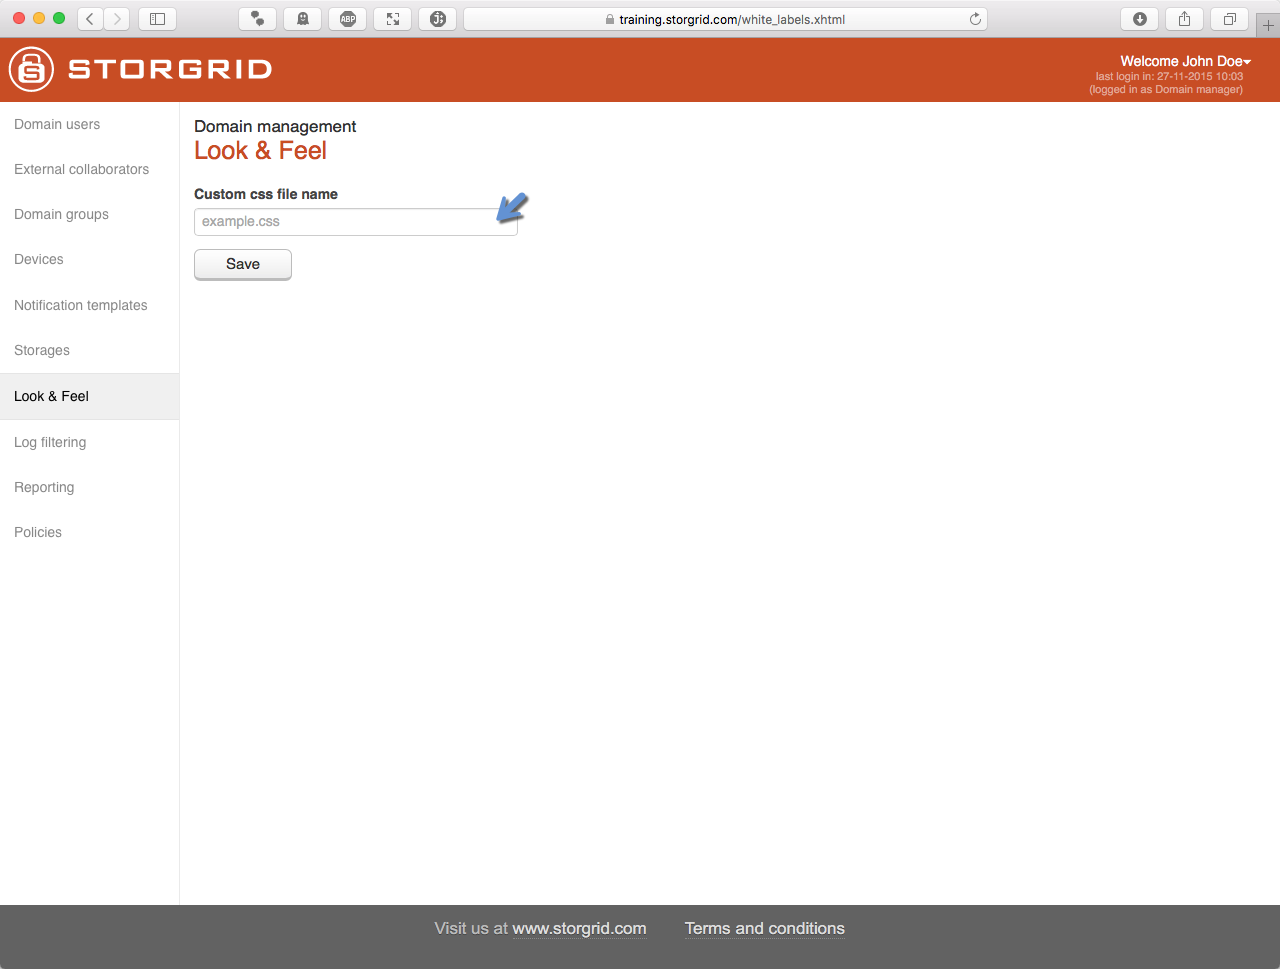
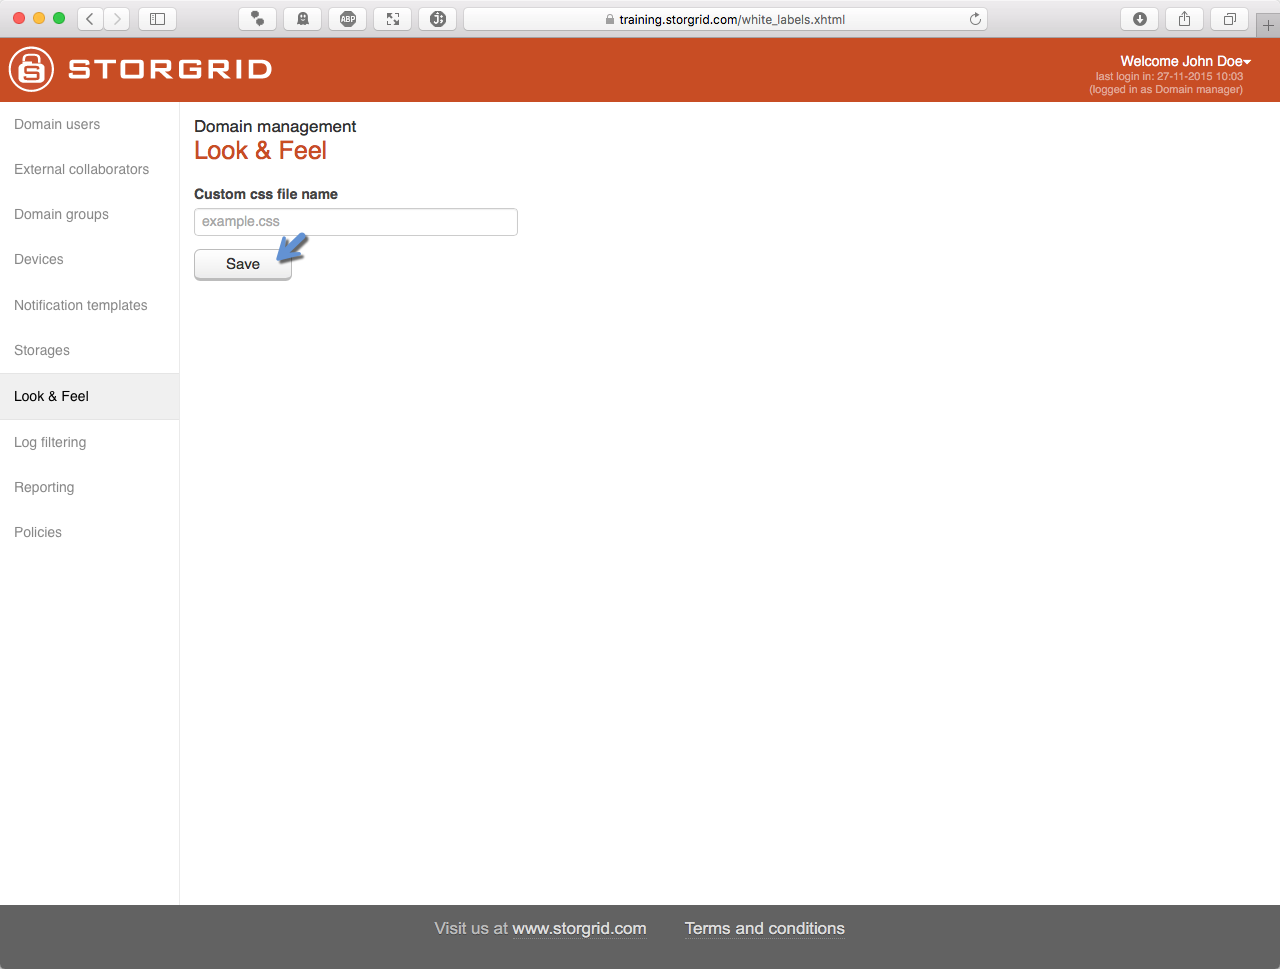
Important
The file structure and directory structure is important: * whitelabel/images (directory) * whitelabel/filename.css (file, can be renamed to anything.css)
Tip
Press the link below to download the example css file and use this as a starting point
Log filtering
All traffic with the Storgrid EFS server is logged. This enables you to follow an audit trail of e.g. a device or user. These log files are already stored on the system storage. But these log files contain a lot of entries. Log filtering gives you the possibility to drill down to a specific user or device.
You start by defining the period you would like to have a report from. Select which Severity you would like to have. Next you can select which clients you would like to select in the report. Additionally you can even give more granularity by specifying the client version, a user or users and File/Folders. Lastly you specify which report type you prefer CSV or XLSX. After you press the “Create report” button the system will sent an email to the person currently requesting the report with the filename in it.
The report can be found in system storage in the directory “logs”.
Reporting
Reporting consolidates all important information into one report. You can also subscribe to a report, with preferred predefined values, e.g. the current state of the system or what the weekly storage usage is.
You start by defining the “Reporting period”, basically you can select the current state, select some predefined periods or specify a custom period. The chapters differ when you select “Current state” VS “any other period”. If you’ve made the necessary selections and press the “Create report” button, the system will sent the report to the user requesting the report in PDF.
If you prefer to receive the report e.g. weekly you can easily do this by selecting either “This week” or “Last week” choose the relevant chapters and press the subscribe button. After which you can specify the day, time and email address. Of course you can even subscribe to more reports when needed.
The contents of the report in “Current state”
Number of domain users
Number of external collaborators
List domain groups
Show members
Device usage
Consolidated
Per device
Storage usage
The contents of the report in a certain period
Number of domain users
Lowest
Average
Peak
Number of external collaborators
Lowest
Average
Peak
Device usage consolidated
Lowest
Average
Peak
Storage usage
Lowest
Average
Peak
Policies
The policies section is one of the most important sections. Here you can assign certain policies to certain users or groups.
Currently the following policies can allowed or disallowed:
No. |
Description |
|---|---|
1 |
Web Client Usage |
2 |
WebDAV Usage |
3 |
Android Client Usage |
4 |
Synchronisation with Android |
5 |
iOS Client usage |
6 |
Synchronisation with iOS |
7 |
OSX Client Usage |
8 |
Windows Desktop Client Usage |
9 |
JAVA Desktop Client Usage |
10 |
Sharing |
11 |
Sharing to external |
12 |
SmartOffice usage on clients |
13 |
Third party usage on android |
14 |
Third party usage on iOS |
15 |
Third party usage on OS X client |
16 |
Third party usage on windows desktop |
17 |
Third party usage on JAVA Desktop |
18 |
Encryption on clients |
Some notes:
“Third party usage” means that you are not allowed to decrypt and open file in another application other then Storgrid. On a OSX Client e.g. macbook this means, if disallowed, you can’t decrypt .sef files at all.
“SmartOffice usage on clients” only relates to Mobile Applications. Because SmartOffice is not supported on workstations.